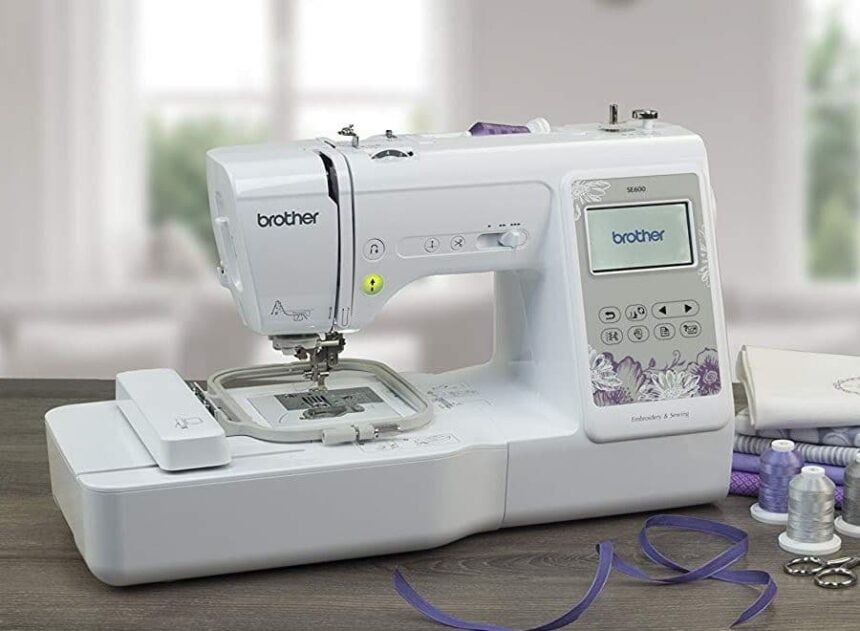


The Brother SE600 is a two in one machine since you can use it in two modes – the Sewing mode and the Embroidery mode. This makes it a super versatile machine that can help you with different types of applications and uses in one single machine. Its versatility and low learning curve make it an exciting device for beginners.
It has a 10 × 10 cm embroidery area. This is enough space that will allow you to sew and embroider with ease. Also, it has a 3.2 inches touchscreen LCD. In this Brother SE600 review, we’ll show you, among other things, how this lets you make on-screen preview of your designs and edits before embroidering, ensuring ease of use. Keep reading to find out everything about this versatile machine from one of the world’s biggest and most popular sewing machine brands.
The Brother SE600 machine is a very inexpensive sewing and computerized embroidery machine for beginners and professionals looking to learn and practice sewing and embroidering with a very versatile machine. Its price doesn’t do justice to its overall value. But high-performance machines, nowadays, don’t have to come at a hefty price. In this section, we’ll see everything this all-in-one machine has to offer. Stay excited and keep reading!
With a total of 103 sewing stitches built into it, the computerized Brother SE600 is a high-performance sewing machine that will come in handy for most of your DIY, home, and commercial sewing projects, either as a professional, beginner, or a DIY enthusiast.
It has a needle to arm length or height suitable for small quilting works and bulky jeans. The working space area of 6.4 by 4.1 inches also offers sufficient space and freedom at home.
Despite being a very inexpensive machine, this two-in-one machine comes with many add-on features that any seamstress will get excited about.

Let’s give you a quick reminder that this is not a one-sided machine, like most multifunction machines, which usually don’t offer all-round qualities. The Embroidery Machine mode of the Brother SE600 is typically “Brotherly,” design-wise.
This 2-in-1 machine has 70 new embroidery designs built in for you. However, this design is little compared to its brother, the Brother SE625, which comes with 280 embroider designs. Nonetheless, you can also introduce your embroidery designs via the USB port.
Remember that these custom designs must be in the .PES file format, which is the original Brother format, but also supports DST formats, which is the universal format.
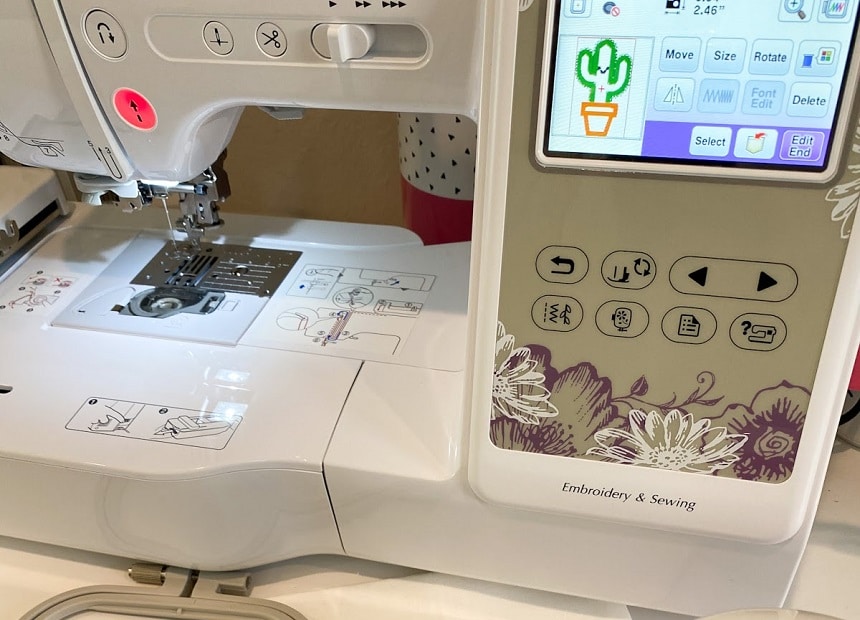
Some of the features which make the machine a high-performance embroidery machine are the 3.2 inches LCD screen, which can be touched, and from which you can control the computer’s embroidery software, set your fonts, patterns, and import your designs. So, you don’t have to be skilled in drawing arts before recreating one.
Some additional features of this amazing machine that help while working on the embroidery mode are its nine built-in fonts, LED lighting, automatic thread cutter, a tie-off button, automatic needle threading, and touch screen. That’s not all; it also includes a 10 by 10-centimeter hoop.
It’s like this: a sewing machine can only mechanically move the needle up/down and a few millimeters to the right or left. More, however, is not possible with the sewing mode or other sewing machines.
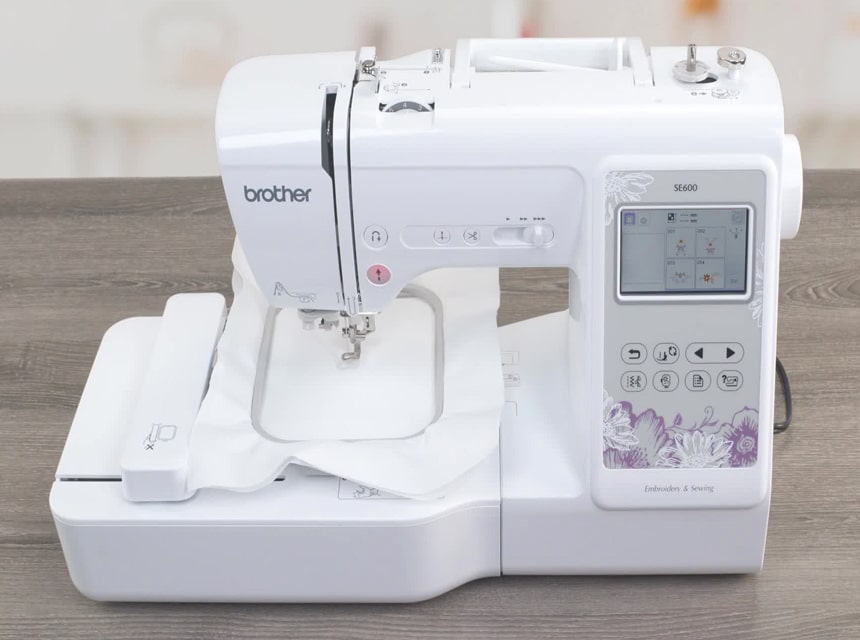
However, the included electronic embroidery arm and the embroidery frame, in which the fabric is clamped, are responsible for creating an embroidery.
The principle: the needle still only goes up/down, but the fabric in the embroidery frame moves in all directions, according to the programming stored in the respective design.
This is how the embroidered areas are created. If a color/thread change is due, the machine stops at precisely the right place, you insert the new thread, and it continues. So easy!
This also clarifies why you cannot embroider everything and everywhere, but only that which can be easily clamped into an embroidery frame.
This is why it is always better to embroider the fabric first and then cut it, and not the other way around.

By getting an entry-level embroidery machine, you already have an immense number of great design and processing options. You will be able to load one or more embroidery designs in, and off you go.
An embroidery software will simplify your use of the machine. You can load any number of motifs and combine, enlarge, reduce, rotate and mirror them. So you can, of course, also define the colors individually and see in advance on the screen how it will look afterwards as an embroidery. Everything must fit into your hoop afterwards. But the software shows you that.
You can find many embroidery motifs on the Internet that are created as applications, especially often with children’s motifs. This means that only contours or smaller details are embroidered; the actual surface then consists of a piece of fabric.
The machine will embroider and stop in pre-programmed steps. You put the piece of fabric on, change the thread color and continue. Hence, you’ll be able to get the hang of it quickly. Looks super cute.
Embroidered applications have their charm and, of course, save a lot of embroidery thread (and the designers a lot of programming work). The look changes depending on the fabric. That saves some scraps of fabric from the garbage can.
Incidentally, you can always implement embroidery designs that consist of contours as an application.
A large selection of embroidered frame shapes can also be called up in the software. They can be used to embroider the most beautiful appliqués in next to no time. You can’t do it that perfectly with the zigzag or appliqué stitch of a sewing machine.
All of these are small highlights that will trigger delight somewhere and at some point. There are also so-called outline designs. They only consist of contours that can look very attractive.
Note: The embroidery software doesn’t come with the machine. Perhaps this is why this machine is so inexpensive in the first place. So, to create your embroidery designs, you will have to purchase a digitizing software. For beginners, the price ranges from $20 to as high as $3,000. But you will get great value for money, considering what you can get from the package.
While you have a sewing working space of 6.4 by 4.1 inches, the SE600 has an embroidery area of 4 by 4 inches.
Anyone working with an embroidery machine like the Brother SE600 wants above all beautiful patterns and fonts with which they can embroider the names of their loved ones, the right words or monograms, and all that.
The machine comes with 80 embroidery designs. However, as earlier mentioned, the great thing is that you get a whole pool of them with a beginner’s embroidery software, most of which are compatible with this machine.
In any case, the repertoire of the embroidery machine contains a selection of alphabets (and numbers/characters), the letters of which are programmed as an embroidery design.
The great thing is you can also convert fonts that you know from Word into embroidery fonts yourself. But be careful: not every font is suitable for this. Letters that offer a beautiful surface naturally come out better than fine, filigree fonts. You just have to try it out.
The nice thing is that you can see everything you do on your computer screen.
You can convert any writing into embroidery. Italic, bold, bigger, smaller – anything goes. And as you know from your computer programs, you can also convert these fonts into bold or italic, and you can choose the size you want.
If you want to work to be striking, you can, for example, call up large letters in a font and only embroider the border.
If you have created a lettering, then you can also bring it into a shape automatically, for example, an arch or a wave. You can even put it upside down.
If a letter is to be embroidered entirely and it has a nice surface, then you can also provide it with an interesting pattern. The PFAFF embroidery software, for example, offers a variety of so-called embossing stamps or fill stitches. That looks exceptionally classy and is also an incredible, creative gimmick because new looks are always created.

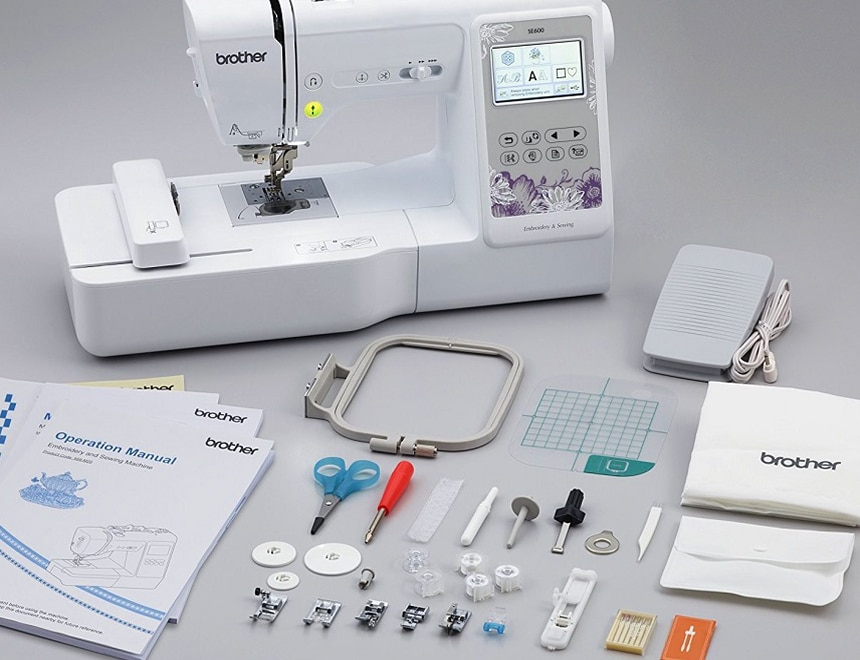
The whole process of putting the thread, the coil, etc., is straightforward and only requires knowing how to follow instructions. The pedal is not used and gives you the option to reinforce the start and end of a seam in addition to cutting the thread! It includes the pedal in case you require it, but it works perfectly as it is.
The embroidery function is a world apart, but it’s not complicated at all. You have to have an idea of what you are doing, the type of fabric, the type of thread, and above all, choosing the right design and colors. But as for the execution (embroidery), it is about 3 minutes to mount the fabric on the frame, locate the design and press a button to do the rest alone.
As already mentioned, the LCD touchscreen, the computerized engineering which ensures you can work with software, patterns, and other design elements, among other features, make this machine easier to use.
Also, thanks to its affordable and entry-level price, this is undoubtedly one of the best sewing and embroidery machines for beginners. From the LCD touchscreen, you can customize and preview your patterns and design before turning them to craft. Hence, there will be fewer mistakes, and you will be more focused on improving your skills.
But what can you do with the software, patterns, fonts, among other elements, and how easy would you find these features as a beginner?
It has a maximum sewing speed of 710 stitches per minute. However, the embroidery speed is only 400 stitches per minute. Embroidery doesn’t have to be as speedy as sewing since the aesthetics matter the most, not necessarily the speed.
You can choose the speed at which you sew. So you have the opportunity to learn on the go and without fear.
The SE600 also includes 103 sewing stitches. This is the same number of sewing stitches you’ll find in subsequently upgraded versions such as the Brother SE625, which is more expensive than the SE600.
These built-in stitches combined with the expanded 6.4 x 4.1 inches workspace allows you more versatility and needle-to-arm room to fold your quilts and bulky projects to the right side of the needle for ease of sewing.
Asides from the 103 sewing stitches, the Brother SE600 has ten buttonhole styles that can be automatically styled.
There are usually two different types of buttonhole styling in home sewing machines. These are the manual and the automatic options. The Brother SE600 is an automatic buttonhole machine, and you can do one-step buttonholes with this.
With this, the machine will be able to sew the four sides of a buttonhole automatically. Then it will stop stitching when it is done.
The Brother SE600 sewing and embroidery machine has a 3.2 inches colored touchscreen LCD. This lets you make an on-screen preview of your designs and edits before embroidering.
On the same screen, you have advanced embroidery editing functions, including the ability to change the colors of individual threads, place the letters in an arc or move the designs with the simple touch of a finger.
Despite its price, this screen is the same size as many other computerized Brother sewing machines within the SE600’s range. For example, the SE625’s screen also measures 3.2 inches. Even the almost twice-as-expensive Brother SE1900 has the same screen size, which is smart and colorful enough for previewing, function selection via touch, among other purposes.
Another great feature of this sewing and embroidery machine is its USB connectivity. This is a feature often found in modern computerized embroidery machines. It gives you the option of inserting a memory card, flash, a drive, or smartphone and importing downloaded embroidery designs or patterns.

The machine may not be as durable as most other sewing and embroidery machines within its range, which is understandable for its price. We found that a few users have problems with the needles breaking during embroidery after some use. Brother manufactures its sewing and embroidery machines in Taiwan. However, if yours comes up with quality or durability issues, US customers are offered up to 25 years of limited warranty.
Some of the key features of the machine are the following:
The Brother sewing and embroidery machine has a large, bright, and colorful screen that you can use to control multiple things with the machine. It’s a touchscreen LCD and can be used to select the various functions of the machine. You can manage your design imports from here, use the software, preview, customize, and edit your works.
You don’t have to worry about not finding suitable design patterns. You can download some online into a memory stick and import them into the machine through the USB port.
The Brother machine comes with a 4 by 4-inch hoop. It’s a medium hoop that comes or is compatible with many Brother sewing machines. It is ideal for making several popular motifs of different sizes.
The Brother SE600 is probably the best but inexpensive sewing and embroidery machine for beginners on the market. This machine comes at an under $500 price, excluding the shipping fee. In comparison, it’s much less expensive than other sewing and embroidery machines from Brother, such as the Brother SE625 and the Brother SE1900. Still, essential features such as the 3.2-inch touchscreen LCD, 103 sewing stitches, and the computerized design are not excluded.
| PROS | CONS |
|
|
As you may have seen, the SE600 machine is one of the most versatile beginner and family sewing machines you can find on the market. It’s an excellent option for sewists who require embroidery options on the same machine.
It is ideal for embroidering names and patterns on uniforms and for any sewing project that you need. It’s for domestic use or a small sewing workshop. However, we don’t think it will withstand intensive commercial usage, especially since the maximum size of the working area is 10 x 10 centimeters. Other models offer greater embroidery area, but their price is much higher.