Floral embroidery is a beautiful pastime that is regularly considered a lost art. I have personally found that embroidery is a great way to slow down and revive an often otherwise historically dormant artistic craft. Throughout history, it has been the typical handiwork of women to be well-trained in sewing both to repair clothing and be well-trained in embroidery to decorate their work.
Now, embroidery is far more accessible to people regardless of identity – nowadays, anyone can enjoy a beautiful and creative way Trusted Source It's a stitch-up: the embroidered past – in pictures | Art and design | The Guardian Julie Cockburn trawls junk shops and eBay, scooping up captivating old portraits – then gives them a spellbinding new lease of life www.theguardian.com of paying attention to nature, and what better way to do so than to replicate it for your safekeeping. Embroidered flowers never wilt, they never lose their luster, and they look beautiful on clothing, pillows, and more. In order to learn how to embroider flowers of all kinds with different stitches, read on!
 With floral embroidery, there are many approaches to embroidery in general that you can take. The quickest way is by machine, but the more traditional approach is to make them by hand. When you make each individual stitch, it’s much easier to have a closer eye on your work and to create patterns and details that you otherwise may not be able to make as subtly with a machine.
If, however, you do wish to go by way of the machine, a good place to start is here. For the sake of the following tutorial, we’re going to look at embroidery that is done by hand.
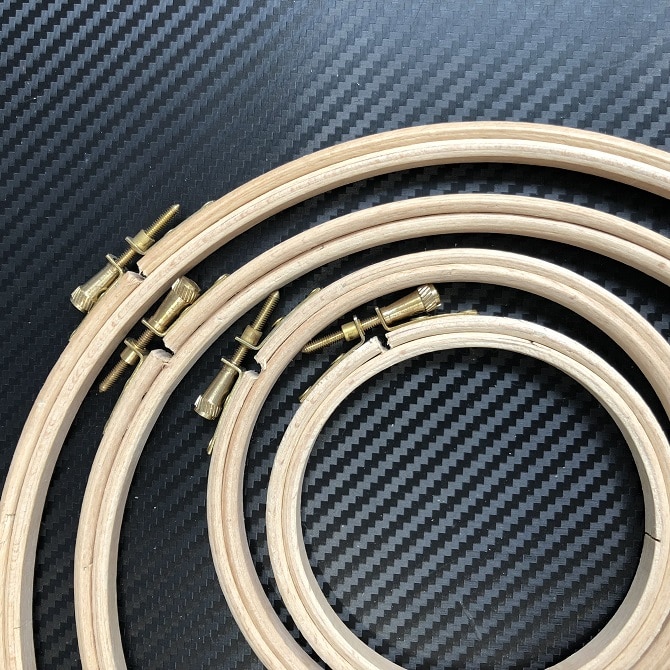
In order to create some successful and eye-catching embroidered work, you’ll need the following: a sturdy hoop, needles of varying sizes depending on the thickness of the lines you’re creating (and a pincushion, you’ll not want them to get lost). For hoops, a good place to start is here – there’s a great array of hoops in various sizes. Not only are these portable, but they sit in your lap. Sewing Land also has a list that you can read here of the best embroidery hoops for beginners.
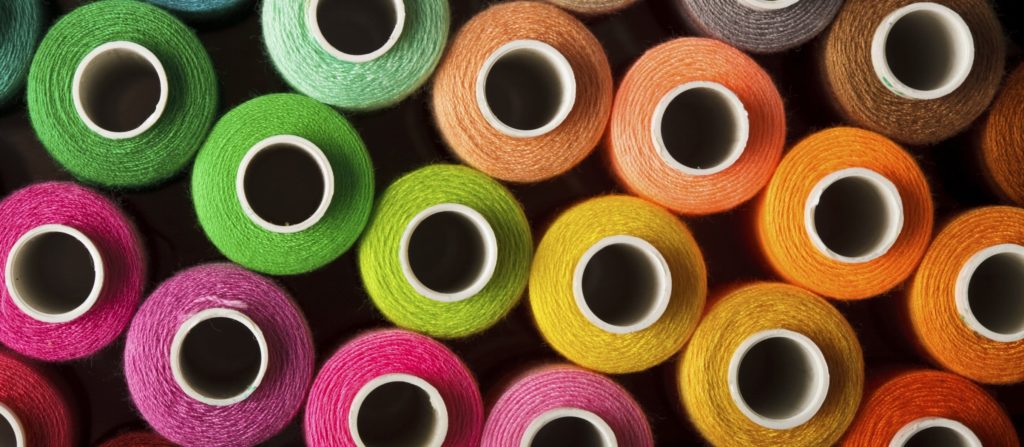
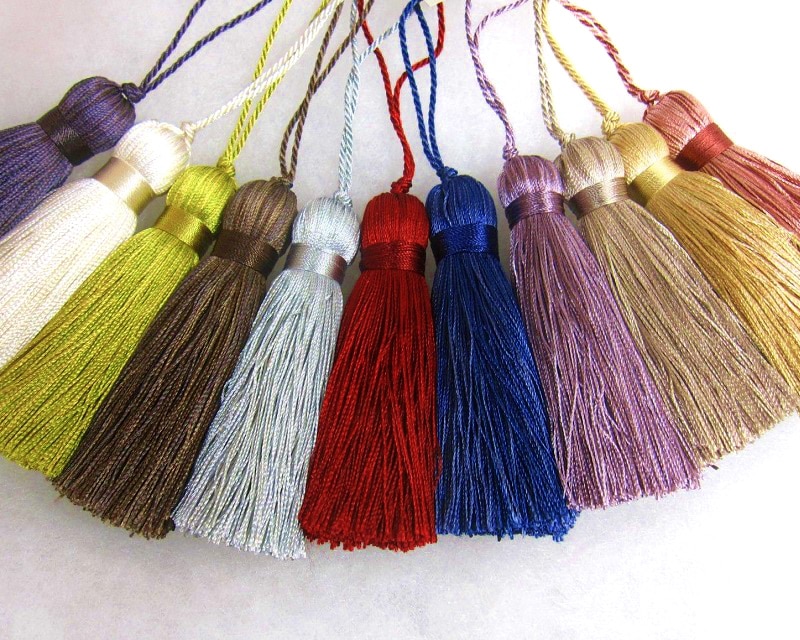
You’ll also need whatever embroidery floss your patterns require in terms of color. Generally, having a good array of blues, reds, greens, whites, and yellows tends to cover all your bases in terms of the array of flowers you can make.
Madeira sells lovely embroidery floss that comes not only in a variety of colors, but its box doubles as a storage rack for spools. Generally, floss used to embroider is referred to as six-stranded because it consists of exactly that—six strands that, when taken from and added to, you can create thinner or thicker line work as you wish.
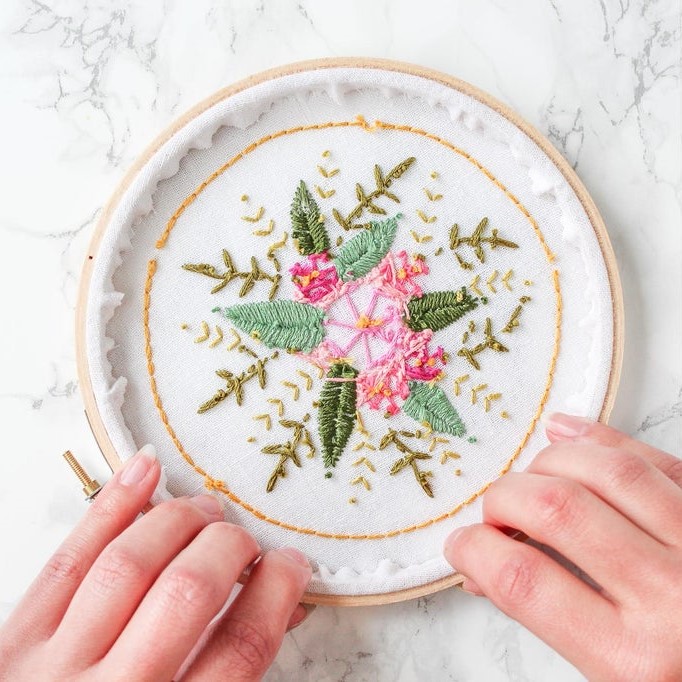
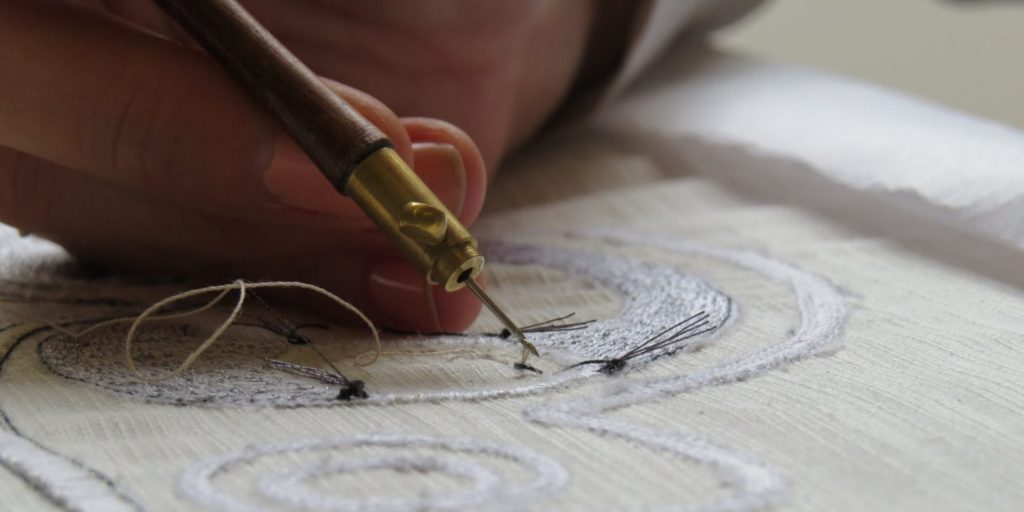
You’ll also need good quality fabric, which you can get from craft stores or online. The best fabrics to go with our cotton fabrics—they stretch well over the hoop, as opposed to linens which can be a bit more difficult to embroider through, but nonetheless create fantastic, textured work.
A good extra item to have is an embroidery stabilizer. Embroidery stabilizers do exactly what their name suggests—you iron onto the opposite (wrong) side of the fabric opposite your work, and it holds your project in place.
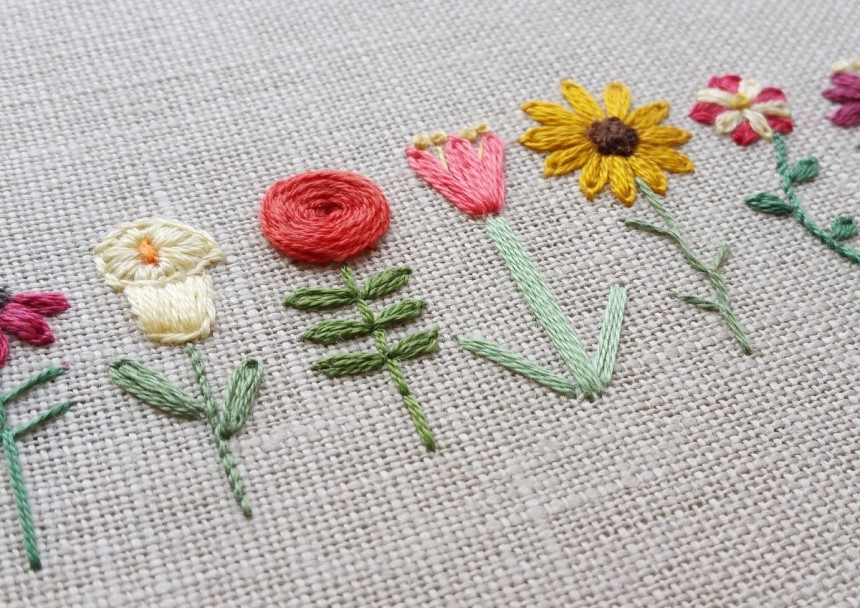
Some of the easiest flowers to embroider are those that, anatomically speaking, isn’t made up of many moving pieces and parts. Flowers with fewer petals, straighter stems, and fewer visual details are the easiest for beginners. Think of (in order from the easiest to the more complicated) daisies, tulips, carnations, roses, and sunflowers.
For the sake of this tutorial, we’re going to cover how to create lavender, poppies, and pansies—all with different stitching techniques. Remember, different stitches will make your thread function in a different way, and this is to bring out the various characteristics and lifelike possibilities to each flower that you stitch.
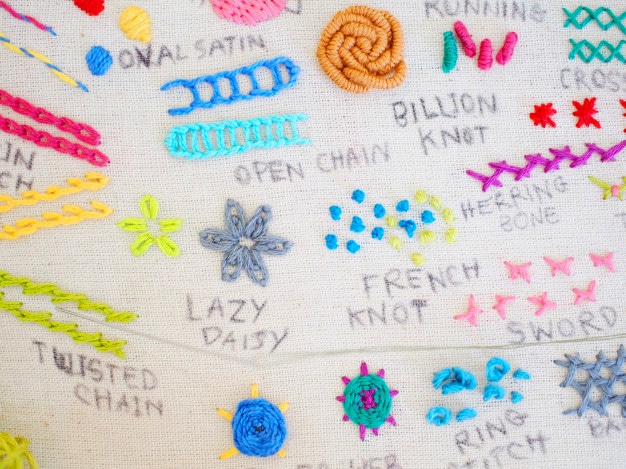
The straight stitch is the easiest stitch for a beginner, mostly because it lives up to its namesake and is exactly what its name suggests. It is a straight stitch through your fabric: your needle goes up through the bottom of the fabric closest to you at point A, and you push it back down through point B on your fabric.
The nice thing about this stitch is that its results aren’t the smoothest as compared to more complicated stitches with heavier floss use, so if you do have an appreciation for the imperfect, this is the best way to go.
In order to create a basic flower, try a fan-like design. Create a yellow center with whichever other stitch you’d like (a personal favorite is a French knot), and then from that center point, do an array of straight stitches with whichever color floss you use. And there you have it, a handful of straight stitches later—a nice flower, comprised of one of the easiest stitch’s embroidery has to offer.
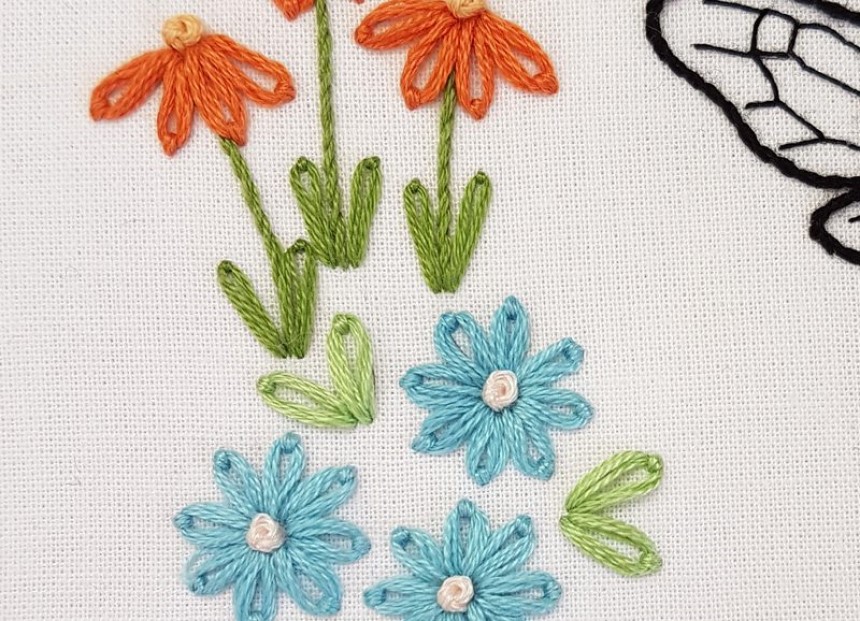
 Lazy daisy stitch lavender
The lazy daisy stitch is another simple stitch whose results are not only eye-catching petals but they are effortlessly beautiful. This stitch is especially effective for creating lavender—its loops lend a stunning rendition of the ladder-like petals lavender displays in nature.
When working with the lazy daisy stitch, you’ll want to first pierce through point A, and then going under the fabric, come through the same direction at your point B—only pierce the fabric going up about halfway through or so—and then loop your floss around your needle once.
Now you can pull the thread all the way through. This will tighten the threaded loop—go back through the lower point, and there you can see a looped, lovely purple petal. Repeat the above process up the length of the stem or stems, and the finished product will be a silvery purple lavender flower.
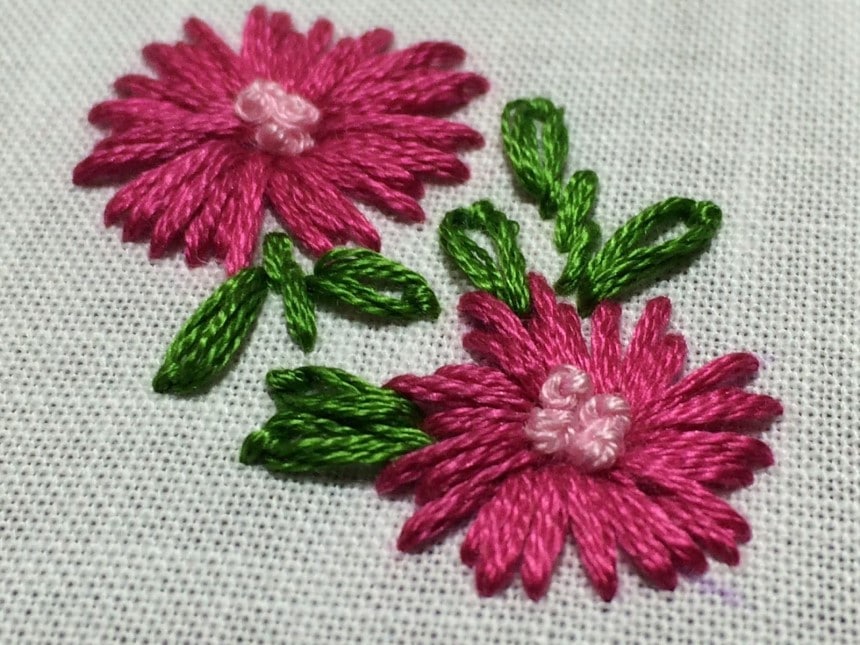
The woven wheel stitch is a lovely stitch that appears complicated at first glance—its collection of weaved, circular work can often intimidate—but rest assured that it’s easier than it appears. It’s perfect for poppies! First, create a wheel of red ‘spokes’ from a center point—this will be the framework around which your wheel takes its shape.
From there, weave in a circular motion around one spoke, then the next, and so on. Move from the center to the outermost points on the circle—in a spiral fashion. Make sure to not catch any threads as you go—this will make the work more seamless and error-free.
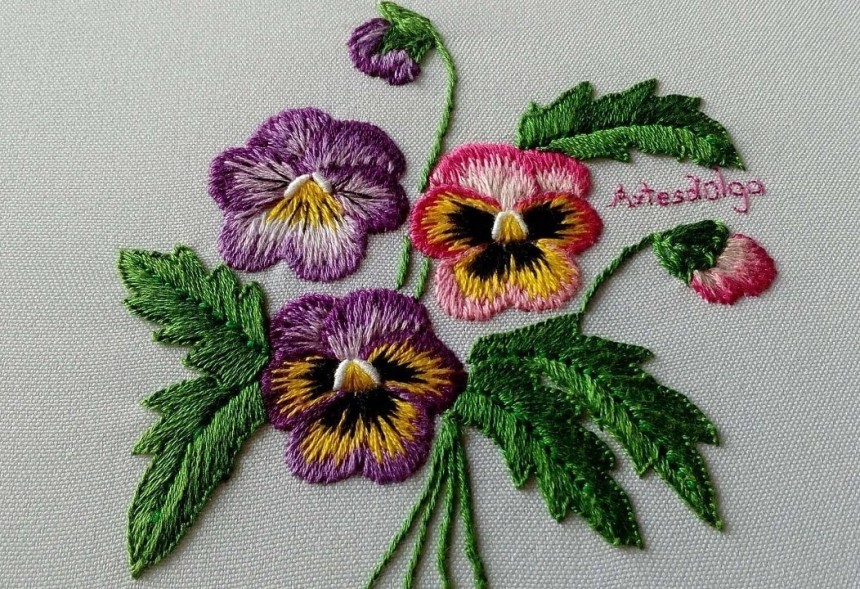
 Long and short stitch pansies
When creating pansies, you’ll want to weave various colors in and out of your outlined petals in order to create a gradient of colors. As you do the longer stitches over your pattern, supplement them with shorter straight stitches so that the color pattern shows your work beginning and ending at different heights. Fill in the rest of your petals so that the pansy itself displays an array of shades true to its living form.
 Looped buttonhole stitch flowers
A buttonhole stitch can be used to create some fantastic flowers! You can create stems, thorns, petals and fill in any parts that need some more tangible, raised work. For the framework, a looped buttonhole stitch consists of two straight stitches.
From there, loop and connect stitches all the way down the straight stitches, snugly around them—albeit not too tightly—do so tightly enough that they are concealed, but not so tightly that they’re constricted. As you go, press the previous stitch toward the one before it so that they are nicely against one another.
 Detached chain stitch
The detached chain stitch is another useful stitch to have in mind when creating various floral patterns. To do this, bring the needle up—and back down at a point more or less very close to it. This will create a loop in the floss that you’ll want to pull over to a third point on the fabric. Hold the loop down by going back through the underside of the fabric at a fourth point. Repeat this as many times as need be—hence the name chain stitch.
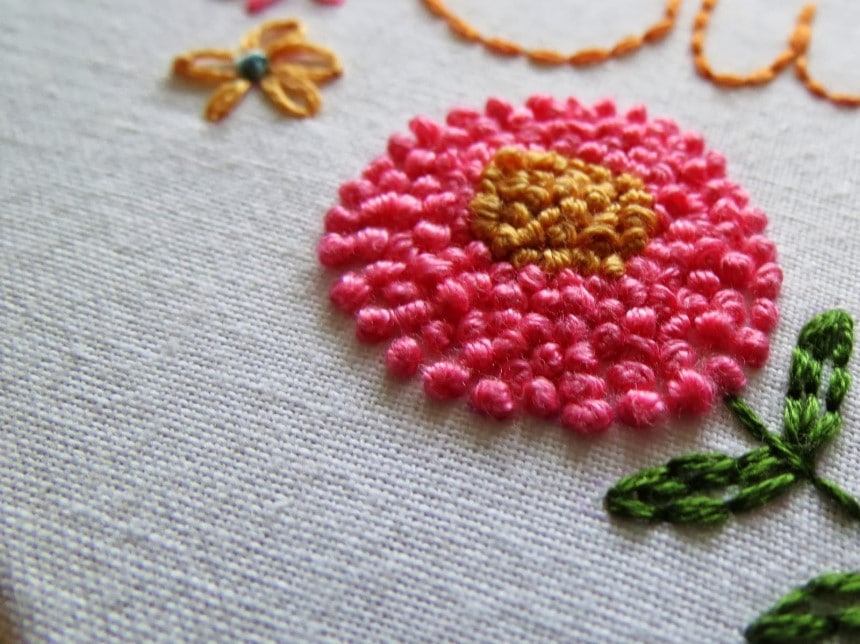
 French knots
The French knot is another great and popular stitch to have in your repertoire—it is one of the best for creating textured, small orb-like shapes to fill floral work. This stitch is both loved and abhorred by those who are intimidated by it—it looks complicated, but an explanation will clarify and assuage any worry you may have about it. As you pull your needle and floss up through the fabric, catch the floss with your other hand—and wrap the floss about the needle once or twice.
The number of times you do so will change the size of the resulting knot. Push the needle back down through the fabric close to the point at which it came through and finish the knot by bringing your needle through the fabric – straight down through the loop.
 Fly stitch
The fly stitch is a versatile, forked stitch that is worked by creating a chain of triangle-esque shapes that repeat down a lengthening tail. Bring your needle down through the fabric, and back up through a perpendicular point.
Then, go down to a third point between both of them—creating a bowl or Y-like shape. To secure this with a tail, go up and back through the fabric at a new point that will hold the bottom of the Y-shape down. Continue this pattern for a nice, branch-like look.
 Final thoughts
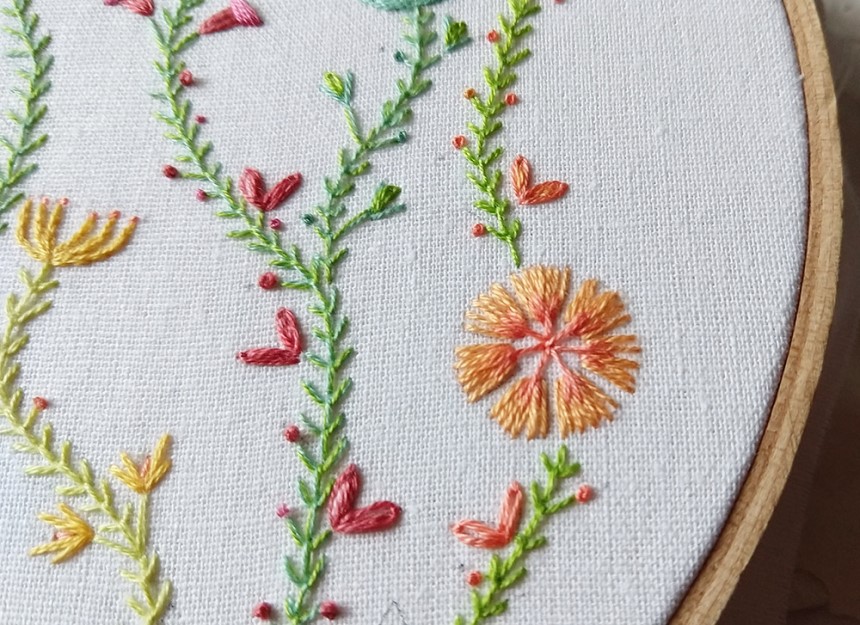
In learning how to embroider flowers, you’re learning to replicate nature on the shoulders of many artisans and craftspeople from various traditions. Different cultural traditions have various methods of embroidering flowers.
The styles of northern Norway, for example, can lend inspiration to creating stunning yet easy symmetrical patterns, and the vibrant colors of Rajasthani embroidery from the northwestern part of India can be equally inspiring and painstaking—and you’ll gain a newfound understanding of the large amounts of work and dedication put toward creating fantastic, embroidered work.
As you work toward finding your own expressive style of mixing and matching various colors, stitches, and fabrics, you’ll learn to bring not only nature to life in your own home but you’ll also foster new talent and skill. Who knows—perhaps one day, in the dead of winter, you’ll create your own garden of floss and fabric while the cold rages outside!
If you’re looking for flower inspiration, check out some flower delivery options to have beautiful blooms sent right to your door. With vibrant colors and intricate details, these floral arrangements can provide fantastic embroidery references as you hone your stitching skills.