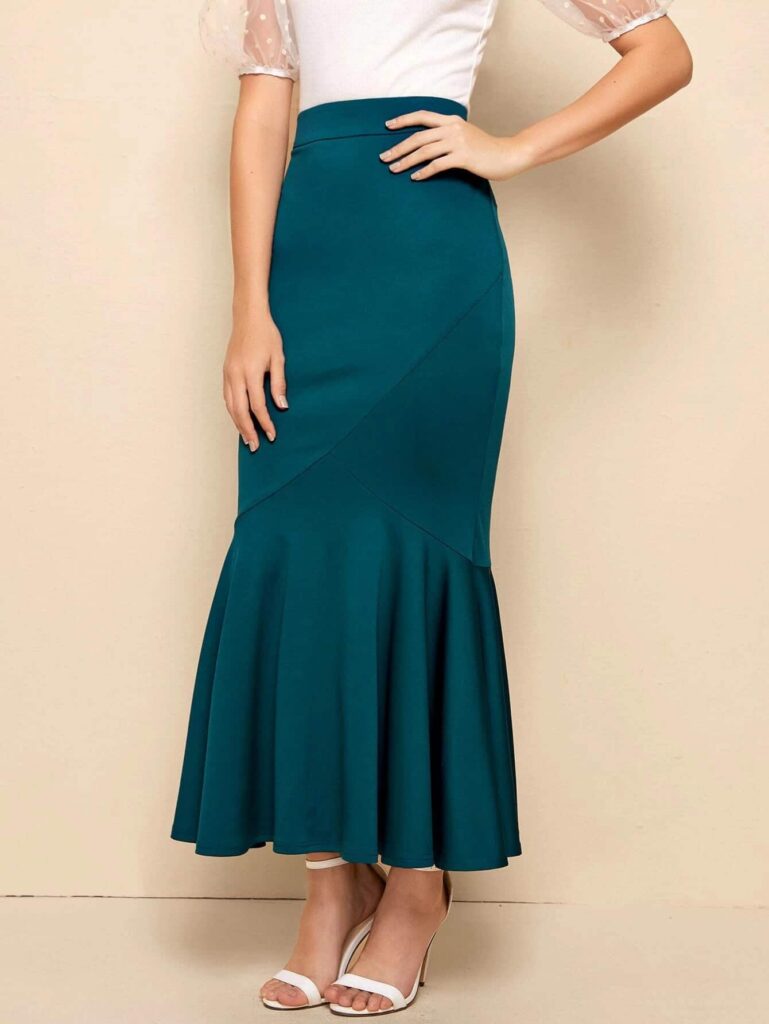
A-line dresses are on the catwalk! From A-line corsets to A-line wedding dresses, we’ve seen them on the most fashionable celebs and in the pages of top fashion magazines. Vintage and timeless, these dresses cross the ages without being out of fashion. On the contrary, they are worn today more than yesterday by stars, because current designers have brought them up to date. So, why not try one yourself? If your reply is, a “yes, why not,” then we’re here to show you how to start with our A-line slip pattern drafts in a detailed step-by-step guide.
(And if you need a dress form to hold your work, we’ve got a great list of the 9 best on the market HERE!)
The advantage of sewing your clothes is that you can choose the content of your wardrobe with your preferences: colors, prints, needs, morphology, styles, and more. And now that you are tempted by this flagship fashion in the world of women’s fashion, here’s how to create them!
Below are step-by-step guides to drafting your A-line dress patterns, first for the adults and second, for a girl of 5 to 6 years old.

To draft an A-line dress, you need:
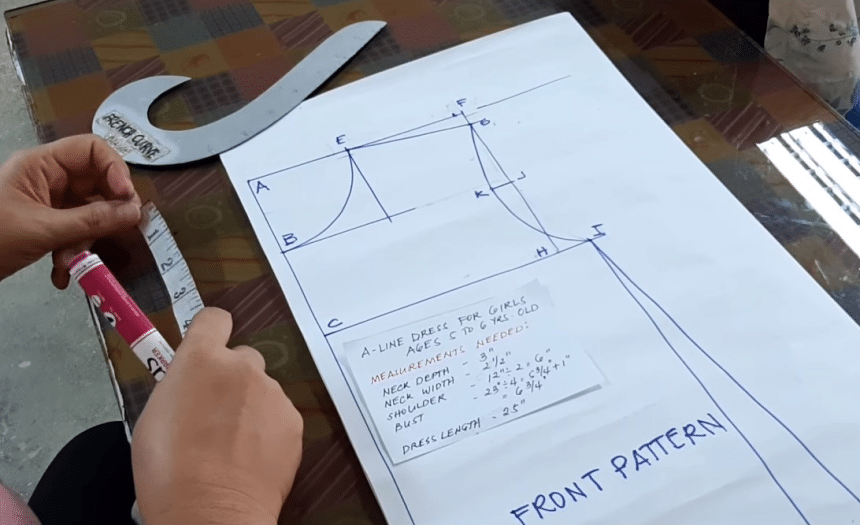
These are the measurements needed in drafting an A-line dress for girls ages five to six years old.
Ensure the neck depth is three inches; the neck width 2½ inches; the shoulder 12 inches divided by 2 equals 6 inches; bust of 23 inches divided by four equals 5¾ inches plus 1 inch equals 6¾ inches bust; and last you should have the dress length, which is 25 inches.
Below is a draft of the measurements explained above that you’re going to be making:
| Measurements Needed | |
| Neck depth | 3 inches |
| Neck width | 2½ inches |
| Shoulder | 12 ÷ 2 = 6 |
| Bust | 23″ ÷ 4 = 5¾ + 1″ = 6¾” |
| Dress length | 25 inches |
Below are step-by-step instructions to making an A-line dress pattern for girls of ages 5 to 6 years old. Following the instructions, you can check out a corresponding video for better guidance.
Step 1: To start drawing this pattern, lay your patternmaking paper.
Step 2: Then you need to draw a perpendicular line and mark the corner “A” as the starting point.
Step 3: From A, measure 3 inches for the neck depth. So, that is Point B. Line A to C must be 6 inches. Usually, the bust line is half of the shoulder. Then from Point A, to get Point D, the length is 25 inches. So that will be Point D.
Step 4: Square out Point B, Point C, and Point D to the right.
Step 5: From Point A, to get Point E, use the neck width, which is 2½ inches. Since you’re going to draw an A-line dress that has no sleeves, you need to move one-fourth inch to make it 2 and 3.
Step 6: Then, from Point A to Point F, use the one-half shoulder. The shoulder is six inches, according to the measurement in our table. Since you add one-fourth here on the neckline you need to add also one-fourth inch. Then project Point E downward up to line B.
Step 7: Also, project Point F downward up to line C. From Point F, to get Point G, measure 1/2 inch. So that is Point G.
Step 8: Then connect E to G and then shape the neckline using the French curve. So you’ll get Point H.
Step 9: Then to get Point I, use one-fourth bust. As bust is 23 divided by four, so that is 5¾ inches plus 1 inch. So, that is 6¾ inches.
Step 10: To locate Point J from Point J, get the center of Point G and H. So that is 5½. Just fold your tape measure into two to locate the center and then J to K, one-half inch to the left.
Step 11: Then shape the armhole passing Point A so this is Point K. Shape the armhole passing Point G, K, and I, using the French curve. Then Point L square down Point I up to line D. So this is Point L. Next, from l, to get Point M to the right, measure 2½ inches so this is Point M. Then connect Point I to M with a diagonal line. Measure 1/2 inch upward so this is Point N.
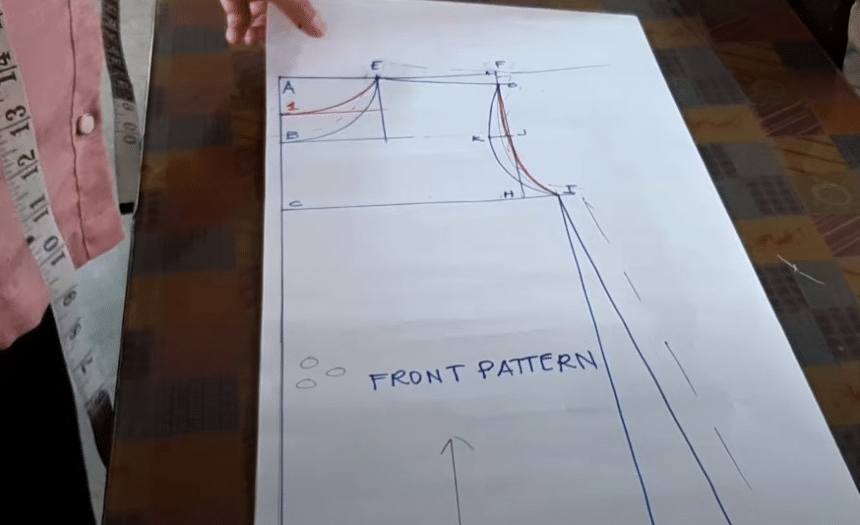
Step 12: Using the hip curve, shape the hip line. With this, our front pattern for the A-line dress is already done. At the end of it, you should have something that looks like the front pattern below:

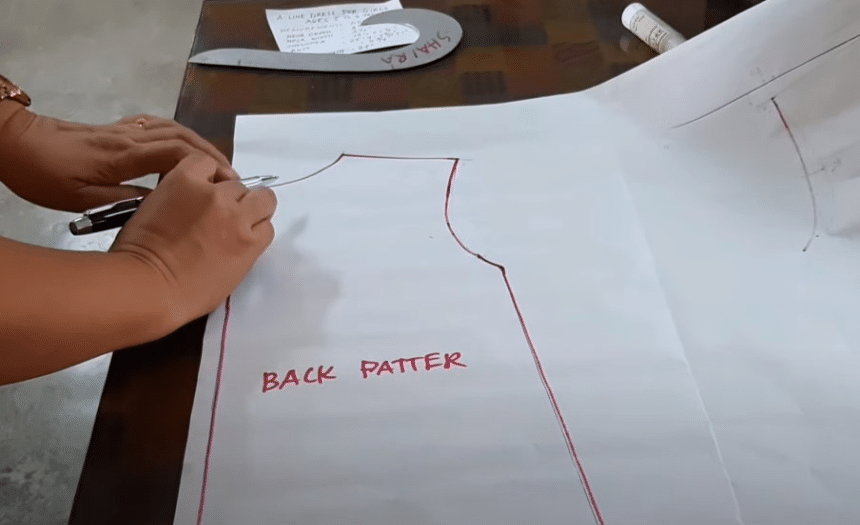
Step 1: To draw the back pattern, we need to use the front pattern.
Take another sheet of paper, lay it under the front pattern draft, and lay a carbon paper in between the blank paper for the back pattern and the already drafted front pattern to transfer all the markings to the bottom paper.
Step 2: So, you need to start tracing. Again let’s start with Point A, the starting point. So from Point A to Point 1, use 1½ inches for the back neck depth. So this is Point 1.
Step 3: Then square out Point 1 and then shape the back neckline using a French curve. The shoulder is the same and then the armhole since this is back. So, you have to shape the armhole from Point G, passing Point G, J, and I because the front is deeper than the back. The sides up to the hemline are the same so you just have to trace. First, place the back neckline and then the shoulder next to the armhole and then the sides, the hemline, and the center.
Step 4: Retrace the lines so they can be clearer. So, there, you have the back pattern.
Step 1: To make the final pattern, you have to put seam allowances. So, for the front neckline, use 3/8 inch.
Step 2: Then for the shoulder, since you are going to stitch it using the front seam, use 5/8 inch.
Step 3: For the armhole, use 3/8 inches, for the sides, use 5/8 inches. For the hemline, use 1 inch.
Step 4: Repeat Step 1, 2, and 3 for the back pattern. For the shoulders, you need 5/8 inches. For the armhole, use 3/8. Then for the side, use 5/8. Then, for the hand line, use 1 inch.
Step 5: Trace your drafted drawings out and the final pattern is ready.
Step 1: To draft a pocket, get a piece of paper and then make a centerfold.
Step 2: Draw a horizontal line. Then from this horizontal line, measure four inches downward and connect. So label each line as Point A and Point B.
Step 3: From Point A, measure 2½ inches to get Point C. Then from Point B to get to get Point D, measure 2 inches.
Step 4: Connect C to D with a diagonal line and then shape the lower part of the pocket to make it look creative and beautiful.
Step 5: On top of the pocket or the pocket opening, measure one and one-fourth inches for the same allowance then for the side, the seam allowance is one-half.
Step 6: Then cut the final pattern of the pocket. To transfer all the markings on the other side, get a carbon paper and then again fold it into two and place all the lines.
For visual guidance to these step-by-step instructions, check out the video below:
<iframe width=”560″ height=”315″ src=”https://www.youtube.com/embed/avgP2Vg6X4E” title=”YouTube video player” frameborder=”0″ allow=”accelerometer; autoplay; clipboard-write; encrypted-media; gyroscope; picture-in-picture” allowfullscreen></iframe>
An A-line dress or an A-line frock is fitted at the hips and gradually widens towards the hem. To make a pattern, you will need the following:
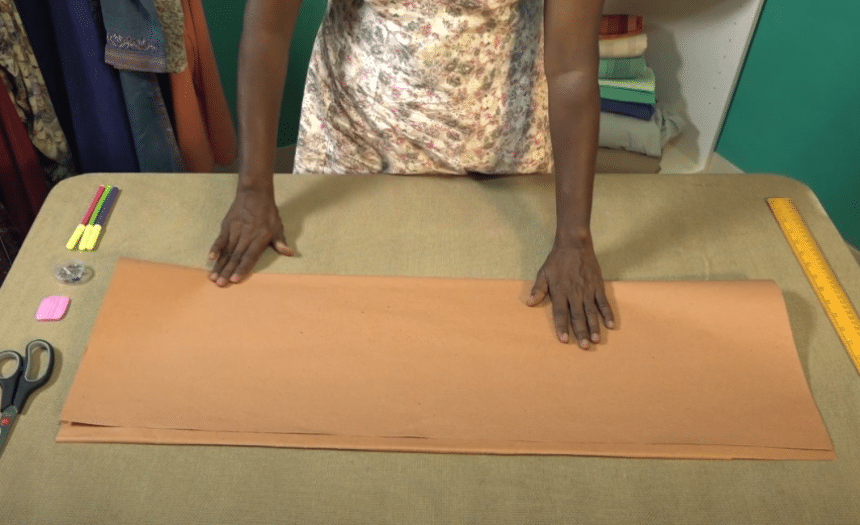
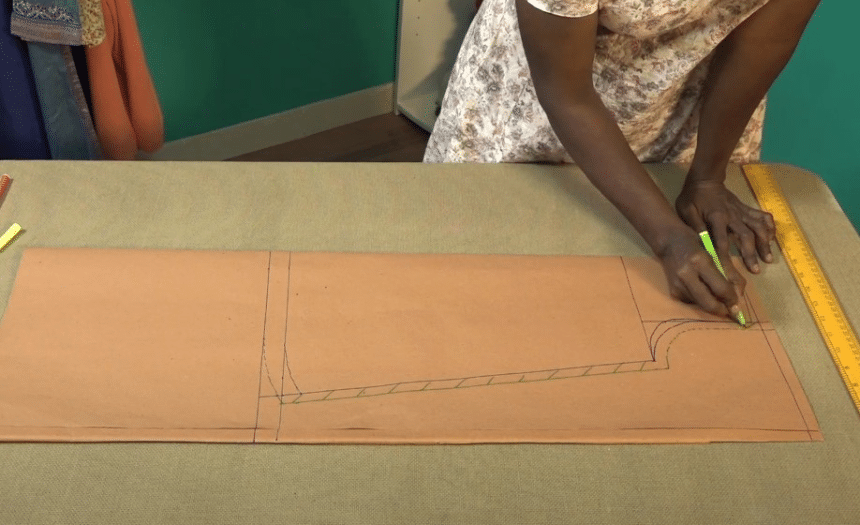
Step 1: Take a pattern sheet and spread it flat out on the table. Remember that patterns are often cut unfolded for symmetry.
Step 2: Fold the sheet of paper you’re using as pattern down just once along the length until it turns to a rectangle that has two long sides.
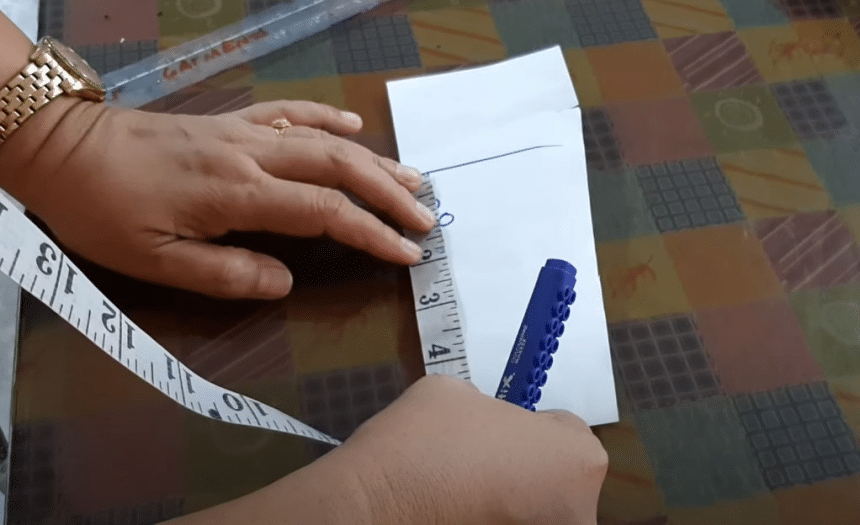
Step 3: If you would like to adapt the dress to your size, you will need the following measurements for both the front and back of the A-line. Begin by marking the following points so that the basic design of the pattern is ready. Start by marking Point A 1/2 inches. From the top edge along the fold, shift the ruler further along the width and mark another point half an inch from the top.
Step 4: Draw a line through these points spanning the width of the sheet.
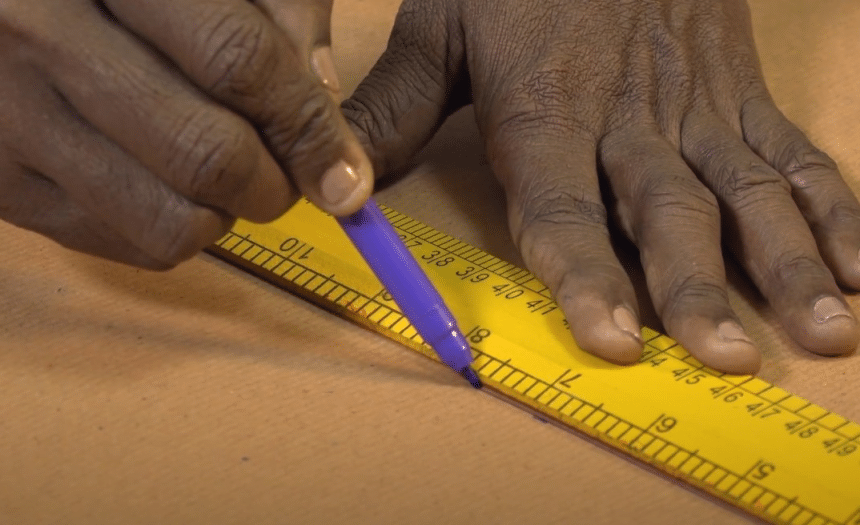
Step 5: Mark the length of the frock along the folded side of the pattern sheet. To do this, mark Point B as 22 inches from A.
Step 6: Along the folded edge, shift the ruler further along the width of the sheet and mark another Point as 22 inches from the line running through A. Make sure the ruler is held perpendicular.
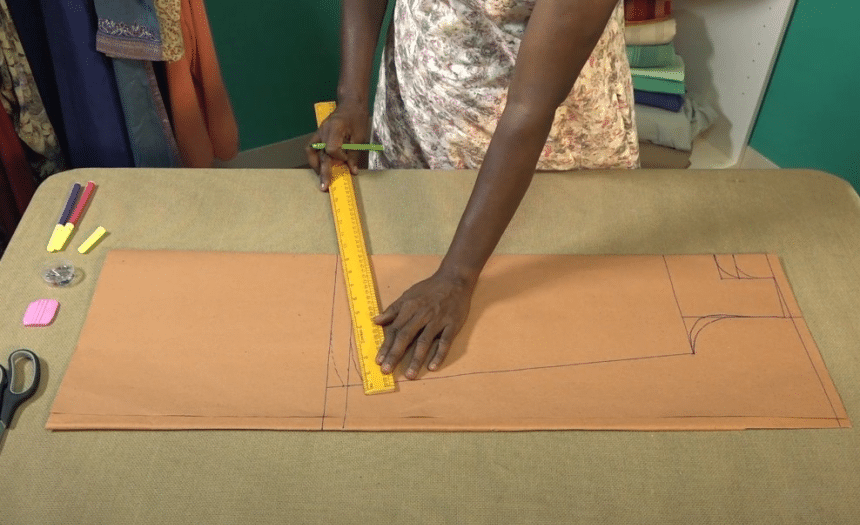
Step 7: Draw a line through the two points spanning the width of the sheet. This line represents the hem. Now, mark the bustline. Place the ruler along the ½-inch line from the top edge and mark Point C as 4.5 inches.
Step 7: From A, now place the ruler along with the fold and mark Point D as 5.5 inches from A towards B. Shift the ruler parallel to A D and mark Point E 5.5 inches from C. Draw the line C. Place the ruler perpendicular to the fold and mark Point F 7 inches from D pass E.
Step 8: Draw a line from D to F. Now mark the points that make up the side seam of the frock. Place the ruler perpendicular to the fold and Mark Point G 9 inches from B.
Step 9: Now draw a line that connects the points F and G. Once this is done, mark Point H 1 inch from G on the line F G.
Step 10: You will now mark the layout of the neckline. On line A B, mark points I and G 2.7 inches and 1.7 inches from A, respectively. Mark Point K 1.7 inches from A towards C. With the ruler placed on line A K, mark points L 1.7 inches from I and Point M 1.7 inches from G.
Step 11: Draw a line from K H to L. You may now proceed to mark the hem allowance of the frock. Mark two distant points 1 inch below the hemline and draw a line through them.
Step 12: Extend the line FG to the line you have just drawn. Now, along the extended line, mark Point S 0.1 inches below G.
Step 13: Next, mark the points that define the curve of the armhole and then mark the shoulder. On line C E, mark Point P 0.3 inches below C and Point Q 1.1 inches above E.
Step 14: Draw a line between the points K and P. KP is the shoulder line. You may now draw the arcs that define the curves of the neckline, armhole, and the rounded end of the hem. Start by drawing arcs from K to G and from M to I to define the neckline of the front and back pieces.
Step 15: Now, join an arc from P to F that defines the armhole of the back piece. Draw another arc from P to F, this time passing through Q to define the front armhole. The front armhole will have a bigger curvature than the back one.
Step 16: Draw an arc from Point H into line BG. Now draw parallel R from Point S into the hem allowance line.
Step 17: You may now proceed to define the side seam allowance. Mark a series of points at a distance of 0.5 inches from the side seam line using the second color.
Step 18: Once this is done, draw a line running through the points and use the same color to shape the seam allowance.
Step 19: Repeat the process along the armhole but use many more equally spaced points for a precise arc. Join the points with the dotted line and shape the seam allowance. Now using a third color, shade the hem allowance. You may now start cutting the pattern along its outline. Follow the outline up to C.
Step 20: Now cut along the back neckline arc from J. Finally, cut a line from the top edge to Point C that runs parallel to K P, defining the shoulder seam allowance. Shade it using the second color as shown. If you like, open out the folded pattern and verify the dimensions and shape.
For visual guidance to these step-by-step instructions, check out the video below:
You can also make an A-line dress pattern from an existing type of the dress you want to make.
Step 1: Cut a piece of paper that is larger than your sample garment and fold it in half. Then place it on a flat work surface – not a carpet or tablecloth. If you don’t have pattern paper, you can use brown wrapping paper. You can also work on a sturdy pinboard if you’d like to pin the garment to paper while you work.
Step 2: Fold your garment in half vertically and pin it along the seams. Since most garments are cut symmetrically, you will need to fold your garment lengthways so that the seam in the middle is visible. If you have folded the garment exactly and the seams are neatly on top of each other, you can fix it with pins so that it does not slip again.
Step 3: You trace every single part of the garment, so only mark out the part of the future pattern that you want to trace now.
Tip: Make sure the piece of clothing you are trying to copy fits you well. This will make it easier for you to create a pattern that fits your size without having to make too large adjustments.
Step 4: Place the piece on the paper and pin it there. Line up the fold of the garment with the fold of the paper. Insert pins about every three to four inches along the edges to keep the piece from sliding around as you trace it. For example, if your garment has sleeves, fold them over the main body first so they don’t look out. You can use this technique on a wide variety of clothing items, but it’s best for anything that is sewn together from simple shapes.
Step 5: Take a pencil, tailor’s chalk, or a tailor’s wheel and use it to trace the seams of the piece you pinned on the paper. Don’t try to trace every part of the piece just yet.
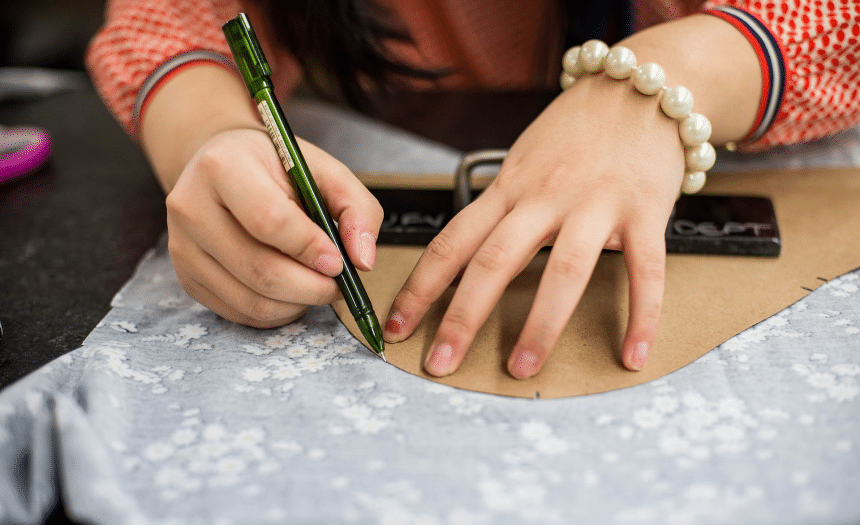
Step 6: If you get stuck at one point because another piece of fabric is in the way, you have to fold it over or use a tailor’s wheel. You can just practice this rolling the fabric because it does not damage the fabric.
Step 7: Detach the garment from the paper and trace the line with a thicker pen. Pull out the pins and set the garment to one side. Take a felt-tip pen and trace the line. Now you can label the template. For example, write “front center” on the part.
Step 8: You can also mark any lines that are specific to the piece. For example, draw a curved line to indicate where the neckline meets the centerline.
Step 9: Draw in the seam allowance around the part of your pattern. Use a tailor’s ruler and draw another one-half inch outside the previous outer line around the part. This is the seam allowance. Most commercial patterns have a ½-inch seam allowance. Whatever value you choose is up to you.
Step 10: Make a drawing for each component of your garment. Spread out another piece of paper and repeat the whole process for every part of your garment that you need to sew on. Make a note on the respective template if you want to attach a closure such as a hook, button, or zipper there.
Tip: Don’t forget to label each part of your pattern. This will make it much easier for you to use the pattern later if you have long forgotten which part was which.
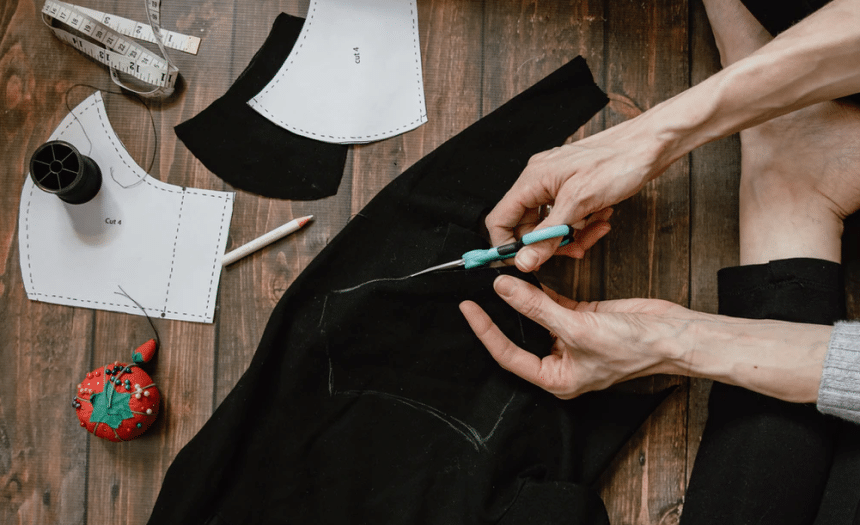
Step 11: Take a pair of sharp scissors and cut out each part individually. Make sure to keep the paper folded in half in the right places so you don’t accidentally cut your pattern. If you want, you can also place a cutting mat under the paper and cut out the pieces with a rotary cutter.
As you can see from the drafting of patterns, dress pattern making requires a lot of patience, a bit of maths, and accuracy. However, if you want to cut the maths and the time, there are free and online A-line dress patterns for a little price.
Although dress patterns are often sold online, just like you can watch a free YouTube tutorial online, you can also get a free pattern draft for your A-line dress if you check well.
One of the free patterns available online which you can use is the A-line Dress Pattern designed by Vestidos Basicos.
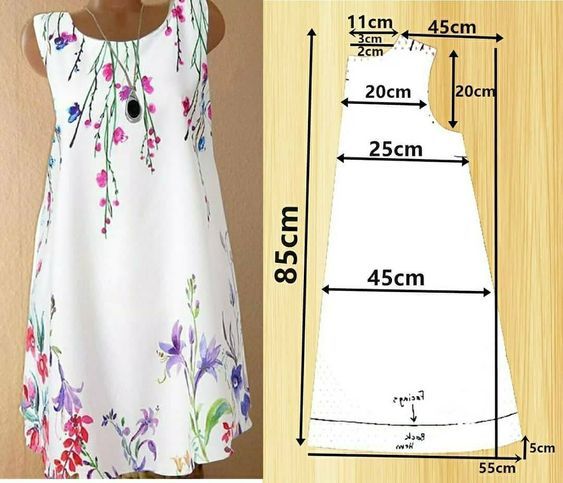
This can be downloaded freely as an image file on Pinterest.
There are good already made patterns for A-line dresses online. One of these is the Infinite A-line Dress. It’s a sewing pattern draft for newborn girls to 8-year-old girls that are made available in PDF.
For those who want a full A-line dress with arms, the Sewing Pattern A-Line Dress from The Avid Seamstress is a perfect pattern. The same pattern can also be ordered from the brand, The Avid Seamstress, itself.
A much inexpensive pattern is also sold by Makerist. This is a V-neck A-line dress pattern and is available in a printable PDF format.
If you can make your A-line dress pattern, you can save a ton of money and time in musty locker rooms. With the slip pattern drafts provided in this article, if you can draw your creations to fit your body measurements and sew your blouses and dresses yourself, then you can be sure that they will fit like a glove. If you want to get a pattern even easier, take a piece of clothing that fits you perfectly and trace it on paper. You can also find free patterns online or just decide to order an A-line dress pattern for around $10 to $20.