When it comes to sleeves, there are many types and styles of sleeves that you can go with. From sleeveless to puff sleeves to flutter sleeves, the possibilities are endless. If you want to go for a more feminine look, then you should consider bishop sleeves for your shirts. Bishop sleeves are long sleeves that are usually gathered at the hem or a cuff. These sleeves are mostly fitted at the armhole and then flare out gradually. You can even stitch bishop sleeves on your own, with the help of a bishop sleeve pattern.
While drafting a bishop sleeve pattern can be challenging for beginners because there are certain things to consider, this guide will help you learn how to make a bodice like a pro! We have gathered information regarding all the tools you may need, along with an easy-to-follow step-by-step guide that will show you how to draft a bishop sleeve pattern.
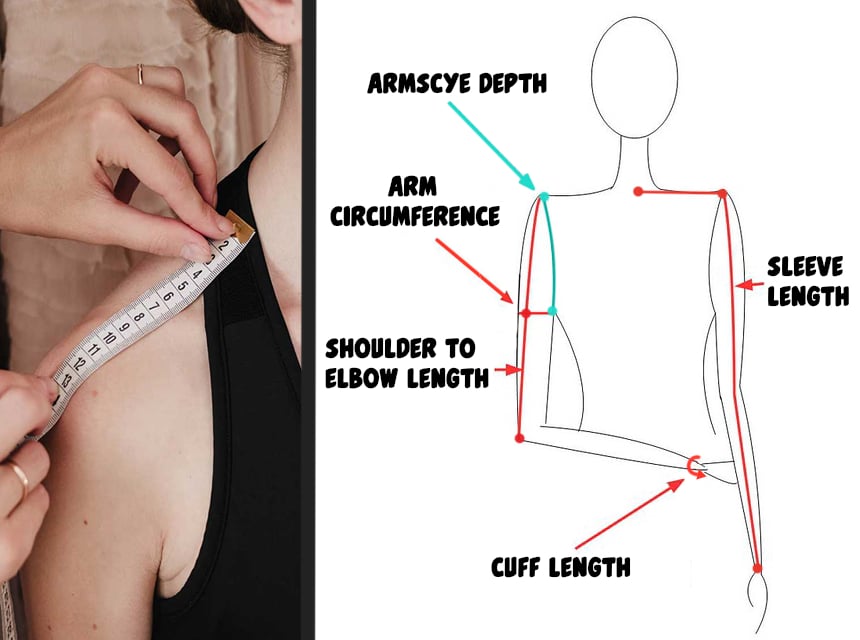
Before you start working on the bishop sleeve pattern, you will be needing some specific measurements so that the sleeves fit you well. Here are all the areas you would need to measure and how you can measure them correctly:
Now that you have all the measurements you will require, you can start working on the bishop sleeve pattern!
Bishop sleeves Trusted Source Sleeve Shifts of the 1890s – Historical Sewing historicalsewing.com are becoming the new trend, which is why you need to start making your own. With just a few tools and this step-by-step guide, you can create your own bishop sleeve pattern!
All sewing projects require some tools that are essential for the task. Similarly, making a bishop sleeve pattern will require some tools and materials. It is always best to have all the required tools and material prepared in advance so that it helps you save time. Here is a list of all the items you will need to work on the bishop sleeve pattern:
A pattern master is a French curved ruler that comes with different markings to help you take angled measurements for the pattern.
Here is how you can draft a bishop sleeve pattern:
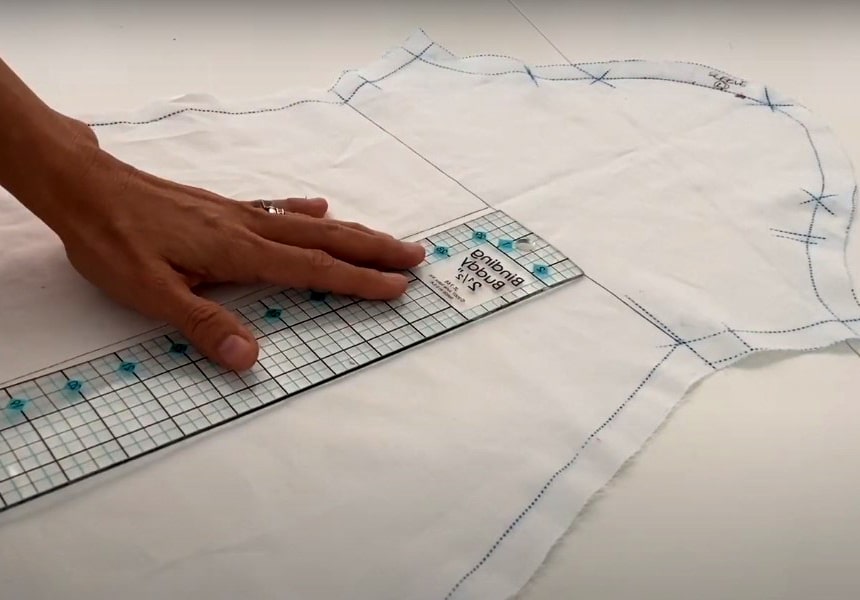
Step 1: Take any simple sleeve pattern online and print it out. Then, using that pattern, trace out the sleeves onto the tracing paper according to your desired length and measurements.
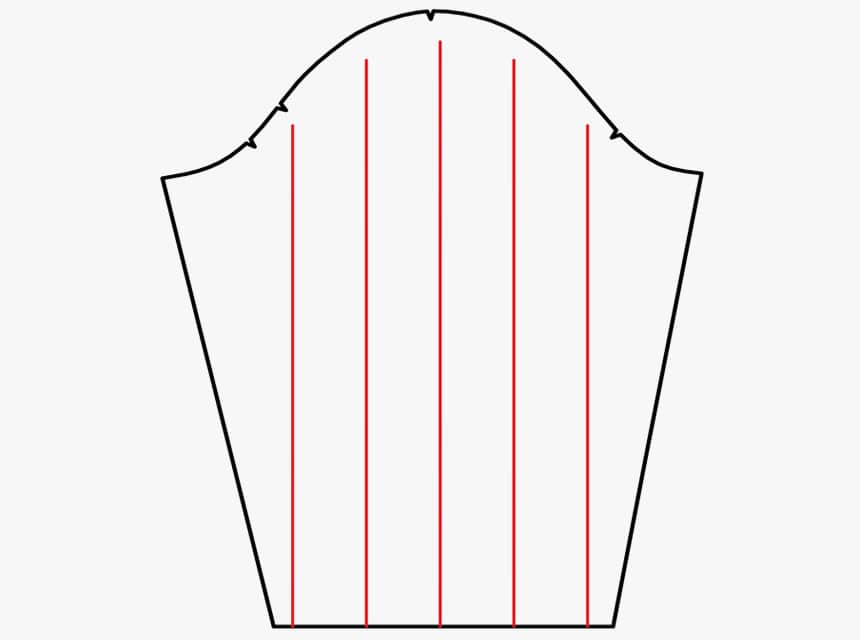
Step 2: Once you have traced out the sleeve, add about 5 inches of length along the grainline. Then, divide the sleeve into 4 even-sized sections.
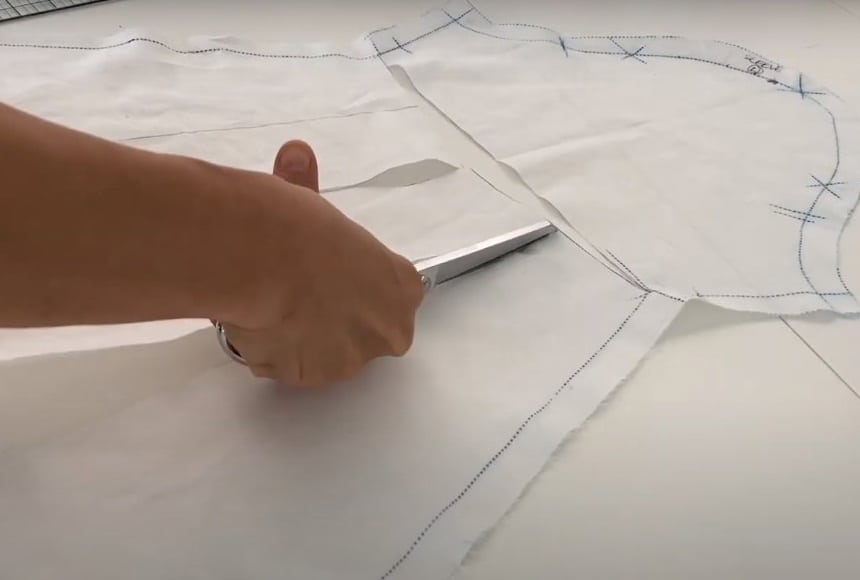
Step 3: Take some sewing scissors that are sharp and accurate to cut along the first two sections. However, do not cut all the way top. Leave a few inches of the paper neat the cut line. Do the same for the other two sections.
Step 4: Then, get some more of the pattern-making paper and tape it under the middle two sections. To add to the puffiness of the sleeves, pull the first and the fourth section away from the middle section. Pull out the sections according to the fullness of sleeves that you want.
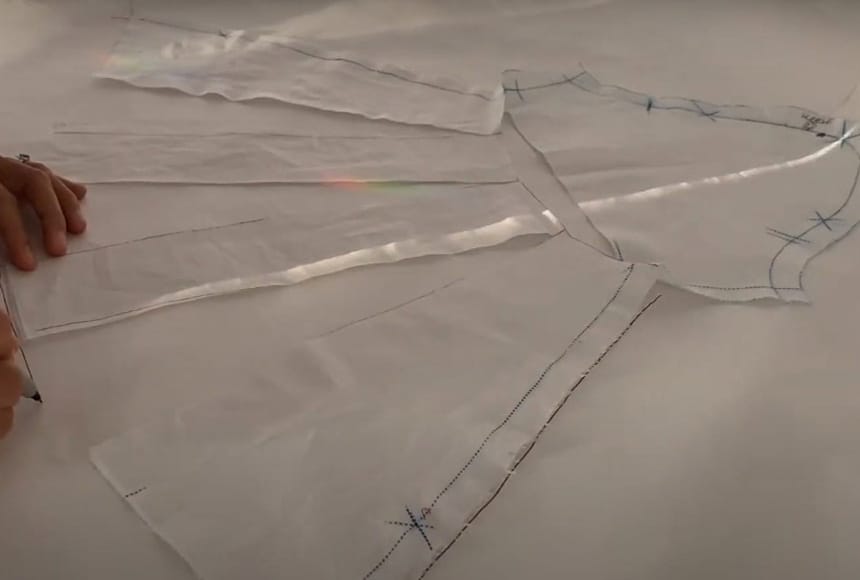
Step 5: By taping them in place, you get 4.5 inches of fullness from the first two sections and 5.5 inches of fullness from the last two sections. Then, redraw the sleeve hem and make sure that you connect the new lines.
Step 6: At this point, you can even add a ruffle to your pattern if you want. Next, take a rectangular piece, around ¼ inch wide and 2.5 inches in length, for the cuff pattern.
Step 7: Using sewing pins, attach the pattern to the fabric that you want to use for your bishop sleeves. Make sure that the pattern is well attached so that it does not move around while you are cutting it.
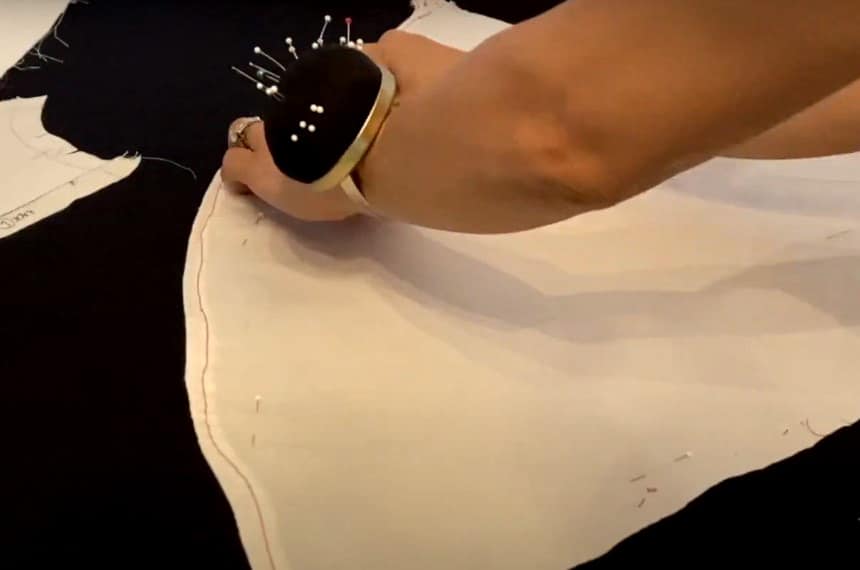
Step 8: Now, take your sewing scissors and cut your fabric around the pattern. Make sure that you cut precisely as the pattern contains exact measurements for the sleeves. Then, we move on to the sewing machine. If you are working in lowlight, then make sure that you have the best sewing machine light.
Step 9: To join the pieces together, stitch 2 rows of basting stitches along your fabric of choice. While sewing, make sure that you leave ⅝ inches of the seam allowance.
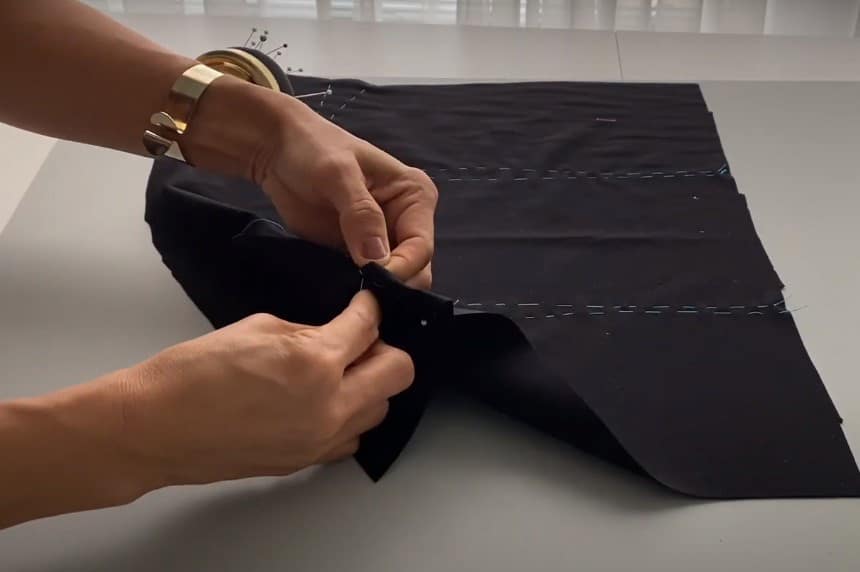
Step 10: For the cuffs, fold the fabric in half while joining the short sides together. Then, stitch them at ¼ inches. Then, attach the bishop sleeve to the cuffs using a sewing needle and a thread. Your sleeves are now ready to be attached!
These sleeves are a great addition to any kind of blouse and dress. If you follow the instructions carefully, your bishop’s sleeves tutorial would definitely turn out great!
The great thing about bishop sleeves is that they are extremely versatile. You can attach them to any type of dress or blouse as they will go with them easily. Bishop sleeves can be used on any formal, workwear garment as well as some elegant party dress. The possibilities are endless.
Your selection of material also matters. For example, a silk or satin bishop sleeve will give out a very elegant look while a velvet Trusted Source Velvet - Wikipedia en.wikipedia.org bishop sleeve will give out a rustic look to your clothing!
Bishop sleeves can suit anyone which is why you should definitely have a dress or a blouse with such statement sleeves. These sleeves can add an extra flair to any outfit, making you look great as well as elegant. While you can buy bishop sleeve patterns online, with this guide you can easily stitch up your own sleeves that can also be customized. Drafting a pattern may seem like a daunting task, but with detailed instructions, you can do anything. We hope that this guide helps you design some sleeves of your own! Happy stitching!