So you have learnt how to sew and now want to up your game to the next level, embroidery. Or maybe you just had a fascination with embroidery and want to try it out. Maybe it’s a group project you started, or maybe you are just bored and want to learn something new. Whatever it is that lured you towards this read it does not matter, apart from the fact that you need to know how to embroider, and are trying to figure out where to start. Lucky for you this article is a good place to start. From this article you will get to learn basic embroidery from embroidery DIYs, hand embroidery tips to machine embroidery tips and tricks to get you well off on the skills and confidence that you need to tackle your next embroidery project.
The following are the most fundamental embroidery tips for beginners that will get you well on your way to your next embroidery masterpiece.
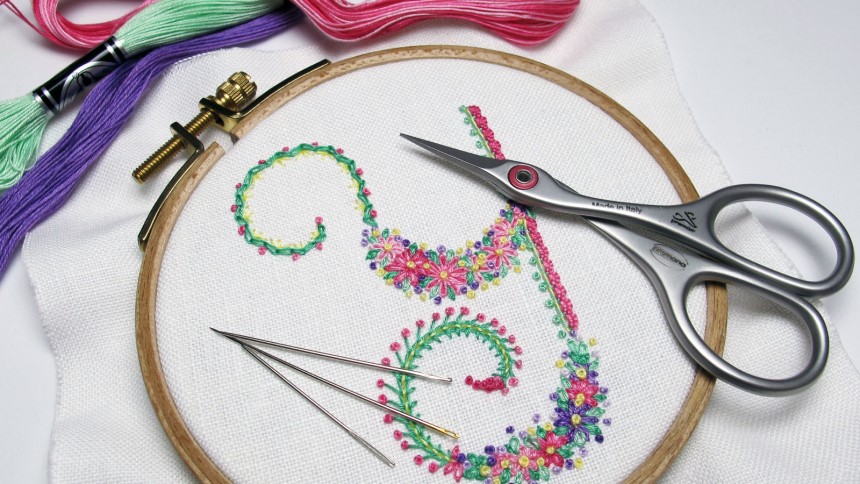
Embroidery is a type of art. And so just like a painter would need a brush and the right type of paint to create a creative image on a piece of canvas, as an embroiderer there are certain instruments that are requisite for your project’s fruition.
Needles; the needle is like the painter’s brush, thus it has be the right needle. Any needle can be used to pull a thread through fabric but the right needle would assure you a better embroidery outcome and a significantly less frustrating first-time embroidery experience. The needles range based on size and shape which makes them utile for different embroidery stitching.
The Crewel needle is the most basic embroidery needle used for all purpose embroidery stitching. It is designed with a medium long eye that is a little bigger than the shaft. There is also the tapestry needle which has a shorter shaft, a relatively longer eye and a dull tip. The tapestry needle’s design is meant for a counted cross stitch, surface embroidery where there is lacing and whipping involved on account of its blunt tip. Then there is the milliner needle, which is commonly referred to as the straw needle which is characterized by its short eye and long shaft. The milliner’s design makes it ideal for wrapped stitches so you might consider getting this one for cast-on stitches, bullion knots or French knots.
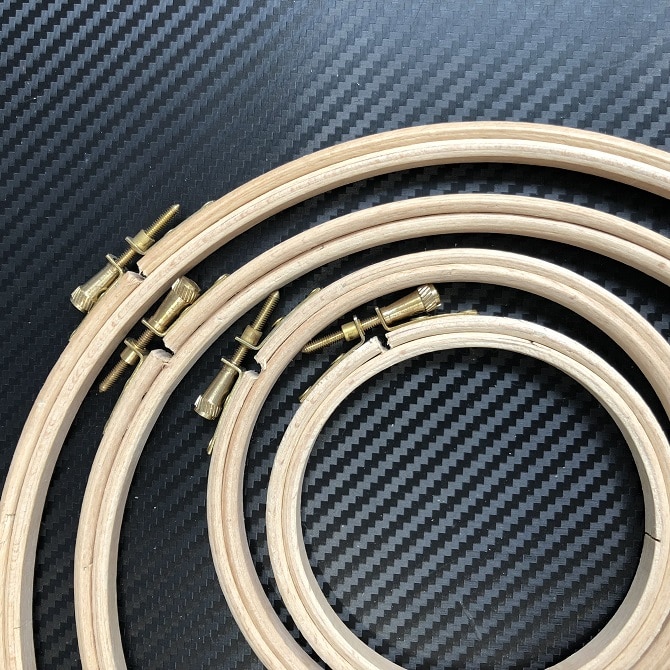
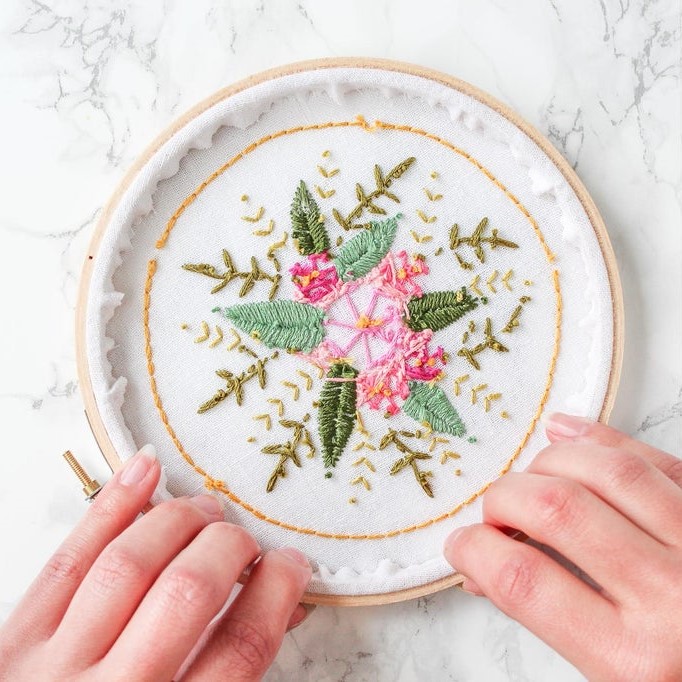
Hoops; as an embroidery beginner the hoop is your best friend. The hoop helps in holding the fabric tightly to avoid rucking up of your stitch which is an embroidery inevitability unless you are a serious pro. It also helps to frame your embroidery to guide your stitching path. You can get plastic and wooden hoop varieties.
Embroidery scissors; these are scissors specifically designed for this job. They feature smaller and thinner blades which makes them very sharp. This design helps them get as close as possible to the ground fabric to make clean cuts of the stitching thread.
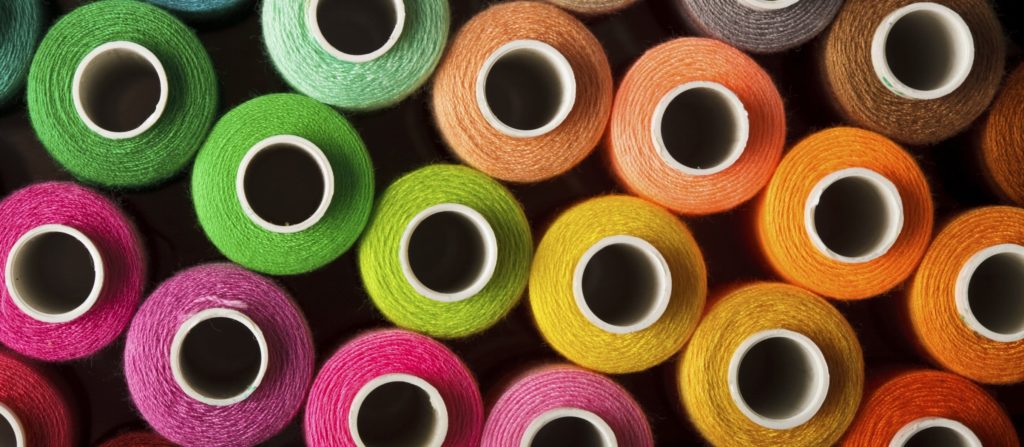
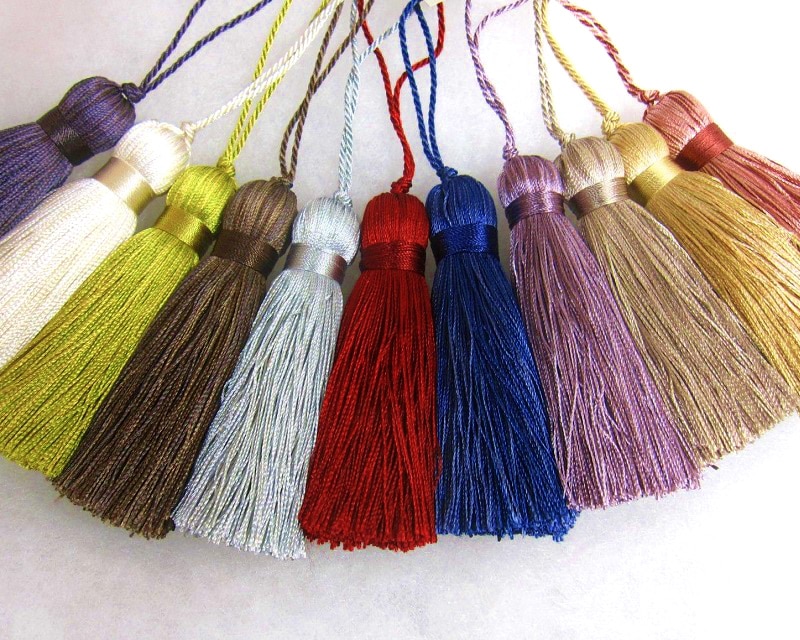
Of course, the thread has not been forgotten. The thread is like the paint that creates the picture that you the embroider intended. Depending on the embroidery you can choose a single or various color. But that is not the only thing about the thread to consider when it comes to embroidery. There are different types of thread that are ideal for distinctive embroidery projects and/or experiences.
Rayon thread; this the most common embroidery thread in the business, well known for its bright colors and gleaming silky sheen. It is widely available in a variety of colors. However, the rayon thread is not ideal for a beginner since it knots easily. If you have to use it then slightly dampen the thread or use it in short lengths to reduce the tangling effect.
Cotton thread; this thread is among the best for embroidery since it is quite strong and almost free of lint (which is a very desirable quality for an embroidery thread). It however, doe s not boast of a luster finish. The cotton thread’s coarse and dull construct makes it ideal for hardanger, cross stitch, redwork, quilting, and bean stitch designs.
Metallic thread; this is a specialty thread used to improve the artistic effect of an embroidery because of its shimmering beauty. Metallic threads give a fabulous finish to textile art with their holographic and sometimes flat fibers. Their design decreases the stitching speed and can cause tearing, frays and tangling.
So get your metallic thread embroidery tips here; remember to lessen the tension on your machine, and use a larger topstitch needle so that you do not get frustrated while stitching.
Silk threads; this is another brilliant type of natural thread characterized by strong and gleaming fiber. Known as a luxury thread, silk is craftily used in making fine embroidery. Silk’s fine texture also makes it ideal for couching thicker threads in embroideries such metallic threads. However, silk threads tend to bleed and fade easily. To counter this remember to use a steam iron and lightly press your silk thread embroidery.
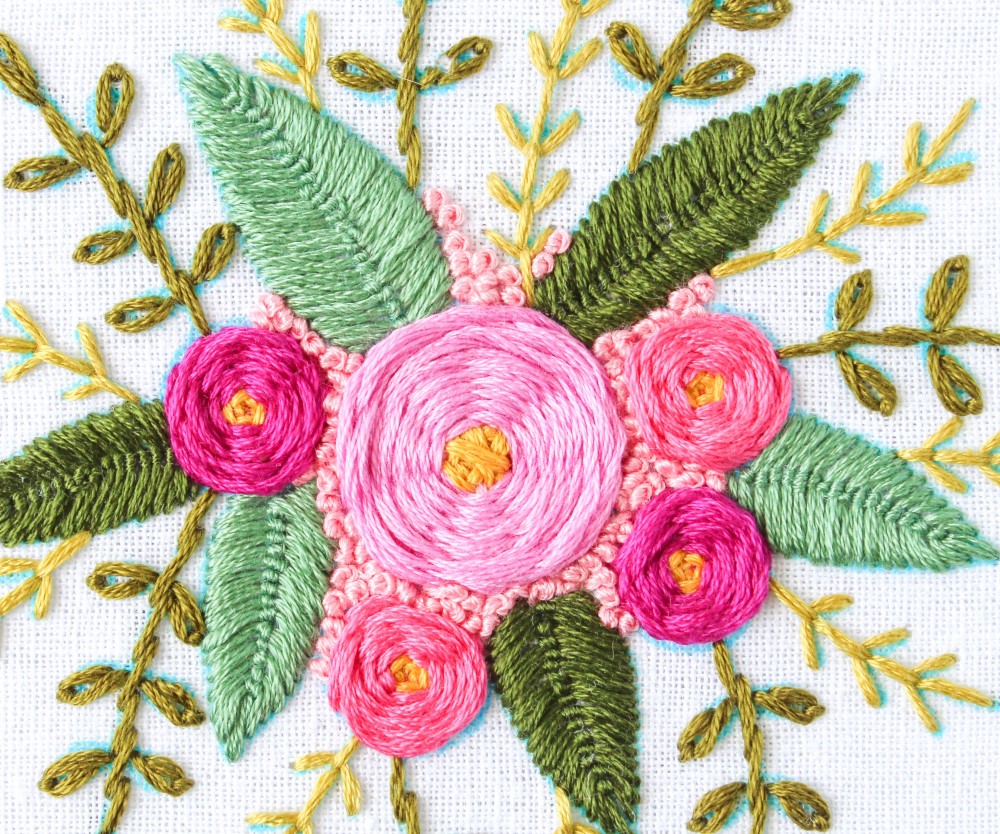
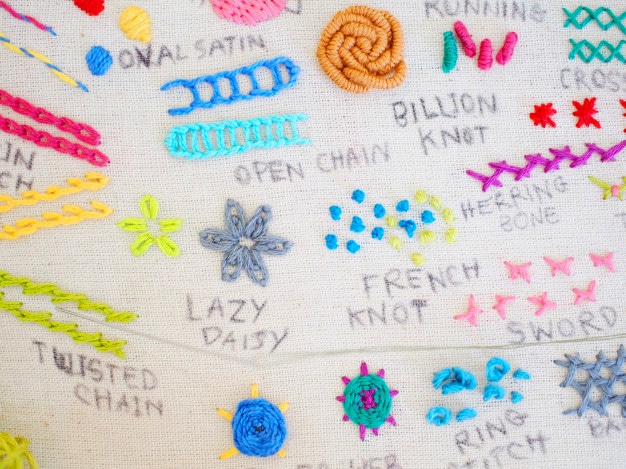
To create this fascinating piece of fiber art that is seeking to be expressed you need to know how to make a stitch. This is kind of like stroking the wet brush on the canvas but with a needle and a thread. The thing is, there are different types of embroidery stitches which are viable for different types of embroidery art. As a beginner here are some basic embroidery stitches to get you started towards achieving that embroidery masterpiece.
Back stitch; this would easily become your favorite embroidery stitch style since it is easy to learn and even easier to use. The back stitch can be used for any kind of embroidery, which works so well that it can be used alongside other types of stitches. It entails the creation of a solid line which makes it utile mostly for text or creating design outlines.
Running stitch; this stitch style is simple but can be modified to a more complex design, thus making it quite versatile. The simple part entails creating dashes and outlines and it gets trickier when you adjust the length or spacing or when you add a second row of stitches between the first. The running stitch can be utile for weaving and wrapping.
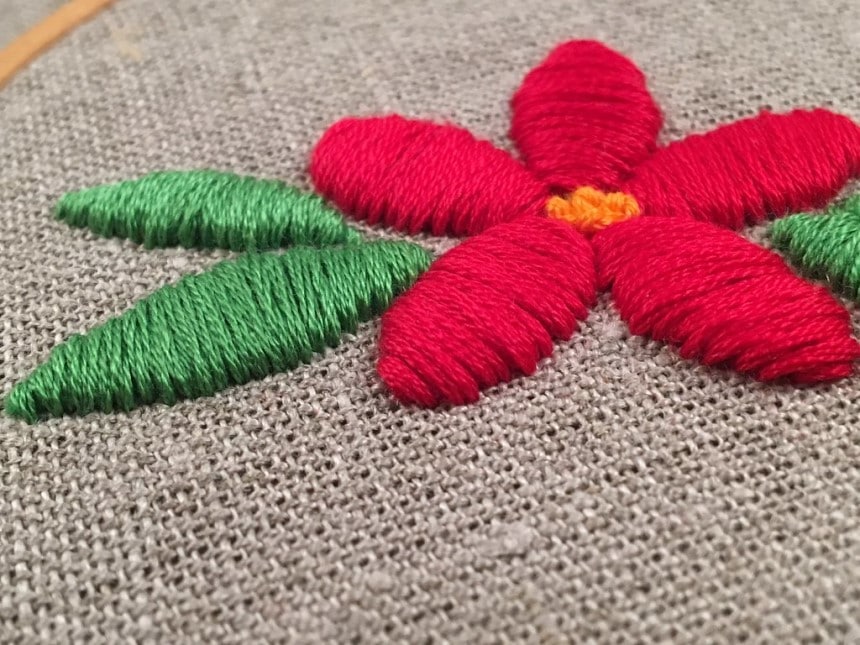
Satin stitch; if you want to fill an area on the fabric that is your canvas the satin stitch is the stitch you are looking for. It basically entails a group of lines neatly stacked up against each other. The length variation of the lines as well as their proximity is what determines the artistic image created from the satin stitch.
Chain stitch; this is a trickier stich style that looks really good if you can successfully pull it off. It entails the forming of a row of linked stitches that classically form a bold line of embroidery. It is recommended that you practice on spare fabric before you can take this stitch style on. Once you are confident with the chain stitch you can try its different variations which includes a reverse stitch.
French knot; this is a relatively harder stitch to learn and apply, but gratifying to know once you get the hang of it. The French knot entails wrapping the needle to form a beautiful knot on the top side of the fabric. It comes in handy when making a textured fill. The trick to making the French knot work is to hold the working thread at a balance between stiff but not too tight.
Punch needle embroidery comes as one of the diverse styles in which embroidery art can be applied. This one in particular is easy to learn and you might find it to be quite a bit of fun once you start some projects on it. However, as a beginner you will need a few punch needle embroidery tips and tricks to get you started.
Choosing the fabric; the fabric is the foundation of this textile art piece, thus if it is not chosen well it could ruin the process and the experience.
Different punch needles have different thickness which makes them uniquely suitable for specific fabric. You need to consider this to avoid you needle from popping or damaging of the fabric.
Yarn; for the yarn that you choose there needs to be a balance. A balance between how seamlessly the yarn fits through the punch needle and how firmly the yarn grips onto the holes of the foundation fabric. You can always add extra strands of yarn together if a single yarn does not adequately fit through the punch needle or the fabric holes. Floss is also an option for the smaller gauge punch needles that are too small for yarns.
Proper framing; punch needle embroidery is a little different from basic embroidery therefore, basic hoops will not do the job the way you would want it to. Basic wooden hoops would let the fabric loose with each punch needle stitch which can be really infuriating and uncomplimentary to the whole outcome. Try and get yourself a gripper frame or a plastic non-slippery hoop. If none of these are accessible to you get creative and use a staple gun to hold the fabric more steadily on your wooden frame.
General considerations; for punch needle embroidery success, considering other factors such as fabric tension, yarn tautness, needle direction, where to start and so on will significantly improve your experience as well as your artistic results. Ensure that the fabric tension is as tight as it can be for that neat effect. Also, the yarn needs to be a little loose on the ball end. Excess tension could pull the stitches out. As for the needle the open side should always lead, thus it should always face the direction of the stitches. And for even stitches and loops make sure that you punch all the way down until the wooden part of the needle is brushing over the fabric.

As a beginner you probably would want to or have to start with hand embroidery. You should know however, that without the right fabric as your foundation your embroidery may not turn out as well as you anticipated it to be (but you already knew that). So, to avoid overstretched, puckered, or distorted embroidery designs not to mention the frustrations that may come with all that hard work being wasted, get some hand embroidery tips on the getting the right fabric right here.
Thread count; this is among the most fundamental aspects of choosing fabric. You need to ensure that the weave is not too tight because this will make it harder to penetrate and even so painful on your hand. The thread count is determined by looking at the number of threads per square inch which should be low. Cotton is a good choice in this aspect since its variety of weaves normally come under a 150-thread count.
Natural fabric; the best fabric any day for embroidery stitching is natural fabric. This is because the natural fabric are characteristically softer yet form a strong enough foundation to hold embroidery stitches. Natural textiles are also ideal since their fibers run both horizontally and vertically which allows for eased needle penetration. Examples of such fabrics include cotton, silk, wool, and linen. A blend of these fabrics is also considered natural fabric.
Wash first; an easily overlooked tip but very important if you get to know why. Washing you fabric before you decorate it with embroidery helps a lot in avoiding puckering. This is because it tightens the weave to enable consistent stitches across the fabric. Also washing preshrinks the textile so that when you wash after the embroidery the fabric would have already adapted.
Reinforce the foundation; this comes in handy when you are considering a heavy layered design using extra accents such as beads or buttons. This aspect helps you lay a foundation to the foundation which will help you stabilize the stitch on your fabric yet maintain the intended artistic design.
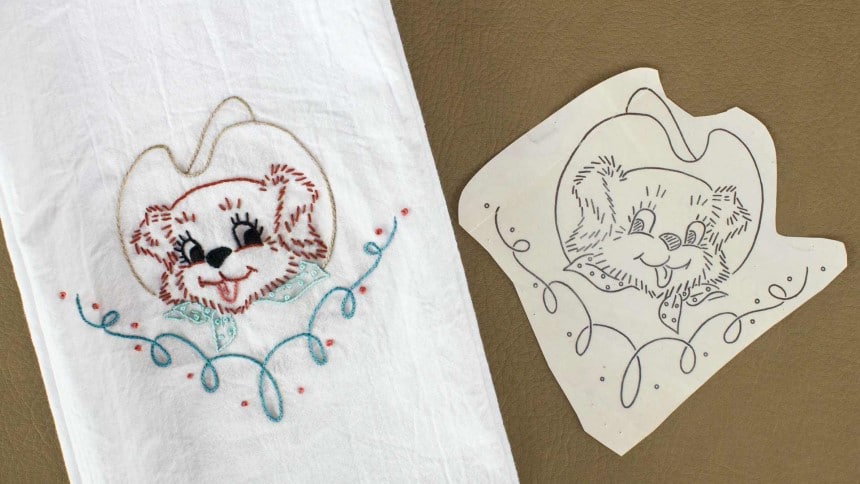
As an artist you will have to come up with creative designs for your embroidery projects elsewhere then transfer them to the fabric. This helps you master your piece before you express it on that piece of fabric. To do this there are a couple of techniques at your disposal. However, despite one or two being favorable and easy to use for you each of these techniques are uniquely utile in transferring embroidery designs depending on the different characteristics of the fabric you are using at the time.
Light tracing; with a healthy supply of light which can be from the sun or a useful lightbox you can easily transfer your pattern. Start by taping your design to the lightbox or the window. Then tape your fabric over the art piece and trace over it using a water-soluble pen. A finely sharpened pencil would also suffice as long as after washing the trace will have disappeared. This style serves light fabric best.
Heat transfer pens; these are available in different colors and are permanent so if you go through this route you have to ensure that your final embroidery entirely covers the markings. It entails using the heat transfer pen to draw a reverse image on a lightweight piece of paper (this is because it creates a mirror image when pressed onto the fabric). The lightweight piece of paper is then pressed onto the fabric with a hot iron which activates the ink transferring it onto the fabric. This style is ideal for both light and especially heavy textiles.
Water soluble stabilizer; this technique entails printing the art pattern on the water-soluble stabilizer which is then placed directly on your intended fabric. After stitching through the fabric, you then soak embroidery in warm water to dissolve the stabilizer. This technique is ideal especially for dark fabrics and more detailed art pieces.
Hot iron transfers; this technique is probably the easiest to use and would be ideal for a beginner. It involves readily designed and ready to use patterns so all you have to do is identify one that you like. Then you transfer the design to you fabric using a hot iron. The concept patterns used greatly vary which usually come gray, blue or black prints.
Now that you know about all the fundamentals of hand embroidery how about a promotion? A promotion to machine embroidery which is supposed to ease the whole experience but can get a little technical at times. Not to worry nonetheless for with these machine embroidery tips and tricks you will do just fine.
Machine embroidery tips; to get started you need to ensure that you have the essentials with you. This includes the right needles, a machine-oriented hoop, stabilizer, embroidery thread, bobbin thread, and a pair of small scissors.
Another thing to consider is your hooping. The goal is to ensure that your fabric is as smooth and as flat as possible within the hoop.
Machine embroidery tricks; sometimes your project may be experiencing some setbacks as a consequence of certain limiting factors. With a few tricks up your sleeve(s) these commonly experienced setbacks would not limit you. For instance if you embroidery design does not fit within the hoop you can use stabilizers with temporary adhesive spray. For scenarios where your hoop does not adequately tighten to hold you fabric well, you could create a hoop collar for your hoop. You could use a grippy piece of fabric with a hollow trim to be aligned within the clutch spaces of the hoop. For some machines the top stabilizer gets eaten down by the machine if it is not held in position. Creating a running stitch around the top stabilizers counters this problem.
And there you have it. An extensive compilation on the different aspects of embroidery that anyone can learn from. Hopefully all that reading on the different embroidery tips has been helpful and will amount to some artistic textile masterpiece. All in all, remember to test you skill first on scrap fabric before embarking on your actual project. And also, the only way you get better is if you practice as much as you can.