Sewing is a work of art that involves several processes to deliver a perfect project. As a dressmaker, you don’t want to end up having a garment with a rough binding. That can be the case if you are working with a quilt that has curved edges. There’s no need to fret, you need to make continuous bias binding Trusted Source Bias tape - Wikipedia Bias tape or bias binding is a narrow strip of fabric, cut on the bias. The strip’s fibers, being at 45 degrees to the length of the strip, makes it stretchier as well as more fluid and more drapeable compared to a strip that is cut on the grain. en.m.wikipedia.org to remedy the situation.
Essentially, continuous bias binding can give you the perfect project you desire. You will need to cut your strips on the bias to achieve smoother edges. Besides, learning how to make continuous bias binding is not a complicated exercise as you might have thought.
Luckily for you, this article will explain the step-by-step instructions you need to make continuous bias binding. It will also highlight the tools and materials you need to get the job done. Ride along with us as we delve into the world of continuous bias binding.
A continuous bias binding is a way of pre-sewing bias binding strips before actually cutting them. The technique prevents the need for sewing a bunch of strips together to get the length needed to go around your project.
Moreover, this process is required if your quilt has curved edges. Essentially, bias binding wraps around the curved edges effortlessly and delivers a smoother binding.
Ultimately, a continuous bias binding helps to cover raw edges and create a decorative finish simultaneously.
Making a continuous bias binding requires several tools and materials. We will list and explain them below:
The most important aspect of learning how to make continuous bias binding is understanding the steps required to get it done. Below, we will provide step-by-step instructions you must follow to make continuous bias binding:
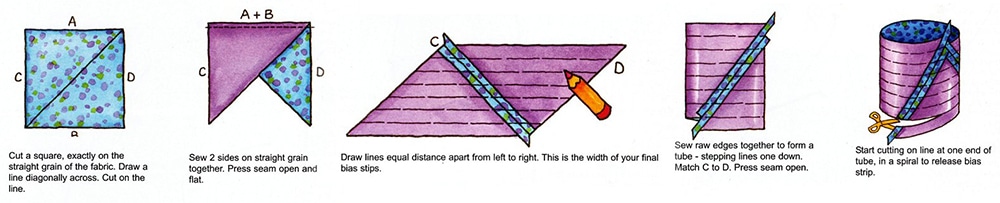
Step 1: The first thing you need to do when making a continuous bias binding is to cut a square from your binding fabric. Use your ruler to measure the fabric and determine the length of binding you need. Allow 10 inches for the closure and turning corners. The formula is: [(width of quilt + height of quilt) x 2] + 10.
Step 2: Then go ahead to cut the square in half diagonally in such a way that you get two triangles.
Step 3: Put the right sides together and align the triangles’ edges. Use a ¼-inch seam to sew the triangles together to make a parallelogram. You can then press the seam allowances open.
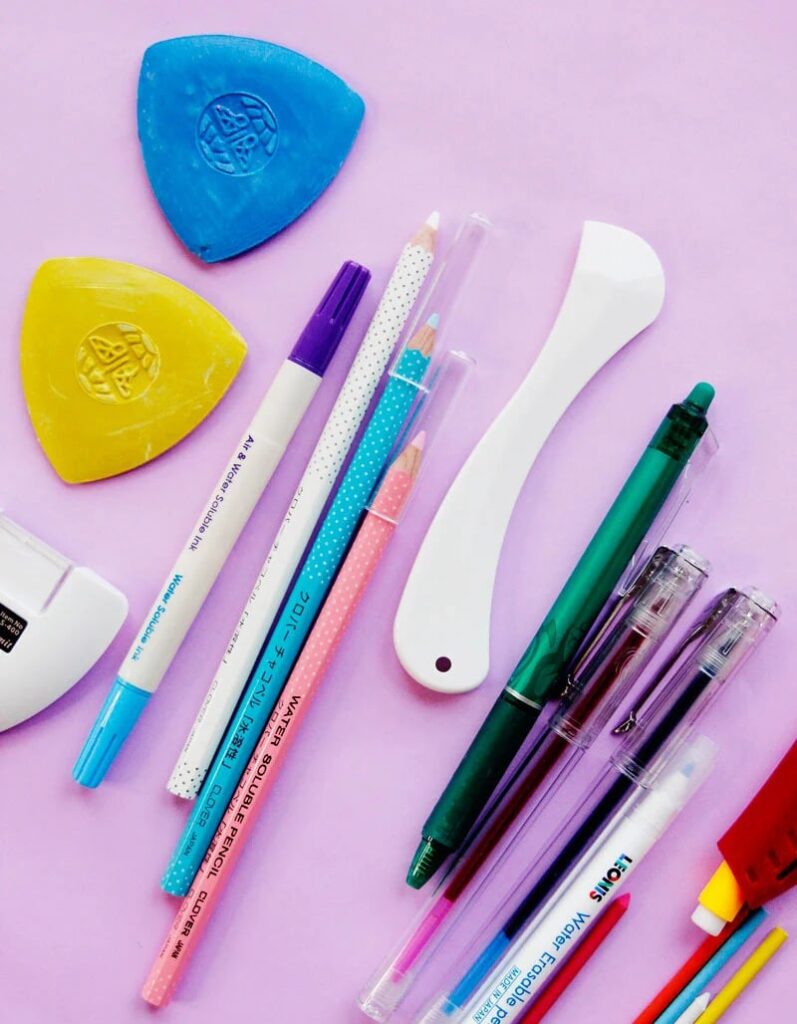
Step 4: Use your ruler and marking pen or chalk to draw lines on the wrong side long edges of the fabric to make strips of your preferred binding width.
Step 5: Bring the diagonal edges together and match the raw edges together to form a tube. Offset the drawn edges by shifting one strip. Match the lines with pins at the ¼-inch seamline and use a high-quality hand quilting needle to stitch the seam. Then press the seam allowances open.
Step 6: Use your scissors to cut along a continuously drawn line. Cutting across the seam each time requires you to move down a marked line.
Creating a perfect job is usually the primary target of a dressmaker but that can be threatened if their fabric has rough edges. Removing the rough edges and getting smoother edges require making a continuous bias binding. With this technique, you can get the perfect project. Learning how to make continuous binding can be tricky, but simple.
Besides, our guide simplifies the process by breaking it down into simple and easy-to-understand steps. You need to strictly follow the instructions to get the desired results. Apart from the instructions, you need to acquire tools and materials of the highest quality to enjoy a seamless exercise.