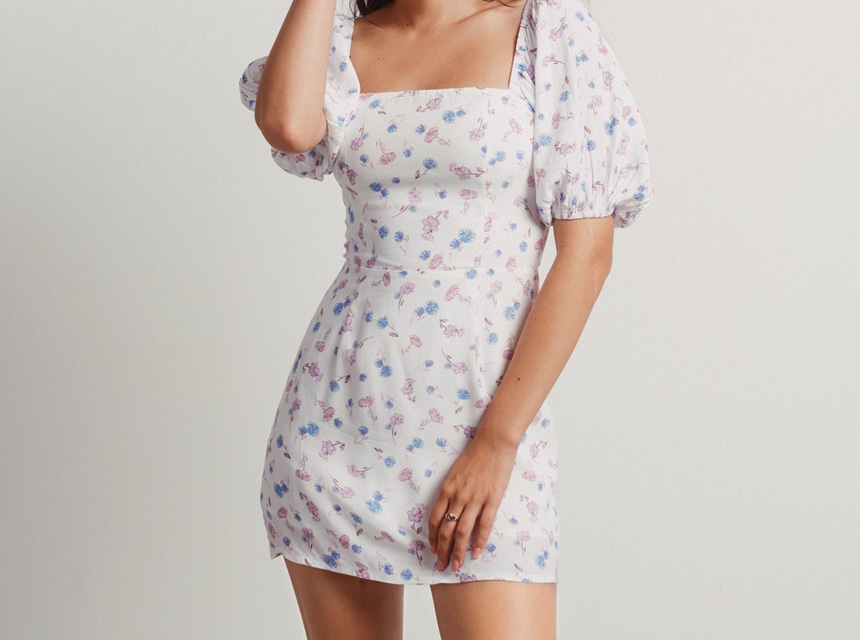

Who says that your shirt sleeves have to be plain and boring? You can always customize your sleeves and make something that is as elegant looking as flutter sleeves. Flutter sleeves are essentially short sleeves that have a loose fitting. These sleeves fall on your upper arm with their soft folds. The best thing about this kind of sleeves is that they suit most body types because of the way they balance your figure. Since these sleeves are flowy, they also allow a great deal of mobility for your arm to move around.
Today, we will be guiding you through the proper and detailed way to draft a flutter sleeve pattern. So let’s get started!
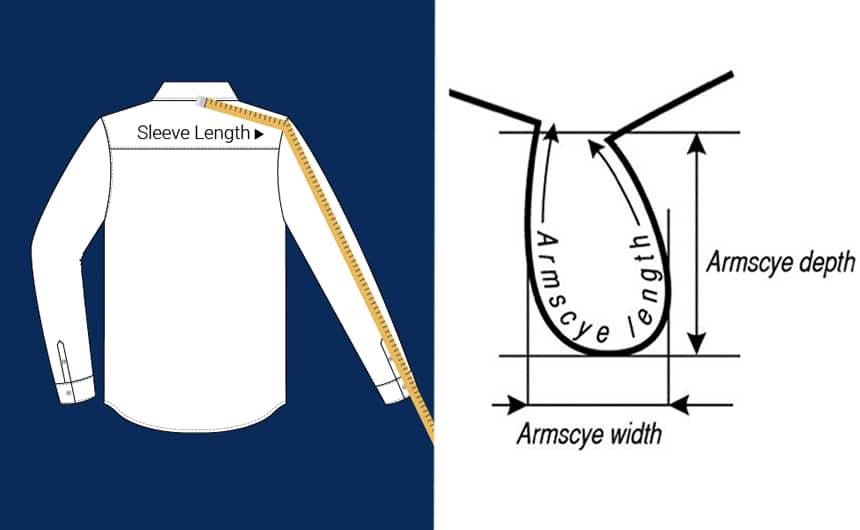
Before you start working on the flutter sleeve pattern, you need to get a few accurate measurements to make sure that you get a more customized fit. Here are the measurements that you need to take:
These are all the measurements that you would need for making flutter sleeves.
Make sure that you carefully note down these measurements as they will be used while we draft our flutter sleeve pattern.
Here is how you can draft your own flutter sleeve pattern:
Like all sewing projects, making a flutter pattern requires some tools and material. We have worked on an extensive list of the things you will need. While you may not need all of these items, it is always best to be prepared in advance. Here is a list of all the things you will be needing:
While stitching may not be for everyone, you can easily draft flutter sleeve patterns by following the following steps:
Step 1: We will be starting off with a blouse sleeve block. Using a scissor, shorten the block to about two to three inches below your bicep.
Step 2: Then, take a pencil and draw vertical lines on the block. This will be dividing the sleeve into different sections. Make sure that your sections are at least 1.5 inches wide while the end sections should be at least 3 inches wide.
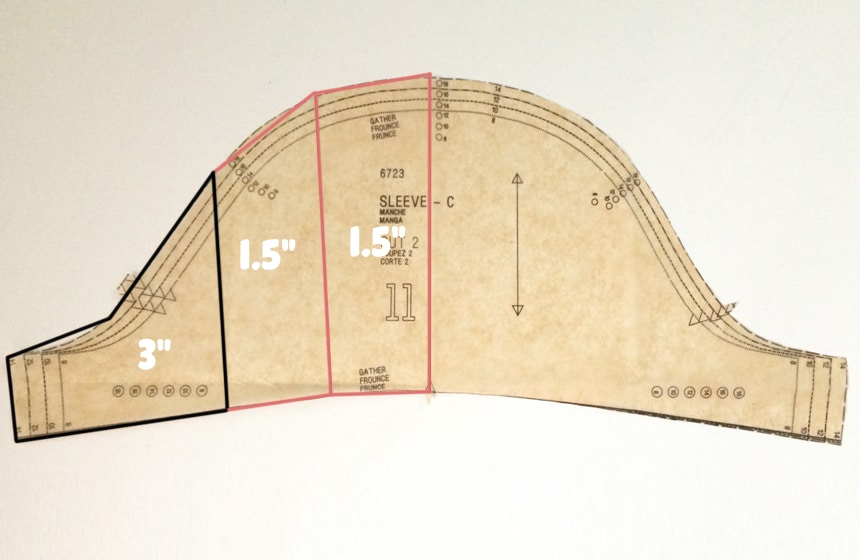
Step 3: Using scissors, cut along these lines while making sure that you do not cut all the way to the sleeve cap. If you do end up accidentally cutting all the way, then there is no need to worry as long as your pieces remain in the same order.
Step 4: Now, we will be spreading apart all the pieces. This will help create the flutter that the sleeves are known for. Ideally, we recommend spreading the pieces to about 1.5 inches. But you can decide on how little or more flare that you want to add to your sleeves. For more flutter, you can spread the pieces further apart.
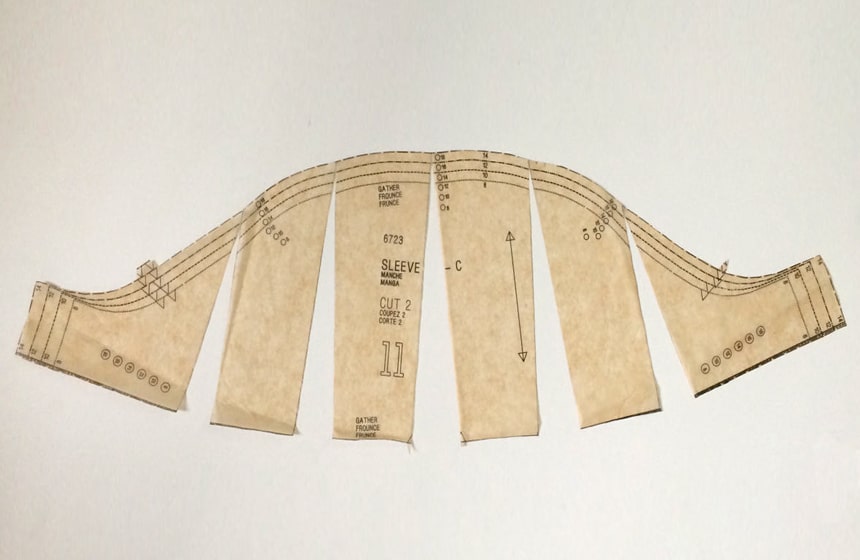
Step 5: Then cut a lightweight fabric according to the pattern and arrange the pieces for stitching. Once stitched, your sleeves are ready to be attached to any dress or shirt that you like!
When it comes to style, flutter sleeves are extremely versatile. You can attach the sleeves on any kind of dress, blouse, or shirt and they will look so good. These sleeves will look good for any party or formal event. You can even wear flutter sleeves casually to any garden party Trusted Source Garden party (disambiguation) - Wikipedia en.wikipedia.org or lunch.
Like the name suggests, flutter sleeves add that fluttering effect to any kind of outfit that you wear. These sleeves can look elegant or even add that fun element to your outfit. You can buy many flutter sleeve patterns online, but if you want you make your own sleeve pattern then this guide is ideal for you. While it may seem a tedious task at first, our detailed and easy to follow instructions will be guiding you through each step of the way. We hope that you have fun while working on your sleeves!


