

Some of you may be interested in sewing for DIY projects, crafting, and even for some small fabric repair jobs at home. However, the biggest excuse we come across is the lack of a sewing machine. The good news is that you actually don’t need one. After all, the sewing machine is a relatively recent invention Trusted Source History of the sewing machine! timeline | Timetoast timelines History of the sewing machine! www.timetoast.com . Before that, people used hand stitches for centuries, and their skills are still available today.
You just need to learn the different types of hand stitches and soon the machine might even seem redundant. Also, even people with machines will tell you they sometimes have to put theirs aside and result to hand stitching depending on the project at hand. Below are ten different types of stitches that can get you through almost every hand-sewing job.
The section below will tell you all about these 10 different types of stitches and how best to use them.
The running stitch should be among the first stitches you master as a beginner due to how easy it is. It’s also very versatile with uses in gathering fabrics, seams, and even as a decorative tool in embroidery. Even when you look at a simple example of the running stitch, it seems like a straight line where the stitches are equal in length.
To create the running stitch, you thread your needle and knot the thread as the first two steps. When you double knot the line, it makes it harder for it to go through the fabric. You push the needle through the underside of the fabric, so the knot ends up hidden. Follow up by pulling the needle and thread until the knot is stopped by the fabric.
Next, push the needle through the top of the fabric and into the underside. Pull this all the way through without bunching up the fabric. After that, push the needle through the bottom of the fabric again. While doing this, ensure the distance between the stitches created is equal.
Repeat the same procedure until you reach the end of the fabric, and remember to keep a straight line.
The backstitch is a nice, tight, and all-around dependable stitch that shouldn’t be too hard to learn as well. Like the running stitch, you start at the bottom to hide the knot. Once the needle is through to the top side of the fabric, push it through the fabric back to the underside. This should create your first stitch.
After that, the next stitch on the underside should be the same length as the first one. You then pull the needle through to the top of the fabric, but instead of going forward, you backtrack the needle to the end of the first stitch. Push the needle through here to the underside of the fabric again.
If you were to turn the workpiece over at this point, you would see two stitches with the needle in the middle. As such, you will skip past the second stitch and move slightly forward before pushing the needle through up the fabric again.
Repeat what you did before and push the needle through the end of the second stitch. Keep this process going until you’re done. This stitch is used in embroidery as well as attaching two or more pieces of fabric.
 Saddle stitch
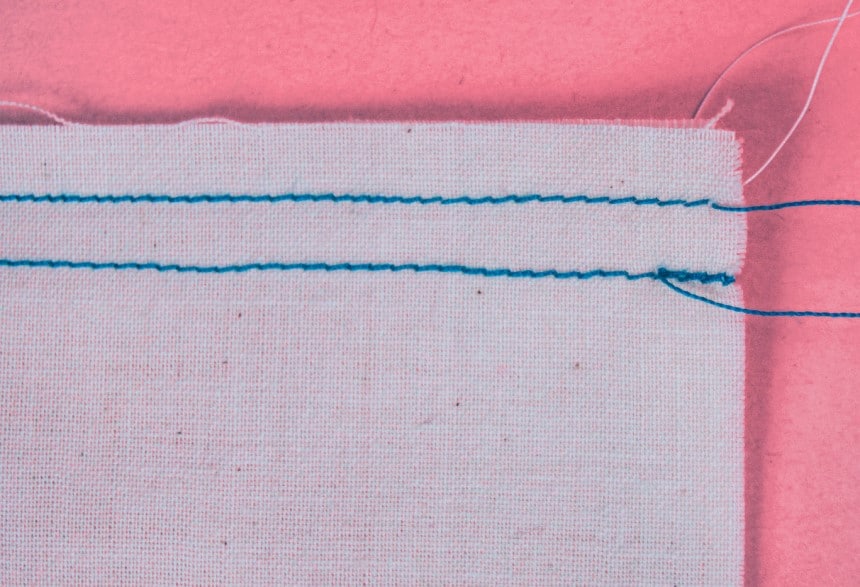
A saddle stitch is mainly used on leather, and it ends up creating two rows of stitching in a single row of holes. It also ends up in magazines, booklets, catalogs, and more. You first need to make the holes before you begin stitching. Use pricking irons, although you might need to use a mallet to push them through.
You’re also going to need to use two needles, with one on each end of the thread. As such, the knots will need to be as close to the needles as possible. To start, you push the needle through the last hole in the workpiece. This setup allows each consecutive stitch to be closer to you.
Ensure the two sides of the thread are equal. After that, push the needle on your right hand through the second hole. Put the needle on your left hand under the needle going through the leather and use this configuration to pull it out. Once done, you should have two needles in the same hand, with the one previously on the right side being on top of the other.
Rotate your hand, so you’re able to push the needle that was previously on your left hand through the same hole that the first needle just exited. Once the needle pokes out on the right side, lift the thread that is still on the right over it before pulling the rest of the needle and thread through. Pull until the two sides of the thread are snug on the second hole before moving on to the third.
Repeat this until you get to the end of the workpiece.
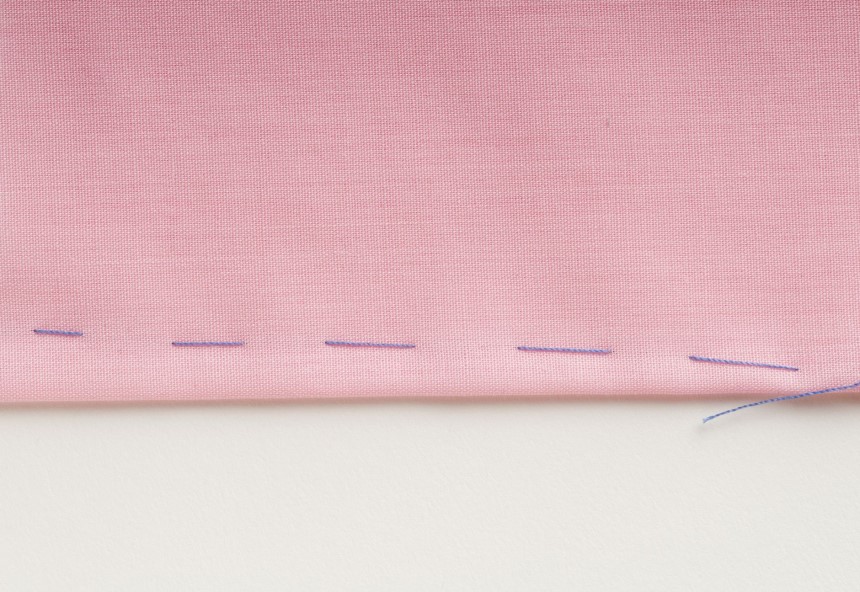
The basting stitch isn’t hard to figure out since it’s almost identical to the running stitch. As such, you should follow the same methodology to pull it off. However, the basting stitch uses long stitches as compared to the running stitch. As such, it is often used in place of pins since it comes off easily. Also, it can be used to gather fabric.
 Whipstitch
If you want to get nice flat seams in your craftwork, the whip stitch is a great way to do it. The whip stitch should also be close to the edges of the fabrics that you’re sewing together. First, separate the two layers of fabric where you intend to start the stitch. Push the needle through the back fabric from front to back. This means the knot on the thread will end up between the fabrics.
You then pull the thread over the edges of both pieces of fabric to the front side. After that, you can then push the needle through both fabric layers from front to back. Space your next stitch then repeat these steps along the seam until you’re done. You will also have to choose the length of the seams to suit your needs, although short ones tend to look a lot better. Additionally, you need to maintain regular spacing.
 Overcast stitch
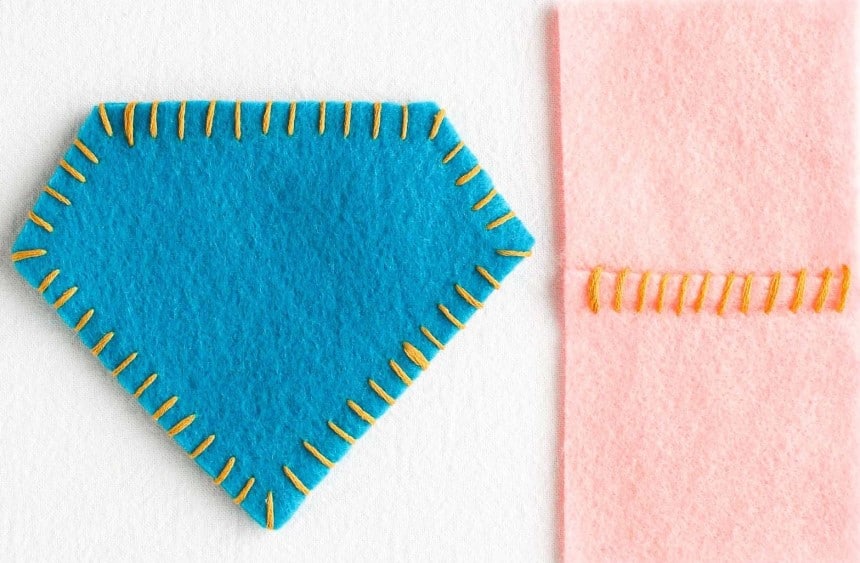
An overcast stitch is more or less like a whip stitch. People often use it to make sure the raw edges of the fabric don’t unravel. Start by pushing the needle through the fabrics from back to front. You can separate the two fabrics for the beginning of the first stitch to hide the knot. After that, pull the thread over the edges of both pieces of fabric and then push the needle through the fabrics from back to front again. Do this repeatedly and at regular stitch intervals until you finish the seam.
 Catch stitch
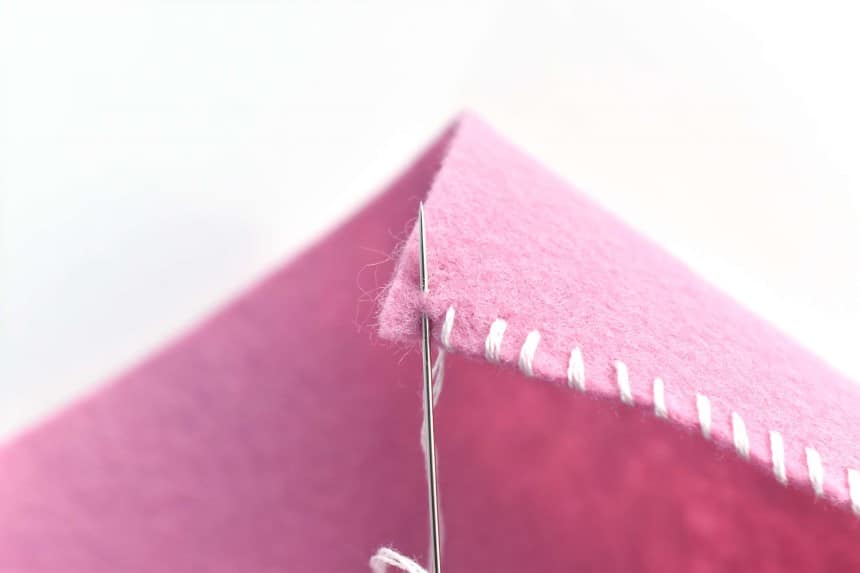
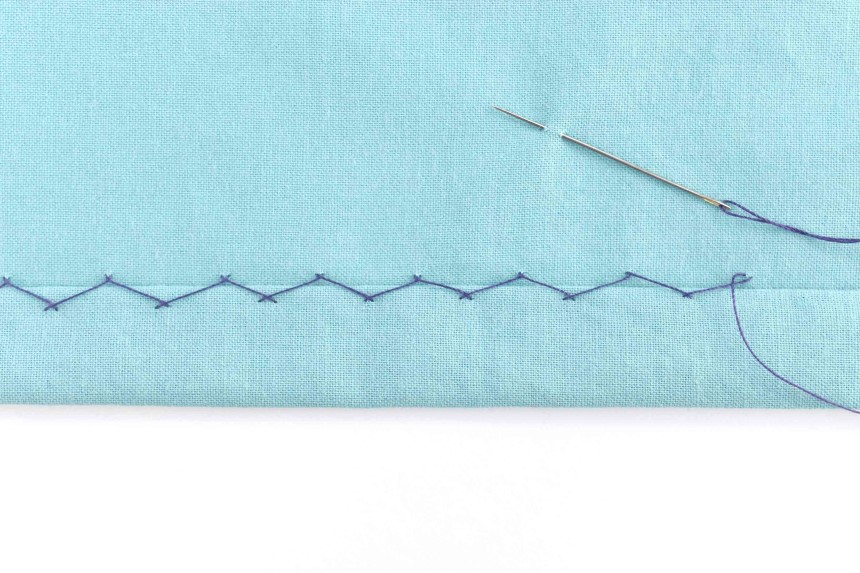
The catch stitch works exceptionally well with hemming knit garments. Additionally, it’s similar to an overcast stitch in that it can help reduce fraying or unraveling of the garment’s raw edges. The first time you see the stitch, you might think it’s a difficult stitch to handle, but it gets easier once you know the steps.
Let’s assume that you’ve already folded your hem. Open it up slightly and push the needle through the fabric that’s going to be inside the garment. This allows you to hide the knot for a neater look. After that, pull the needle through to the part of the fabric above the folded edge.
Work the needle from right to left or left to right depending on whether you’re left-handed or right-handed in a slight diagonal. The needle will have to travel through this part of the fabric but only slightly since you don’t want it to be visible on the other side of the fabric.
Once done, pull the needle, so the thread cuts across this small diagonal line to make a kind of X-shape. Use the same left to right or right to left diagonal on the fabric just under the folded edge. A point to note is that you should only push the thread through the fabric on the inner side of the hem.
You might be tempted to push the needle through the fabric that will end up outside the hem, but that will make the stitch look bad. Again, pull the thread, so it cuts through the diagonal and makes a small X-shape. After that, pull the thread to the area above the folded edge and repeat as before. You should end up with a series of connecting Xs below and above the folded edge.
 Buttonhole / blanket stitch
The blanket/ Buttonhole stitch is just as the name suggests. It is used to create buttonholes, and it works exceptionally well when you use it to finish a raw fabric edge. However, this stitch is used on fabric that doesn’t fray. Also, it is sometimes used as a decorative element, and consequently, you may want it to be more visible than other stitches you work with.
Like the whip stitch, separate the fabrics first before pushing in your needle from front to back through the bottom fabric. This is, of course, done to hide the knot. Pull the thread over the top edges of the fabric, then push it from front to back through both fabric layers. Unlike the overcast stitch, you want the exit point to be the same as the exit you created while hiding the knot.
You might not always be 100% accurate, but the closer you can get to the first exit point, the better. Pull the thread through, then pass the needle under the thread holding the two pieces of fabric together. The general direction of the needle as it passes under the thread should be from left to right.
For the next stitch, go from front to back through the two fabric layers. However, you again need to pass the needle under the loop created before pulling the thread all the way through. Try to ensure the line of thread going from the entry point of the fabric to the top edge of the fabric stays vertical.
Repeat how you made your second stitch for all the consecutive stitches. Also, your stitches should be evenly spaced. Keep this going until you finally knot the thread it at the end.
The blind hemming stitch/ slip stitch is just like the catch stitch in that it works best for hems. However, unlike the catch stitch, which can be seen on the inside of the hem, the resulting stitch is almost invisible on both sides of the garment.
First, create the hem by folding the fabric twice near the edge. Anchor the knot by inserting the needle into the folded edge. Start on the inside of the fold to hide the knot. Next, insert the needle slightly above the folded edge of the hem before bringing it back out on the same side. This should result in a thin line of thread that cuts across this section of the fabric on the underside. Make sure you’re picking as little of the fabric as possible while doing this.
Go back across the fabric to the folded edge. This time insert the needle into the folded edge, tunnel it before bringing it back up after about a quarter-inch of travel. After that, insert the needle into the fabric that is slightly above the folded edge. Repeat as before, so you end up with a thin line of thread that cuts across this section of the fabric on the underside. This anchors the hem by the fold line to the fabric above the hem.
Repeat this process until you’re done hemming.
 Vertical hem/couch stitch
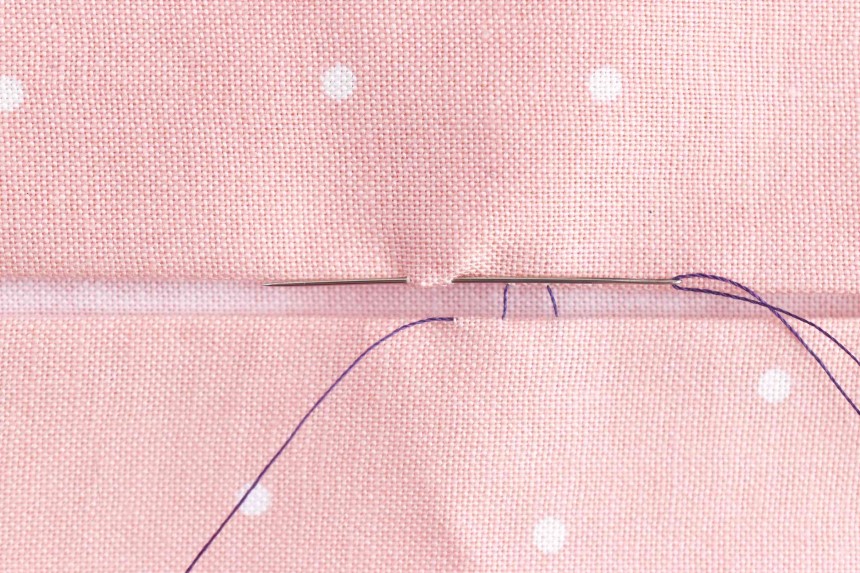
The last hand stitch hemming technique that we’re going to cover is the couch stitch. Again you need a hem to make it work. You will start in between the fold to anchor the thread while hiding it. As such, insert the needle through the inside of the hem from back to front. The entry point should 3-4mm below the edge.
Once the thread is through, insert the needle into the fabric above the fold line. This is where you make sure the line between these two points is vertical. You gather up a few threads of the fabric in this section to anchor the thread before letting it come up on the same side. As such, a tiny line of thread should form up on the underside of this fabric.
After that, lift part of the hemming fold, then use your needle to cut across a diagonal before inserting it into the fabric from front to back. Consequently, the diagonal line of thread should be hidden between the hem and the fabric under it.
Once again, you’re going to need to insert the needle into the fabric above the fold line as before to create a vertical. Repeat until you finish the hem.
Here are a few helpful sewing tips for any beginner learning about the stitches mentioned above for the first time.
Always choose a thread color similar to the color of the fabric. This is why we advocate that you buy thread sets with multiple colors for your projects. The HDST-Home set is one such example, and it comes highly recommended by reviewers. The set includes 25 colors, and it comes with bobbins for when you do graduate to using a machine.
If the same color thread is unavailable, use a thread that is darker colored compared to the fabric. However, there is an exception when it comes to the basting stitch. Also, use a finer thread for finer materials. The same applies to needles since they vary in size. Finer needles tend to work for finer materials as well.
Next, remember to use the right needle for the job. The FIVEIZERO Set seems to give users a specialized needle for any job, whether it’s embroidery, quilting, or more. There are even needles in the set with big eyes.
Another tip is in how you handle the needle and thread. Don’t pull too tight, or else you risk bunching up the fabric. Of course, if that was the goal all along, you can make an exception. Also, thread the needle with just enough thread as this will help prevent tangling.
Lastly, make sure you close the thread by either backstitching or knotting when you’re done. This will anchor the thread and prevent it from unraveling.
The types of hand stitches mentioned above can get you through any sewing situation if you perfect them. Of course, most of them are available in sewing machines as well, so you won’t lose anything when you eventually make the upgrade. Now that the steps to do them have been outlined above, you can start creating crafts whenever you’re ready.