There are dozens of different skirt designs in fashion today, but the A line skirt remains a classic. This popular skirt remains the staple of many closets in the USA and around the world. However, with the clothing industry reaching over $260 billion in the USA Trusted Source • Clothing and clothing accessories store sales U.S. 1992-2019 | Statista This timeline shows clothing and clothing accessories store sales in the United States from 1992 to 2019. In 2019, U.S. clothing and clothing accessories store sales amounted to about 268.7 billion U.S. dollars. According to the NAICS definition, companies operating in this sector are retailing clothing and clothing accessories from fixed point-of-sale locations. www.statista.com alone, it can be financially challenging to remain fashionable and keep your budget in check. Fortunately, there is a solution.
Learning how to make your own garments can not only save money, but allow you to create a unique and custom look. You won’t need to worry that someone is wearing the exact same skirt as you, as you would if you bought it from a department store or budget clothing line. You can create a skirt in your choice of fabric and customize it to suit your specific body shape. With that in mind, here we’ll explore basic A line skirt pattern options and how you can create your own A line skirt.
An A line skirt takes its name from the A shape. It fits snug to the waist, sliding over the hips with a flare to the hem. A true A line has no pleats or tucks, gently widening to the hem from the fitted waist and hips, but there are now numerous A line skirt pattern options that include tucks or pleats to add interest and complement different outfits.
The A line basic shape can flatter almost any body shape Trusted Source Women's Body Shapes: 10 Types, Measurements, Changes, More Some of us are curvier, some of us have narrower hips or broader shoulders — whatever your body shape, it’s important to know that there is no “average” or “typical” body. Everyone’s a bit different. Still, most of us can generally categorize our body shape into broad body type categories. Here’s what you should know. www.healthline.com . Even if you have a bigger hipped pear shape or a rounder apple body shape, the skirt can help you disguise problem areas and create a more hourglass body shape. However, it can also work well on those with a slender body shape that lacks curves, drawing the eye down the body.
The great thing about an A line skirt is that it is highly versatile. A simple A line skirt pattern can work well in a variety of fabrics, so you can create a lightweight summer skirt or use a heavier fabric for cooler weather. Your choice of fabric and accessories can also determine whether you create a casual or more formal look.
You can pair your A line skirt with a bright top or vest for a casual look or wear it with a blouse for a smarter aesthetic. In winter, an A line skirt can look great with pantyhose to help keep you warm while still looking stylish, but an A line mini skirt pattern could be the star of your summer closet.
Once you master the basic A line skirt pattern, you can create a variety of styles, so you’ll have a great option for every season and occasion.
You will need some basic equipment including pins, a cutting mat, sharp scissors and sewing tools. In most cases, you may be able to create your skirt by hand, but it is far easier to use a sewing machine.
To learn how to make an A line skirt, you will also need to know some sewing basics. However, you shouldn’t need a beginners guide to making skirts to follow this basic A line skirt pattern or the best sewing machine. Just remember to take your time measuring and cutting your fabric and follow the instructions step by step.
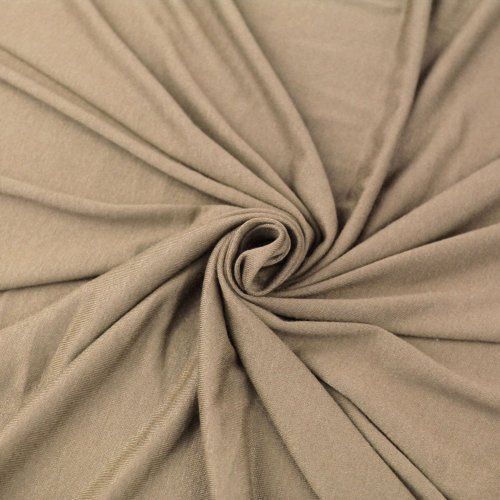
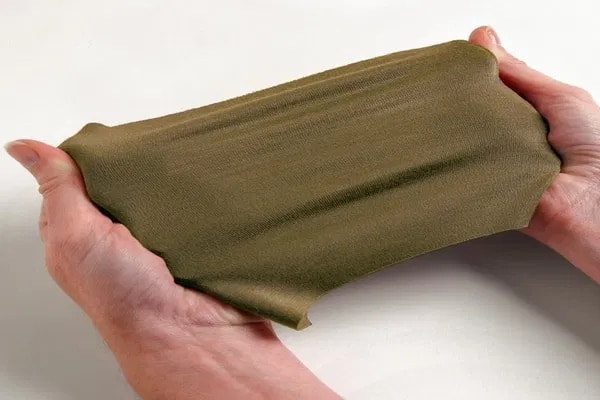
The great thing about A line skirts is that you can use practically any fabric. You could experiment with a cheaper, lightweight fabric before attempting to make a heavier winter skirt. Just remember to check the fabric width and ensure that you have sufficient width for the skirt pattern and seam allowances before you begin.
Even if you are using a heavier fabric, it is still a good idea to have some interfacing on hand. This will allow you to stiffen the waistbands of your skirts for easier fastening. While some designs tie shut, if you want to make a professional look to your home crafts, you will want to add a zip and other fastenings, so you will also need these supplies.
Finally, be sure to have a trusty stitch ripper on hand, so you can baste stitch as you go and then easily remove these stitches once you’re finished.
The first A line skirt pattern free option you should explore is the simple A line skirt. This will help you develop your technique and then you can start to customize.
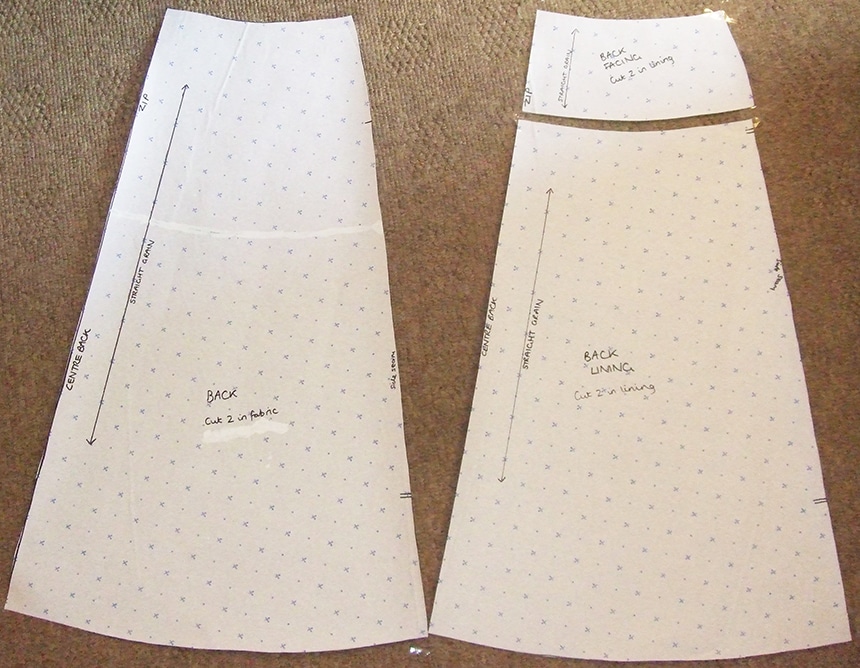
You’re going to need two pieces of fabric to create this skirt; a front piece and a back piece. You can decide on your preferred length and how much you would like the skirt to flare at this stage. Be sure to cut the fabric pieces bigger than your dimensions, marking the pattern to provide for seam allowance. The easiest way to do this is on a cutting mat, but if you have a smooth tabletop, you should be able to make straight cuts. Fold the pieces by the middle to mark the pattern.
Keeping the front and back pieces with the right sides together, stitch your side seams. This can be done by hand, but you’ll find it easier to sew with a machine. Leave the top edge of one side unstitched to allow you to insert a zipper. Turn the garment right side out.
Take a measurement along the top edge of the skirt and cut a piece to this measurement to create your waistband. Although the final width of the waistband will be 1 ½ inches, your piece should be 3 ¾ inches to allow for folds. You can also interface your waistband for increased stiffness at this stage.
Keeping the waistband piece on the top of your skirt, with the right side down against the right side up skirt, you can join the top edge with a ¼ inch seam allowance.
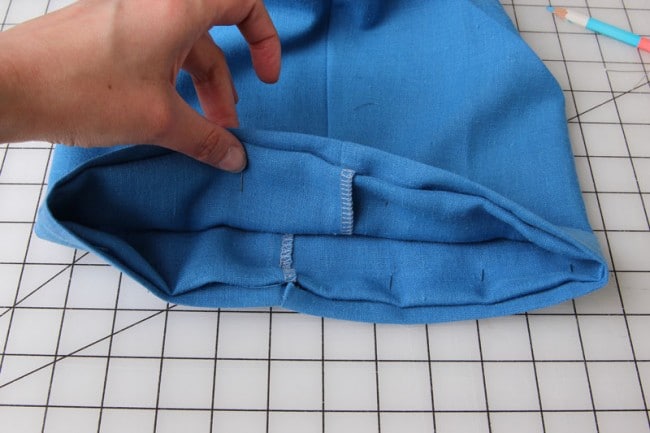
Cut your zipper to a measurement of 11 inches long and make straight stitches along the bottom edge of the zipper to prevent it completely opening up.
Keeping the zipper open, align it face down on one edge. You should keep the zipper ½ inch up from the seam on your waistband. Fold the short edge to the outside and baste stitch into place. Repeat on the other side, turning up the seam allowance inside as you baste stitch.
Fold the top of your waistband down and stitch along the seam allowance. Flip the waistband inside out. Stitch the zipper along the zipper teeth from the top. Fold down the back edge of the waistband and pin into place. Stitch in from the front.
Now you can finish off the skirt by hemming it either by hand or using your sewing machine. While this is a little trickier than an A line skirt pattern elastic waist version, it will create a nicer finished product and show off your sewing skills.
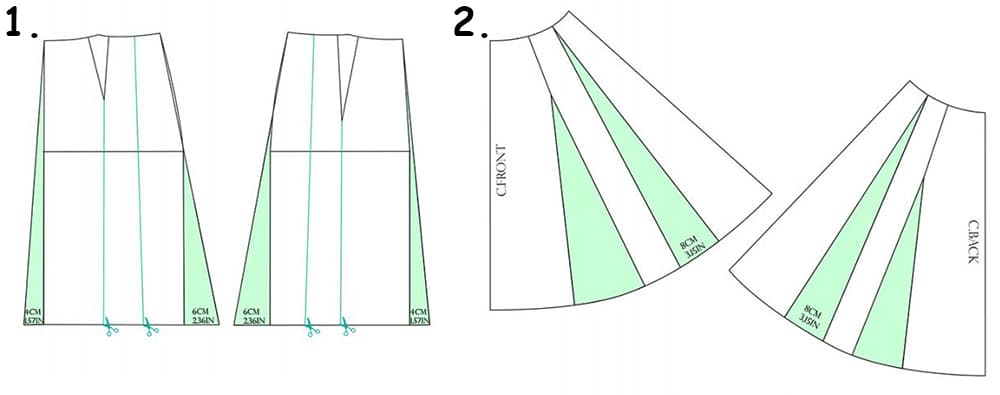
If you’re looking for A line skirt pattern plus size options, a very flared skirt could be the solution. A very flared skirt can help to complement a larger frame, while allowing you to enjoy wearing this classic style. This pattern has a fitted skirt with a full flare, so you will need fabric of 44 inches wide to make it work.
With your cutting mat in place, you can start to lay out the A line skirt pattern. You’ll need 2 yards of fabric at 44 inches wide. Fold in half.
Next measure your waist at the point where you will tie the skirt. Divide this waist measurement by 3.14. Mark this from the top corner near to the fold to create an arc.
Decide on your desired skirt length. You will need to make an allowance for adding a waistband of 1.25 inches and allow 1 inch seam allowance.
Mark this length in an arc from the waistline. For accuracy, mark every three or four inches and join the dots together with chalk. Cut out this pattern.
With the piece right side inside, mark seven inches from the top edge to insert a zipper. Make basting stitches for easy removal before finishing the rest of the seam with regular stitches. Turn the seam towards you and open up the seam allowance. Place the zipper face down on the seam line and ensure the teeth are directly above the seam line. Pin into place.
Use a zipper presser foot to stitch the zipper into place. Turn the skirt right side out and carefully open up the basting stitches.
Since this is a circular skirt with a flare, you will only need a very narrow hem or baby hem. Turn your hem edge once ¼ inches and stitch close to the edge. Cut away the extra allowance with sharp scissors. Turn under the ¼ inch and stitch to finish the hem.
Measure the top edge of the skirt and add one inch for the hook and one inch for seam allowance. Cut a length of fabric to this measurement 3.5 inches wide for your waistband.
Fold the piece lengthwise and stitch the short edge with a ½ inch seam allowance. Stitch the underside and turn the waistband right side out, straightening the corner with a sharp tool. Place the waistband piece on the top of the skirt and stitch together. Attach a hook and bar for fastening.
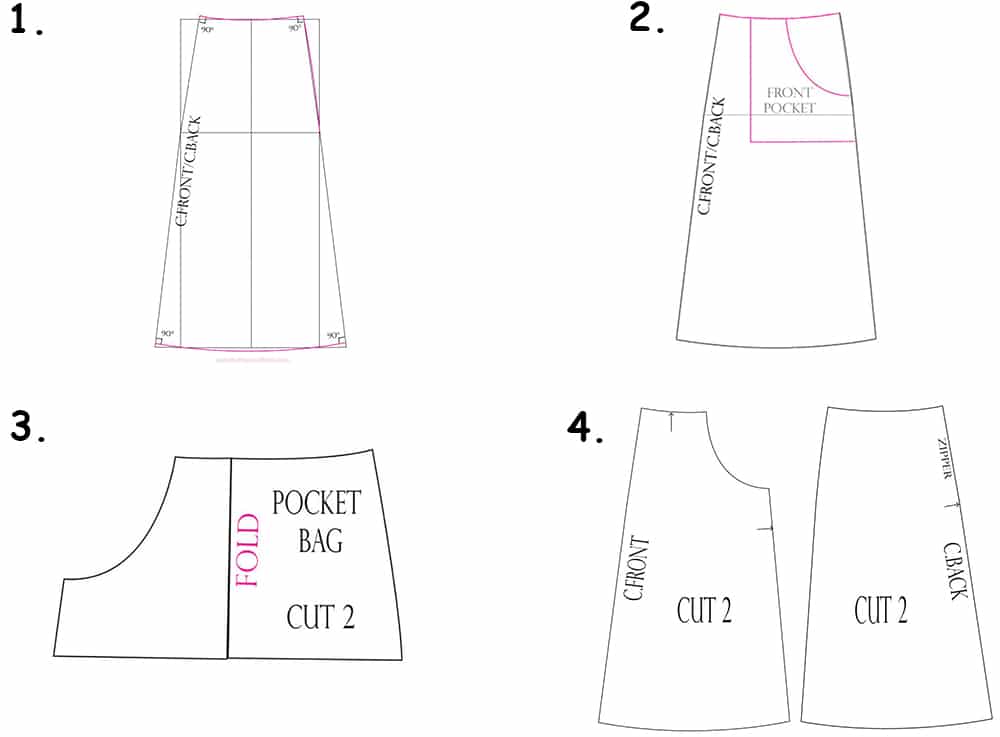
This is a modified A line maxi skirt pattern design that creates a nice silhouette, but also incorporates pockets. The skirt is made with four panels, but the pattern is easy to follow.
Take a waist and hip measurement adding an inch to the hips to make it more comfortable. Divide these figures by four so you can draft your panels. With your waist and hip measurements, you can determine the amount of flare you want to have on your skirt. This is a great way to customize your skirt to your preferences and body shape.
You will also need to create a 90-degree angle for each corner of the panels. If you like, you can add a curve to the side seam between waist and hips.
Once your panels are ready, you can create a waistband and the pockets. The pockets will start under the waistband, so it is a good idea to have a thicker two-inch waistband for the best aesthetics.
To make the pockets use a one-piece pocket pattern, which creates a three-sided bag. You can use the same waistband pattern from the above instructions.
Attach the pocket bags to the skirt by stitching the pieces right side together at your pocket openings. Flip the bag to the wrong side and press the seam to create a fold. You can then stitch the horizontal seam and sew the pocket bag in place to avoid movement as you sew the other seams.
Now you can sew all the panels together. If you want to insert a zip, be sure to install it into the two back panels before you sew them all together. Once all the panels are together, you can hem the entire skirt and attach the waistband.
This is quite a flexible design as you can create the panels out of the same fabric or have an alternating pattern. Additionally, you can leave the pockets open or add a button fastening. The basic principle for creating the waistband, adding a zipper and hemming is the same as the simple A line skirt pattern we covered above. So, you are simply building on the basic design to create a more versatile skirt.
An A line skirt is a flexible addition to your closet. This design looks great in lightweight fabrics for your summer wardrobe, but it can also look superb in heavier winter fabrics. You can even have multiple A line skirts for casual wear and smarter occasions.
Buying multiple skirts can quickly become costly, particularly if you want to keep up with the latest color trends and fabric patterns. However, you can negate this by learning how to make your own A line skirts. While it may seem intimidating, the basic A line skirt is actually quite simple to make with just basic sewing skills.
We’ve covered three A line skirt pattern designs in this article, but when you get the hang of creating your own patterns, you will be able to modify the designs to make unique creations that are perfectly suited to your body shape and personal sense of style. So, when you master the basic A line skirt pattern, this skirt is sure to become a staple in your closet.