There are certain skills that many of us feel we have mastered over time. One of those skills we have been practicing since kindergarten. The particular skill we will be discussing in further depth today is the art of cutting. You might think that you mastered such a skill many years ago, but in reality, when seeking to cut fabric, the skill will challenge most people.
As you consider the art of cutting fabric, you will have to account for a number of different things. For example, what kind of fabric are you working with? Does it have a special print for design? These are just a few of the questions that you will have to ask yourself during this very specific process. One thing to always keep in mind when working with fabrics is that it requires careful attention, planning, addressing issues as they arise, and being kind towards yourself when a mistake does occur. Part of becoming a better garment maker is learning the process and practicing it over and over and over. Only then will you get to a point where you feel more comfortable, only to be challenged by the next set of fabrics or prints. With all of this being said, there is no better feeling than taking all of these steps to ultimately be able to celebrate the creation of a garment that you initially envisioned and now fully created.
Fortunately, you will be giving information that will make your decision-making process much more fluid. This is extremely important as you want your final product to meet the high standards that you were looking for. Travel with us as we identify all the fine details in the art of cutting fabric.
When beginning your cutting fabric project, it is crucial that you have the necessary tools to have an optimal experience. As you enter the world of cutting fabric, there are tools that are more effective in this arena. Not all of the following tools must be used in every instance of garment making, but each of them has its own benefits in certain areas while others provide a more efficient and timely experience for the garment maker. Just like everything else, the choice is yours to decide how you want to ultimately proceed.
The first tool to account for is the scissors. However, not just any scissors but a pair of scissors with a length minimum of 8 inches. These types of scissors usually come in one of two varieties: Angled handled scissors and plain and serrated blades. Each of these scissors performs better in certain areas. However, a lot of its desired function and its preference is tailored specifically to the user. Over time, the user develops a level of comfort and feeling of reliability in the tool, so always account for such while you are making your decision in this area.
Another tool that is vital in the entire process is that of all-purpose scissors. This will be mostly used when dealing with sewing patterns or anytime cutting is needed during sewing. As mentioned before, you will develop a comfort level in this area, and this comfort will lead to better results as well.
The next tool that we recommend is that of pinking scissors. This tool best functions when making zigzag edges for fabrics. It’s a very reliable tool to keep fabric threads from unraveling. When working with fabrics, you want to do everything possible to keep from having the fabrics unravel on you. Taking actions on the front and can mitigate a number of the issues that can occur on the backend.
An optional tool to keep in your tool bag is that of the rotary blade. This particular tool is like a pizza cutter on steroids. According to Wikipedia, the 1st rotary cutter Trusted Source Rotary cutter - Wikipedia A rotary cutter is a tool generally used by quilters to cut fabric. It consists of a handle with a circular blade that rotates, thus the tool’s name. en.wikipedia.org was introduced into the market by the Olfa company back in 1979. When using such a tool, you can expect a clean cut of your fabric but keep in mind the surface the cutting is taking place on as that will be affected as well. The last thing you want to do to your surface is damaged it while seeking to create a garment that should be enhancing the world and not damaging your own property. Be mindful of these steps to make sure you have a positive experience throughout.
The next tool will ensure that your workspace is indeed effective for working on. This tool is known as a sturdy cutting surface, also known as a cutting mat. This will ensure that you. This tool is sturdy, flat, and keeps you from hurting yourself in the process. As an aspiring garment maker, you need to take all possible steps to have the process flow smoothly with your fabrics and put you in a place that will be respectful of your health. Nobody functions at their best when they ruin their fabric or cut themselves while creating clothing.
Prior to beginning the process of cutting your fabric, we recommend that you take some steps for test results to occur. One thing that does not necessarily have to happen, yet we have noticed results best when it does take place, is that a pre-washing of your fabric. This will account for any shrinkage that may occur once that Wash does occur.
Another vital step is to take the time to iron the piece of fabric. This is a very important step as you need to take the wrinkles out of the fabric before cutting. A piece of advice when you are about to start cutting: use the sharpest scissors in your toolbelt to provide you more fluid experience throughout the process. Just like anything else, we as people tend to develop a set comfort level with certain go-to tools.
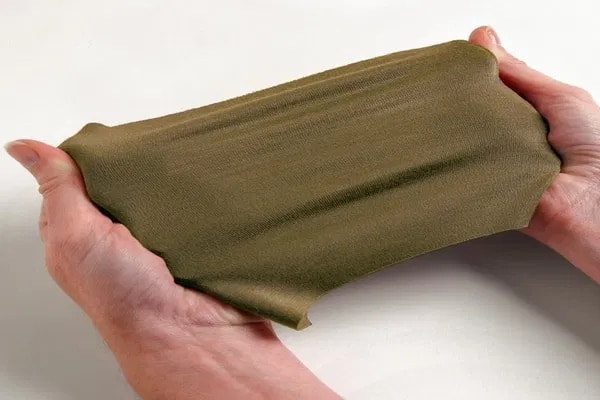
Now that you have accounted for the steps, it’s time to identify the right side of the fabric. For knit fabrics, this may not be as important. However, when working with woven fabrics, it is extremely important. When trying to identify the right side of the woven fabric, have a look at both sides, and the right side tends to have brighter colors or brighter sheen. The wrong side of the woven fabric will tend to have not some ties from the weaving.
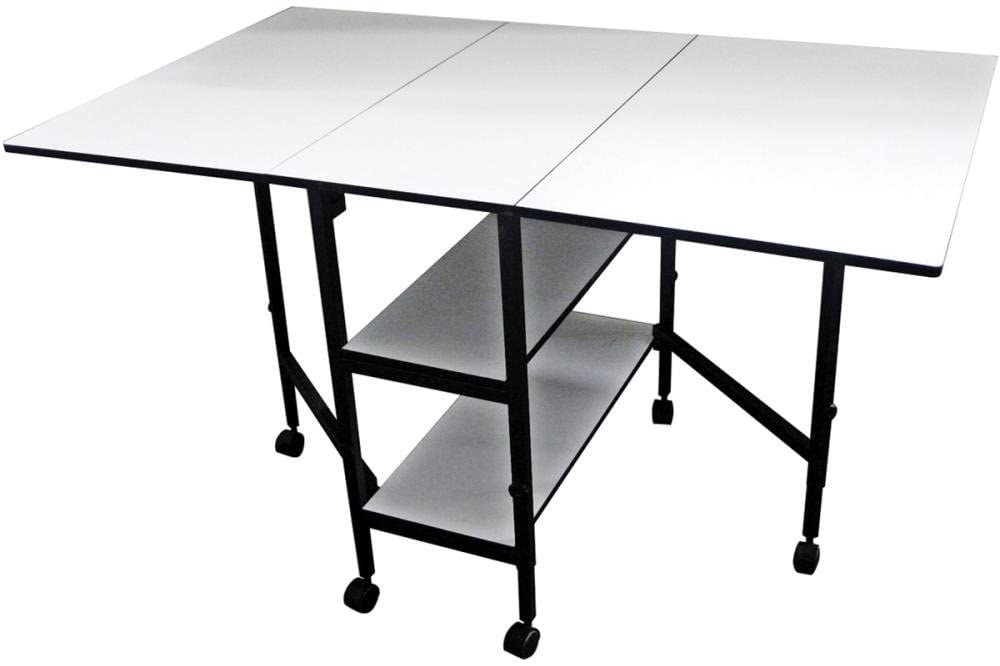
Now you are ready to almost start your cutting, place your fabric on the large hard surface. This is optimal as it provides a smooth cutting surface. The larger surface, the easier it will be to manipulate the fabric as needed during cutting. If using paper patterns, consider using pens to pin down the fabric prior to cutting. This is an important step to keep the fabric from shifting during the cutting process. According to most reviews, the sturdiest model must be the Home Hobby Adjustable Height Foldable Table from Sullivans, which, thanks to its reinforced construction, is the most reliable option out there.
One detail to account for is that of fabric that has been store purchased. Most of the time, this fabric shows you an arrow that will inform you of the grain line. Follow the grainline to ensure that your cuts are to your liking and lead to a product that you will be proud of. If you find you are unsure as to how to proceed best, take additional time to identify the details regarding the grain line.
A crucial aspect of creating a garment is that of ensuring that the fabric patterns fit together. This measurement needs to occur prior to beginning the cutting process. It sounds like a simple step to account for but is one step that is overlooked often. It is steps like these that simplify a process that can get complex if not addressed. You should strongly consider identifying steps like these that make you more efficient when using fabricates to create your own garments. You will notice the difference in quality the more often you take these steps over time.
A couple of more things before starting, you need to identify how you will fold the fabric before cutting. Usually, the fabric is folded lengthwise. However, there are times where the pattern sides do not fit, so an adjustment must be made. It is at these times that the fabric is folded crosswise. As you work through some of these challenges, it is of utmost importance to take these additional steps to arrive at the pattern or garment that you are desiring.
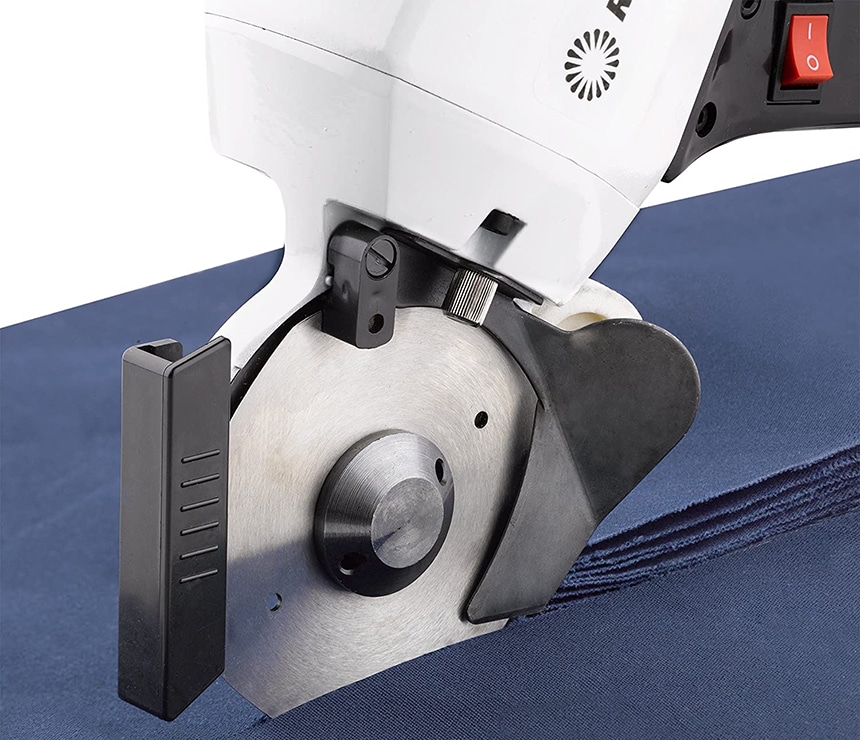
There will be times when you will choose to cut many layers of a pattern. It is at these times, so we recommend using a double fold. This is usually done when cutting fabric with many layers. One thing to keep in mind is that if you are going to cut through more layers of fabric, then you will need to consider the tool you will be using to cut through these various layers. According to most reviews, one of the most effective cutting devices on the market is the Octagonal Knife Cloth Cutting Machine by Reliable, which, thanks to its high-powered motor, knife guard, and automatic knife sharpener, is the effective option out there.
One last thing, cut with one hand in your other hand can hold the pattern paper and fabric down to mitigate the movement of the fabric. This will ensure a good cut and a safe experience for the person doing the cutting. When using the pattern paper, it provides a visual guide for you to follow while working your way through the cut of your fabrics. As we can all attest, we relied on such visual guidance when we were working on cutting activities back during grade school, and these additional steps still make a difference in our fabric cutting lives until this date.
Now we are ready. All those years of art projects in school prepared you for the project that awaits. You are very capable of having this be a successful experience. The reality of the whole experience at large is that the more often you take part in using fabrics to create garments, the more experience you will gather over time. With that said, as you continue to put your fabric work time after time, this will lead to a more efficient experience for the garment maker. There are various other things to account for, so please account for these additional details when seeking to make your fabric straight edge.
It is necessary that you get the crosswise grain of the fabric at 90° to the lengthwise dream grain. The next step works best with natural woven fabrics. It requires you to make a small snip with your scissors on one side, and then terret streets tear it straight. Another method for doing this is through the use of a cutting mat with grid lines. This allows you to cut any extra fabric or if necessary. You may not have access to a cutting mat, yet you may still be able to accomplish this by using a ruler.
There are a number of details to keep in mind when folding the fabric for cutting on the street grain. Find the center of the fabric lengthwise. Then fold the fabric along its centerline and pair up the selvages together. Now we fold the widthwise again by half, and at this point, you should have four layers of salvage us together.
This process allows you to cut two of the same pieces at one time. This can also be used to cut other patterns for areas like sleeves and fat leg pants.
When you arrive at a point where multiple pieces of layers have been created, this is an opportune time to use a rotary cutter to make an effective cut for the fabrics. As we have mentioned before, the use of a rotary cutter is optional as scissors could be used. However, a rotary cutter will provide a more effective cut of the garments that will then, in turn, lead to the garment having a better look altogether.
As we continue along, there are various other details to keep in mind:
Now it is time to use all our fabric knowledge to apply it to different types of fabric. Each fabric has its own unique qualities, so you will have to account for such when starting your project. It is these fine details that will ultimately determine the quality of your finalized work, so make sure you give it the time it deserves.
Many people think that when they work with plain fabric that it is simple to do. Do not fall into this trap, and make sure you account for the following details. When using clean fabric, you need to make sure that it is truly plain. For this to be the case, the front and back need to be identical. Once you verify that this is indeed the case, you are ready to begin. Choose the side that is smoother and without any lines of the weave.
When working with plain fabric, this is your opportunity to gauge the fine details that go into identifying certain characteristics of the fabric. As you begin working on fabrics that have a more complicated look or print, it will be your work with plain fabric that will give you a baseline in identifying differences in fabric to create the garment you’re seeking to create as your final product.
If you’re cutting leather or faux leather, there are various ways to do it. However, we strongly recommend using a rotary cutter and Andy minutes Matt. You can do this with scissors, but using our recommendation will save you time and energy while also providing a better cut. One important detail to keep in mind is to never pin the pattern onto faux leather. Instead of pinning it, consider using paper clips or binder clips to keep the pattern on the fabric.
When working with leather or faux leather, you need to be very careful with your cuts to ensure that the final product has a high-quality look that many fine leather products out in the market today. As you work through the work on the fabric, you need to move slowly yet with a purpose to arrive at the result that you are aspiring to create.
One of the advantages of sewing your own clothing is the ability to match prints along the seam lines. Unfortunately, you don’t see this much in clothing that is bought or sold in stores. One thing to keep in mind, though, if you are cutting plaid, stripe, and other fabric prints, do not follow the lengthwise grain. During these instances, follow the design the print gives you. You can cut the patterns out in a single layer and then match them to the second piece with that of the first.
There are many things to account for when cutting striped fabric. The reality is that there are many different types of stripes in dress materials, specifically up to 16 different types. The most important thing to account for is that both sides have the same number of stripes. This is a common oversight that will give your look an unbalanced one, and it is an error that could be easily avoided.
As you work on your striped fabric, it is extremely important to account for the effect that the stripes will have on your final piece of work. Believe it or not, many people have created a belief that stripes lead to a flattering look when seeking to look slimmer in a particular garment.
The reality of performing garment work is to ensure the final product meets the look that you were going for. One of the most obvious things to look for is to make sure that the patterns match evenly throughout the garment. Another thing you want to look for is that of any loose threads or excess fabric that may give an overall look one of poor design or quality.
Please take note of the sleeves in any areas that involve crosswise matching. Make sure the seam lines are matching and not all the cutting lines. Make a determination on what the center of your pattern will be. This center must keep the same stripe of the check throughout your cut.
You have all had the experience of being out in public and noticing a piece of garment that doesn’t seem right. As you analyze why the piece of clothing seems off, you look for issues with the stripes or patterns, or sometimes there are unraveling of threads within the fabric that is noticeable. Either way, you don’t ever want to be in this position, and that is why you should account for these various issues.
When working with printed and patterned fabric, the challenge is getting prints that are similar for both sides. For example, looking to get the matching print on sleeves would be difficult given the limited nature of the fabric. It is for this reason that we recommend that you purchase more fabric than you are initially anticipating. This way, you can make adjustments as necessary and ensure that you have the needed material to complete the garment.
As you consider using fabric patterns, keep in mind that the options are quite extensive. You can easily find over 100 types of prints and patterns, and some work better with others than others may. It is for this reason that you have to pay very close attention to how each print or pattern will work with the other fabrics. This does require extra work on the front end; however, it is this attention to detail that will lead to a product that you will be happy with within the end.
When working with Typhon and other slippery fabrics, you must exude a good amount of patience in the process. These types of fabrics are frustrating and can easily cause your project to derail before it has the chance to be completed. One method for making working with these types of fabrics More manageable is by spraying the fabric with a little bit of water. When cutting the fabric, be mindful of the cutting surface as it could be ruined during the cut.
The reality is that you may encounter a fabric that is just extremely difficult to cut or manage. If this is the case, consider skipping the cutting and go straight into the sewing of the fabrics. Once the fabrics have been sewn together, then you can consider cutting these fabrics at once.
One thinking of fabrics, one of the most common types that give people problems is that of the delicate fabrics. Part of the reason that this kind of fabric provides so many challenges is that it is so easy to make a mistake when working with it. However, when cared for appropriately, it is one of the fabrics that makes some of the most beautiful garments on the market today.
Fortunately, we live in a world where we have access to numerous tips on how to appropriately handle delicate fabrics. One of the many ways to work with delicate fabrics is to combine fabrics together by sewing them and then looking to cut them after. Another option is to keep thin paper along with the fabric and cut it together. This provides you with a visual cue to determine whether your cutting is appropriate to what you seek to accomplish for your garment.
When working with directional prints, the most important thing to account for is the direction of the print. Please be careful not to create a design that is upside down. Ensure that all pieces are facing the same direction before cutting. If you are working with a one-way print fabric, please make sure that the pattern pieces are cut in the same direction. The print needs to follow the One Direction to get the print you are seeking.
There are times where you want a print to occur in a selected place of the garment. When seeking to make this happen, consider purchasing additional fabric to take into account the need for more material. If you are seeking to match the prints along a seam line, more cloth will be needed to accomplish this. If you choose to use invisible zippers along the seam, it will not even be noticeable that the fabric belongs in two pieces.
When addressing your fabric work, it is vital to ensure that you are aware of your fabric has a nap. Not accounting for this can definitely affect the look of your finalized garment. Run your hand over the fabric and smooth the nap down.
If you don’t account for the nap when cutting your fabric, the overall fabric will look very different. This can become a problem if you’re looking at garments that have sleeves on them that have a different look for each. You want to account for this detail to ensure that your garment has an appropriate look you’re looking to create.

As you may have noticed, there are numerous things to account for one seeking to create your perfect garment. With that being said, with proper attention to detail, you will create the garment that you are seeking while accounting for the fabric and the methods for arriving at a final product. The process for doing so is not considered simple but can be completed effectively by following a step-by-step process to ensure your product is created as intended.
Aside from having the knowledge to make your fabric and garment dreams become a reality, you have also had the opportunity to see and learn about the various tools needed to make this possible. Not all tools discussed in this article are necessary, but most of them are recommended to accomplish the final garment in a faster and more effective fashion. For many of you that have had the opportunity to create your own clothing in the past using fabrics, you understand the advantage that accessing these various tools, like the rotary cutter, can have in your final product.
The wonderful thing about today’s modern technology advancements is that there is no skill that any of us can’t learn. Using fabrics from their initial stages to piecing them together to create a final clothing product is an amazing accomplishment, but one that you can succeed in if you follow the information referenced in this article.