
The clothing industry in the USA is worth over $260 billion and skirts are considered a fashionable essential in many closets. Skirts are available in dozens of styles and designs, so you can create a casual or a smart wardrobe. However, most people appreciate that the cost of buying new skirts can quickly add up. In an effort to save money and remain in style, many people are interested in skater skirt pattern options.
Fortunately, you don’t need to be an expert home sewer to be able to create a superb skater skirt. While there are beginners guides to making skirts, it is possible to follow a free skater skirt pattern, so you can save even more money. This will allow you to make a skater skirt in your favorite fabric to complement your other closet items.

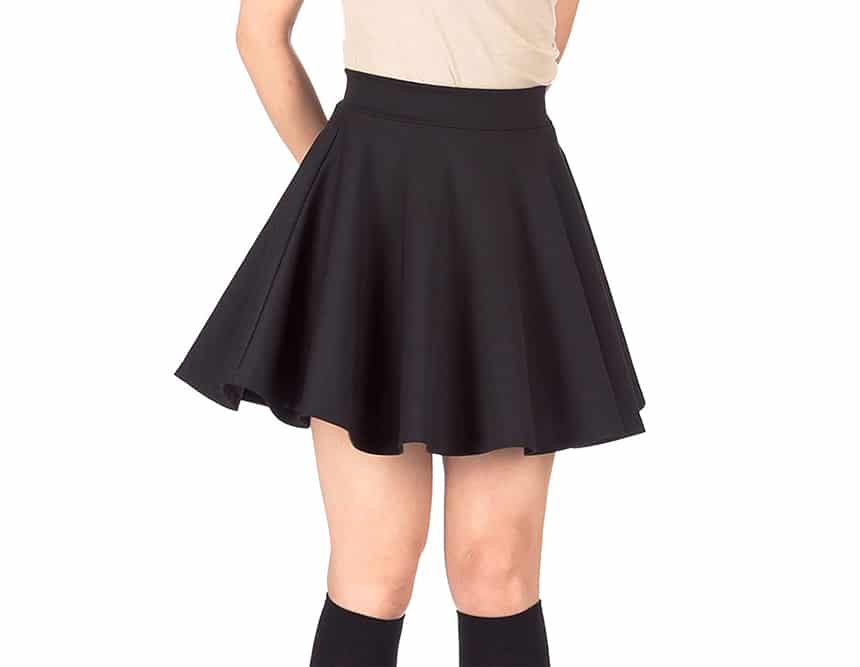
Skater skirts are short, flared skirts worn high on the waist. In simple terms, it is like a circle skirt cut short, like skaters wear when they perform on ice.
In most cases, the skirt finishes below the knee, but there are midi skater skirt pattern options that are worn a little shorter.
Skater skirts can look great on their own, if you have the confidence to wear it with your legs on show, but if you don’t feel like you can, it will still look great with a pair of thick pantyhose or leggings underneath.
You can pair a skater skirt with a shirt for a more formal look, knitwear to look cozy or if you want to create a glamorous look for heading out on the town, you could wear it with a lacy top or bold print vest.
You can follow an easy skater skirt pattern using a variety of different fabrics. You can use lightweight fabrics for a summer skater skirt or thicker fabrics for a skirt you can wear in the cooler months. If you have the best sewing machine, you could even make a skater skirt out of leather.
Before you can follow your skater skirt sewing pattern, you will need to learn some basic sewing skills, such as how to cut fabric straight, and gather some sewing supplies. In addition to a sewing machine, needles, thread and scissors, you may benefit from a cutting mat. This can help you to effectively learn how to make sewing patterns.

The first step in how to make a skating skirt is to take your measurements. You will need a waist measurement where the skirt will be tied around and the length you want your skirt from waist to hem. This allows you to enjoy flexibility, as you can create a plus size skater skirt pattern that is a little longer or a high waisted skater skirt pattern. Essentially, you can tailor your skater skirt to your body type and confidence level.
Next, you’ll need to do a little math to create your pattern. Since this skirt is essentially a circle with a hole in it, you will need to work out your sizes to create your pattern.
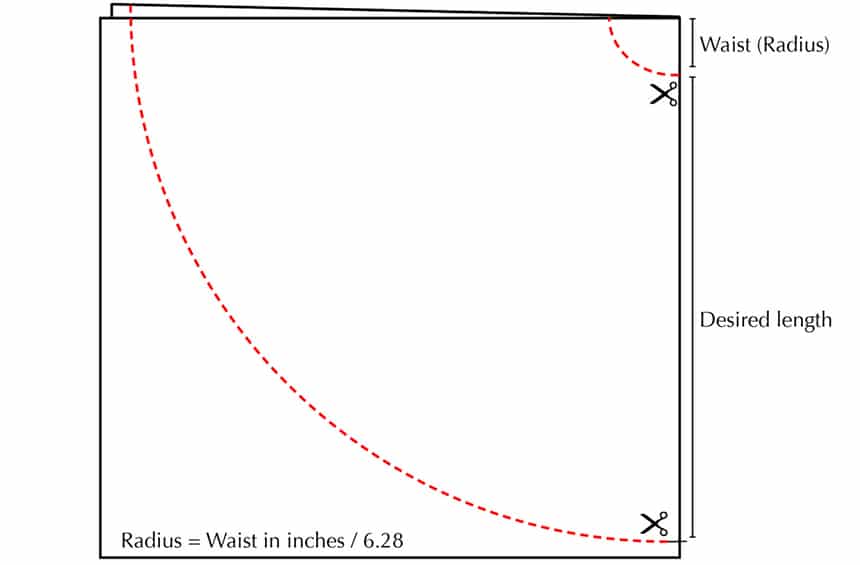
Take your waist measurement and add two inches as a seam allowance. Now, divide this number by 6.28 and then minus ½ inch from this number.
For example, if your waist is 28 inches, adding two will give you 30. Divide this by 6.28 to get 4.77, then minus 0.5, which gives you 4.25 inches.
The length is simply the required length plus one inch for seam allowance.
Fold your fabric lengthwise in half and then fold widthwise in half. This will create four layers of cloth and a center point. Pin your cloth in place. From the top point measure 4.25 inches down and then mark points in two inch increments from this measurement to create your waistline.
Mark your skirt length from the waist line and mark points every two inches to create a line for your hemline. Use chalk to connect the waist and hemline dots, so you have a line to cut.
If you have big hips, you may need to measure the back length of your skirt and add an inch or two, so the hem doesn’t look like it is rising at the back.
Cut along the lines to create a large circle with a small hole in the middle, which will form the main body of the skirt. Cut one side of your circle to create a seam to add a zipper.
Use a basting stitch to attach the zipper with the right sides of the fabric together, and you can then complete the rest of the stitches with a regular seam. Be sure to keep the zipper face down onto your seam allowances with the zipper teeth aligned. Once the zipper is attached, you can open the basting stitches.
You can then create your waistband piece. You’ll need to measure the top of your skirt edge adding 1 ½ inches. You can add interfacing to this fabric to create a stiffer waistband. Press the waistband so one side is a little bigger than the other, as you would with bias binding. Attach the waistband to your skirt. You may need tweezers to turn the corners into sharp points before you top stitch. You can also add a hook and bar to your waistband.
Finally, hem your skirt and then trim any extra allowance close to your stitching line for a neat finish.
A skater skirt can be a great addition to your wardrobe. You can create lightweight skirts for summer and use heavier fabric for the colder weather. This is a flexible design that you can pair with a formal shirt or a casual top, depending on the look you want to achieve. You can even opt for a bold fabric that will make a real statement.
Once you’ve mastered the basic skater skirt pattern, you can develop your skills and tackle a pleated skater skirt pattern to further enhance your wardrobe.