When thinking about the roll zippers play in garment making today, you are well aware of the vital role they play in our clothing. As you stop to think about that for a second, take some time to reflect on the time when the zipper failed you and how that impacted the rest of your day or experience overall. As most consumers can attest to, there are very few experiences that are as concerning as having a zipper fail on you while Out in public. This can cause a feeling of discomfort any anxiety in knowing that you can have an embarrassing experience that haunts you for the rest of your time. Ironically enough, according to Wikipedia, the first-ever zipper invention was patented in 1851 by Elias Howe.
 If you have your own embroidery company, you are well aware of the importance that the zipper may play in the overall creation of the garment. During your years of sewing experience, you understand how creating a shorter zipper can improve the functionality of a piece of clothing. At times, that is the only option to make a piece of garment work. It always helps to have a sewing kit at your disposal. According to most reviews, a go-to kit to have at your disposal is the Ultimate Sewing Starter Kit by Eversewn, which, thanks to its variety of instruments and threads, is one of the most reliable options out there. Shortening your zipper here’s an important skill to have when working with clothing, so we will discuss specific instances that require this and discuss the steps on how to do it in an effective fashion.
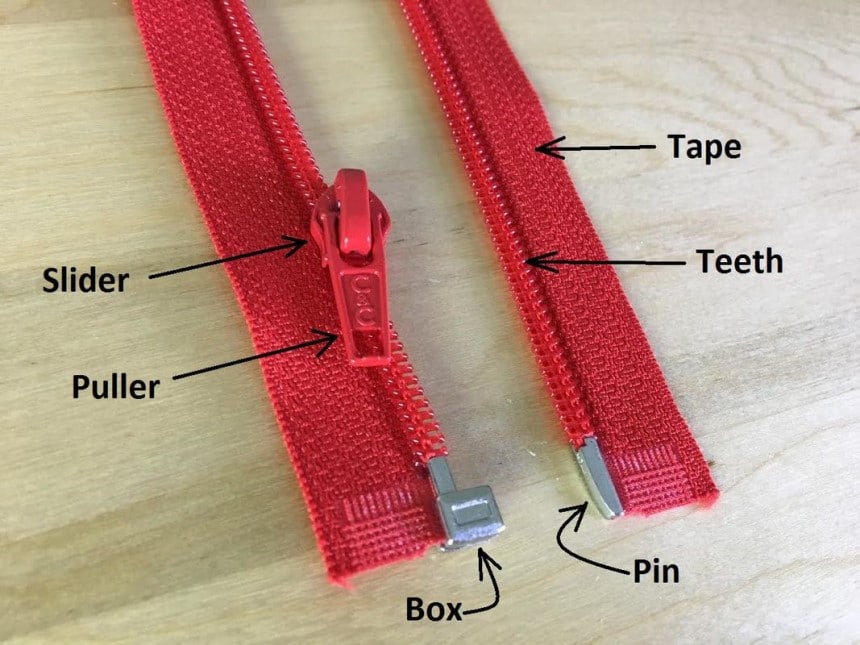
As you consider the shortening of a regular zipper Trusted Source Zipper - Wikipedia A zipper, zip, fly, or zip fastener, formerly known as a clasp locker, is a commonly used device for binding the edges of an opening of fabric or other flexible material, such as on a garment or a bag. It is used in clothing (e.g., jackets and jeans), luggage and other bags, sporting goods, camping gear (e.g. tents and sleeping bags), and other items. en.wikipedia.org , you should ask yourself what constitutes a regular zipper. A regular zipper is usually constituted to have plastic teeth. When looking to shorten a regular zipper, it is a pretty straightforward approach. This is a very important skill to have when seeking to fix an issue that may arise.
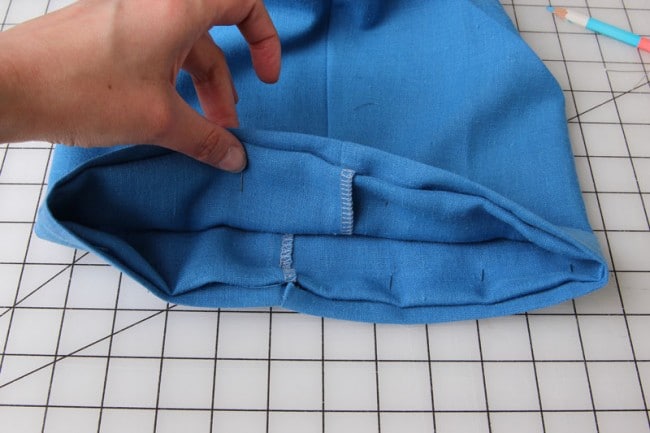
The first thing that we will have to do is to remove the extra month from the bottom of the zipper tape and create a new bottom stopper by signing together by hand or machine. At this point, we will have to mark up the zipper tape with the new bottom stopper. When using your standard sewing machine, sew a straight stitch right over the teeth. Make sure you extend the stitch a tad on both sides in case you have to make a modification.
We recommend sewing back-and-forth a few times to ensure that the stopper is sturdy. If you choose to sew, you will need to add a bar tack on top of the zipper teeth by inserting and exiting the needle on both sides of the teeth multiple times. It is now time to remove the excess zipper tape around 1 inch under or just recently sewn stopper. At this point, we have shortened our regular zipper.
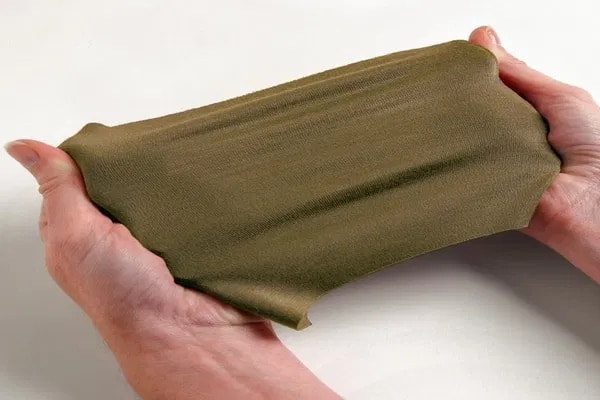
When seeking to shorten an invisible zipper, a very similar approach to the shortening away regular zipper occurs. Follow the same steps as was recommended for the regular zipper, and you will shorten your invisible zipper. One thing to keep in mind when dealing with an invisible zipper is that it serves the same function as a regular zipper, but it looks different.
I get in continuous practice and shortening both regular and invisible zippers, your comfort level in accomplishing this effectively will only serve you well in the long run. If you encounter any issues in the process, the practice will serve you well in the long run. As long as you demonstrate proficiency in this area, then you will gain a reputation for excellent work.
As was discussed in the previous recommendations for shortening zippers, some of these processes are quite simple. With that said, shortening a metal zipper does not qualify under that idea. Too short in the middle zipper requires a more complex approach, but if you follow the step-by-step guide, you will be fine. When working with the middle slipper, you will be removing the excess length from both the top and bottom parts of the zipper. This is different from the previous zippers, the regular zipper, and the invisible zipper, where we only had to remove the bottom part of the zipper. Make sure you measure down to where the top of the pull will be, and keep in mind it is measured from the top of the pull to the stopper. Many people think it’s measured by the length of the zipper tape, and that is not correct.
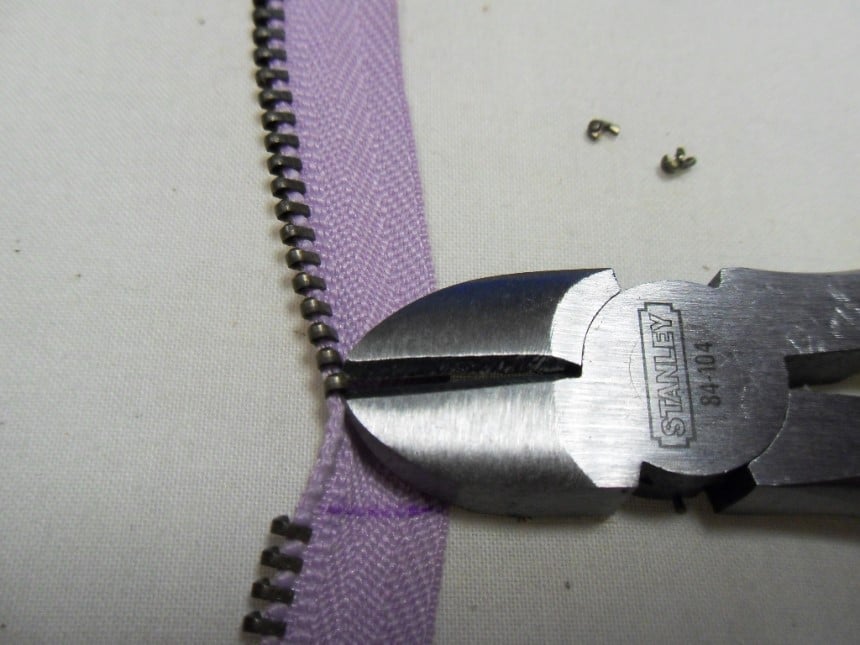
A very important detail when working with a metal zipper is that you cannot just cut away the teeth of the zipper. Since they are made of metal, you should refrain from using scissors and instead use pliers to pull off the teeth. This is not a simple step and can damage some of the edges of the tape, but you will not notice these issues in the end. Continue to pull the teeth off until you have about an inch of free tape space. If you are seeking to reuse the metal stopper at the top, you will have to remove it and then reattach it on top of the metal teeth.
If you are looking to sew your zipper into a seam, then you will not have to reapply the stopper. At this point, you are to cut the zipper tape about 1 inch above the new top of the pull. Make sure not to make any contact with the metal teeth. If you have made it this far, then it is time to celebrate, as shortening a metal zipper is a tedious process overall. Now you are ready to place your zipper into your project by sewing it to where you need it to go.
When you have completed your work on your metal zipper, you can now recognize that you have mastered the art of modifying zippers as needed. This is by far no easy task and one that you should celebrate. There are many garment makers out there that appreciate good work, and getting to this point has established you as a person that was willing to learn and willing to apply the learning in a way that led to accomplishing a complex task. As we move forward in your embroidery journey, continue to seek to learn how to work with the various garments and fabrics to create clothing that takes full advantage of the various zippers that can be used.
 Final thoughts
As an aspiring garment maker, you will encounter various situations that require you to make modifications to your garment. With that said, it makes sense to also always have a sewing kit available near you. According to most reviews, the sturdiest model must be the DIY Sewing Supplies with 183pcs Sewing Accessory by Perskii, which, thanks to its reinforced construction, is one of the most reliable options out there. When you work with garments, you never know when you will be in a pinch to make a quick adjustment to clothing. One of the ways to prepare for things to go wrong in the garment world is to assume that wrong is right around the corner. With that said, having your tool kit and a plan in place for when it comes your way will lead you to be more effective in your systems and processes. Your work with zipper today it’s just started, but you have many experiences ahead of you that will solidify your learning by applying to clothing that you will display to the world.
One of the most common things that occur is that of dealing with zipper issues. More specifically, the shortening or creating of a zipper for your garment. The reality is that once you spend more time working with zippers, you will become more effective in dealing with a challenge that they may present. Don’t fret though, this is a skill that you will master over time, and it is one that will be appreciated by your current clients and future clients to come.
For the novice folk out there, we don’t appreciate the intricacies that occur when working with zippers. We normally don’t even realize their overall importance until they fail us for some reason. At that point, we recognize how truly important it is to address the matter. It is then that you will be set out to assist in helping to make the situation all better. Who knows, with lots of practice, you can look back to a day when you consider yourself a novice garment maker who then developed into a more seasoned designer and creator of clothing. At that point, you can choose to take the next step in your development and maybe even begin your own embroidery business. As a consumer, do you understand what you want, and as a creator, you know what you have to do to meet those needs.