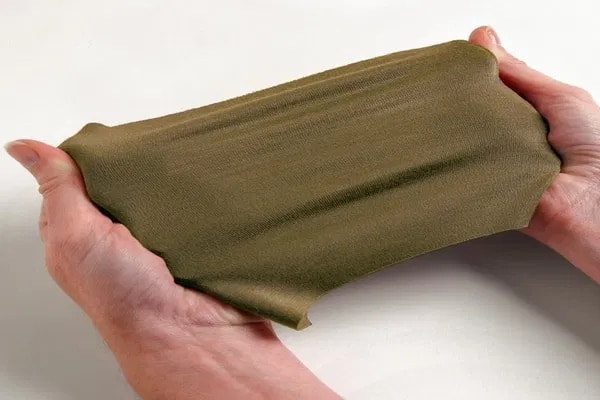
There is no denying that the first thing that crosses your mind when you think of easy-to-stretch super-comfy pants is an elastic waistband. Elastic can also be sewn on cuffs, the top of a dress, or any part of a garment that needs to provide a snug fit. It is highly convenient, both to the wearer and the dressmaker, because it is comfortable and easy to sew on clothes. However, it can be a horror if not done well, and that is why you must learn how to sew elastic by hand correctly.
Since elastic is stretchy, sewing it is different from regular sewing. There are several ways of sewing an elastic to a garment. Still, the 2 main popular ones are sewing directly to the garment or creating a casing for the elastic then inserting the elastic through the casing. If you want to have gathers around the fabric, then go for direct sewing, but if you want the fabric around the elastic to be flat, then you can create a casing for the elastic.
This is one of the easiest ways of sewing elastic to fabric by hand. You can sew into any part of the clothes or fabrics you are working on. Here is a step by step guide on how to do it:
Step 1: Measuring and cutting the elastic into the required size.
The only way to know the amount of elastic you need is by measuring the area of the person’s body that the band will wrap around. The area can be any part of the body, including the wrist, ankle, waist, or even neck.
If you want a snug fit of the elastic band, be sure to subtract some length from the measurement you make. Let’s say the owner of the garment wants a snug-fitting waistband; you will take away 2 to 4 inches from their waist measurements. You are going to need professional sewing scissors for cutting to avoid damaging the ends of the elastic. The Kai 7250 10 Inch Professional Shea is a critically acclaimed pair of scissors by expert reviewers. It is durably built with high-carbon steel that allows for a steeper and sharper edge. It also has a reasonable weight and excellent balance.
Step 2: Overlap the ends of your elastic and then sew them together 2 or 3 times using the zigzag stitch. If you don’t like the bulge that occurs from overlapping the elastic, use a scrap piece of fabric to line up the edges before sewing it.
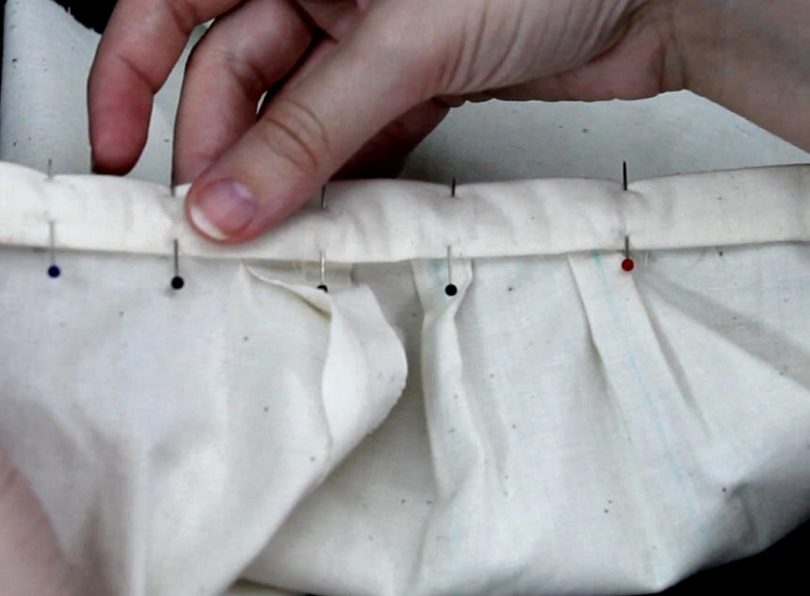
Step 3: Divide your elastic into 4 even sections, then do the same to the area on the fabric where you intend to sew it on. Pin the elastic onto the wrong side of the fabric, matching the quarter marks you had made.
Step 4: Once you are done pinning the elastic onto the fabric, you can begin to sew using a straight stitch Trusted Source Straight stitch - Wikipedia The straight or running stitch is the basic stitch in hand-sewing and embroidery, on which all other forms of sewing are based. The stitch is worked by passing the needle in and out of the fabric at a regular distance. All other stitches are created by varying the straight stitch in length, spacing, and direction. en.wikipedia.org or a zigzag stitch Trusted Source Zigzag stitch - Wikipedia A zigzag stitch is variant geometry of the lockstitch. It is a back-and-forth stitch used where a straight stitch will not suffice, such as in reinforcing buttonholes, in stitching stretchable fabrics, and in temporarily joining two work pieces edge-to-edge. en.wikipedia.org . Sew all the way around the elastic, then make sure you overlap the beginning of the stitching to secure it. Remember to stretch the elastic as you stitch it.
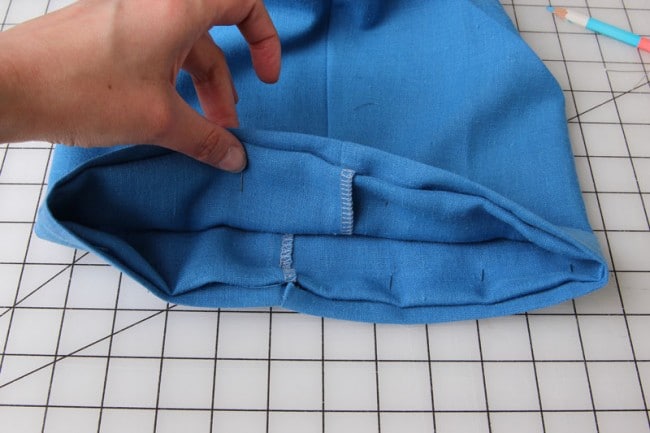
Step 5: Fold the fabric over the already sewn elastic band to cover it and then ensure it is lying flat.
Step 6: Use a zigzag stitch to sew along the bottom edges of the folded fabric. To secure the stitch, overlap it by about an inch, and then voila! You have your elastic sewn in successfully.
This is another easy method that is a fantastic choice if you want fuller gathers or none at all where you intend to sew it on the fabric. You can sew an elastic to any part of a fabric or garment you are making with this method. Here is how to hand sew elastic into the fabric using a casing:
First off, make the casing into which you will sew the elastic. You can do this by turning in the ends of the fabric or piece of cloth you are working on to form ahem. Stitch the hem using the zigzag stitch. You can stitch twice to secure the hem. Ensure you leave an opening large enough to fit your elastic on one end.
Next, measure and cut the elastic band according to the measurements of the casing you just made.
After cutting, mark both ends of the elastic and then sew them together once you have successfully gotten it through the casing. You must be wondering how to do that, eh? To have an easier time, you can attach a safety pin Trusted Source Safety pin - Wikipedia The safety pin is a variation of the regular pin which includes a simple spring mechanism and a clasp. The clasp serves two purposes: to form a closed loop thereby properly fastening the pin to whatever it is applied to, and to cover the end of the pin to protect the user from the sharp point. en.wikipedia.org to one end of the elastic then use it to push through the casing to the other open end.
Remember to straighten the hem as you push the safety pin to prevent the elastic from twisting.
After you have sewn the marked ends of the elastic, pull them back into the hem and ensure they fit properly, then sew the opening on the casing to complete the cloth or fabric.
Elastic waistbands are the real deal because they offer a snug fit and premium comfort. However, if not done well, the elastic can twist inside the waistband casing and make you feel uncomfortable besides looking unattractive. There are multiple methods of sewing an elastic waistband, but here are the easiest and most common ones that you can hack with your hands.
This is a very simple waistband, commonly used in children’s’ clothing or adults’ sports and costume wear. You need a 2 or 3-inch wide elastic band, which you can get in just about any rainbow color and high-quality thread for hand-sewing. If you are not sure what thread to go with, you can check out MILIJIA 50Pcs Prewound Bobbins/Sewing Threads Kit, which is a top recommendation by experts. It comes in 25 vibrant colors and 25 bobbin buddies. It is also compatible with most sewing machines.
Sewing the wide elastic band onto the waist of your skirt, shorts, or pants is easy breezy. All you have to do is sew the edges of the elastic together to make a tube. Use a tight zigzag stitch for strength.
Next, divide the edge of your skirt’s or pants’ waist into 4 even sections and mark them with a pencil. Do the same on the elastic tube you just made, then place the skirt inside the elastic tube. Ensure they are both on their right sides.
Pin the waist of the skirt or pants onto the elastic band matching the marks you made, after which you can begin sewing the elastic tube and the skirt together. Leave a half-inch seam allowance, and then keep stretching the elastic as you sew so that it can match the edge of the skirt’s waist perfectly.
This is a very straightforward method of sewing an elastic waistband on your skirts, shorts, pants, and undergarments. It is highly preferred for its wide variety of colors and its simplicity. It doesn’t involve folding over fabric, inserting elastic through a narrow casing, or cutting out separate fabric strips. It is also very comfortable as one side of the fold-over elastic is often plush for a comfortable feel on the skin, while the other is usually decorative.
Here is how to sew a fold-over elastic waistband:
The first thing is to pick an appropriate finish and width of elastic for your project. The elastic you use on an undergarment wouldn’t be the same as the one you use on a skirt or pair of trousers.
If your garment has seam allowances on the edges, you have o get rid of them because fold over elastic is sewn directly on a raw edge without hemming or sewing the edges of the garment.
Next, sandwich the edge of the garment you are working on to the elastic, then sew one side. Ensure the elastic is perfectly stretched and distributed on the garment you are working on. Once you are done sewing one side, fold the elastic over the other side and sew. You can use clips or pins to hold the fabric in place for added convenience, or you could use your fingers to pinch and fold the elastic incrementally as you sew.
When you are done with the fold over elastic, you can use an iron to press it. Low heat will make it lay flat and eliminate any waviness.

Shirring is a beautiful decorative waistband that makes fabric super stretchy with nice gathers. It is made with simple elastic thread on a sewing machine or by hand. It is popularly used to reduce baggy fabric on oversize dresses. You can also use a shirred waistline to create an empire waistline on dresses.
Do note that a shirred waistband is the best decorative waistband out there, but it lacks the strength and thickness required for skirts and pants. It loosens up after one or two washes.
Shirring can be easily done using a sewing machine, but it can also be accomplished by hand, and here is how:
First, draw about 5 parallel lines at least ¼ inch apart on the fabric you intend to shir. Use a ruler for accuracy. Next, thread your needle with a long thread of about 24 inches, then knot one end.
Sew small and even stitches that are about ½ inch long along the line you had made on the fabric using the needle and thread.
Once you are done stitching up to the end of the shirring row, pull the thread to create the gathered shirring, then knot it firmly. Repeat the stitching and gathering on all the lines you had drawn on the fabric.
If you’ll be using an elastic thread and a sewing machine, here is what you need to do:
Make 5 parallel lines that are ¼ inch apart on the waistline of the fabric you intend to shir. Wind your machine’s bobbin with a thin elastic thread. Be careful not to stretch it when winding it. The thread on the upper pin of your machine should be the regular sewing thread.
Using the elastic thread like regular bobbin thread, stitch along the parallel lines. Use a backstitch to anchor the start and end of the stitching.
When you are done stitching, don’t be afraid to steam press the shirred waistline. Steam pressing will magically shrink the elastic thread giving it a subtle yet attractive look.
Some things you should know: If it is your first time sewing an elastic to a piece of fabric by hand and you want to get it right, you can try it on scrap fabric first.
Use a fabric pencil with disappearing ink to draw lines or make markings on the fabric or garment you are working on.
You don’t have to visit the tailor whenever you have a wedding coming up, and you want your tulle skirt to fit you snuggly at the waist. With all the right tools, you can look snatched all the time with elastic added to any part of your garment. Plus, you don’t even have to own a fancy sewing machine. All you have got to do is learn how to hand stitch elastic, which we have covered in great detail.
Once you wrap your head around it, you will be able to sew elastic by hand in a flash. Besides being super-easy to sew, elastic is comfortable, and that might be enough motivation to make you pick a favorite method that you can use over and over on your pants, skirts, shorts, and dresses.