There’s no denying that monogram shirts are cute, especially if they have a well-thought message on them. It’s a beautiful way of expressing endearment to the things one loves in life. The most popular monograms are people’s name initials, letters from a business or organization’s name. You can monogram various items yourself at a fraction of the price offered at the stores, from t-shirts and quilts to caps, bags, and towels.
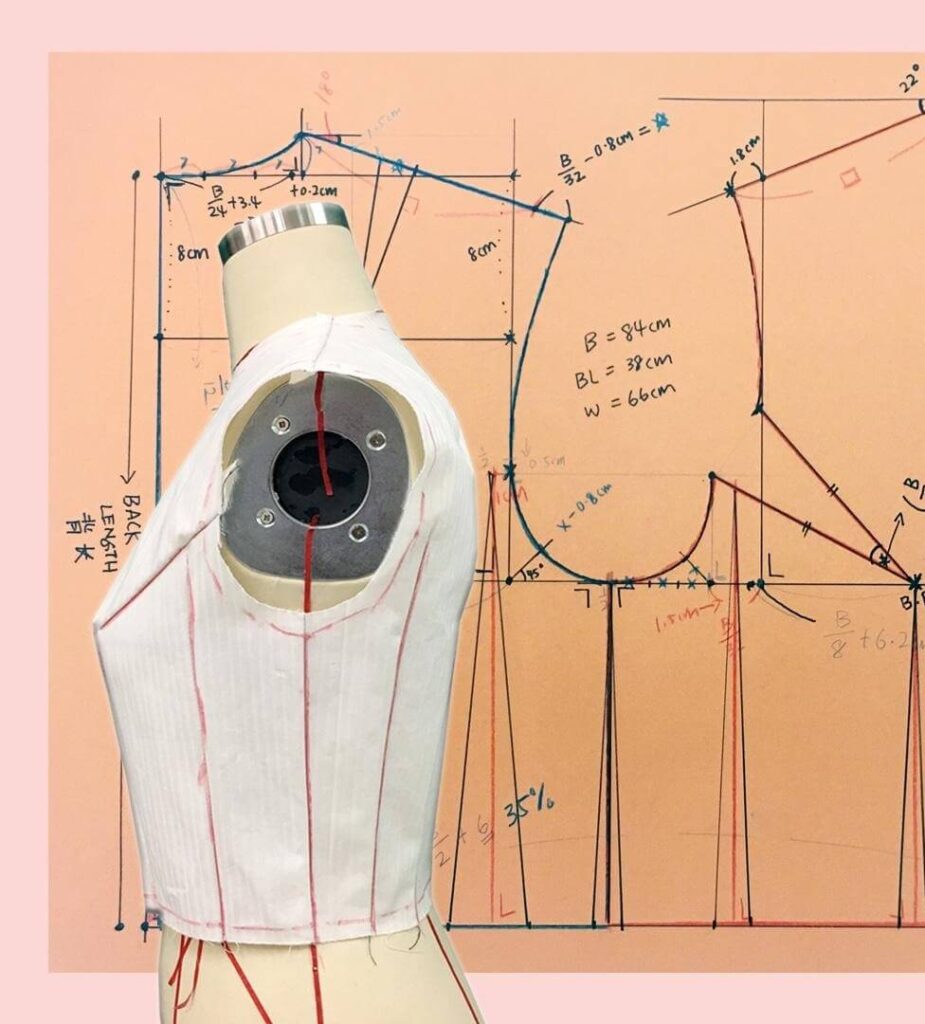
Before you learn how to monogram shirts, ensure you can comfortably use an embroidery machine. Some of the steps involved include designing and cutting the monogram, setting up the machine, then embroidering the design. The process is extremely easy as embroidery machines come with preset designs, easy-to-use software, and lettering that you can use to create your desired design in a flash. Once you catch the drill, you will be creating attractive personalized items that you could sell, gift people, or rock yourself.
A monogram is essentially a symbol that signifies personalization or ownership. The symbol can be made of 2 interlocked letters or a single embellished letter. They can also be 2 letters simply arranged with artwork and borders around them.
The letters are usually the initials of the possessor of the monogrammed item. It can be a person or an organization. For instance, a couple can pick the first letters of their names and make a monogrammed t-shirt to symbolize their togetherness.
Custom monograms can be engraved on many accessories, including caps, t-shirts, doors, home décor, bags, and mags. However, monogrammed apparels are more popular.
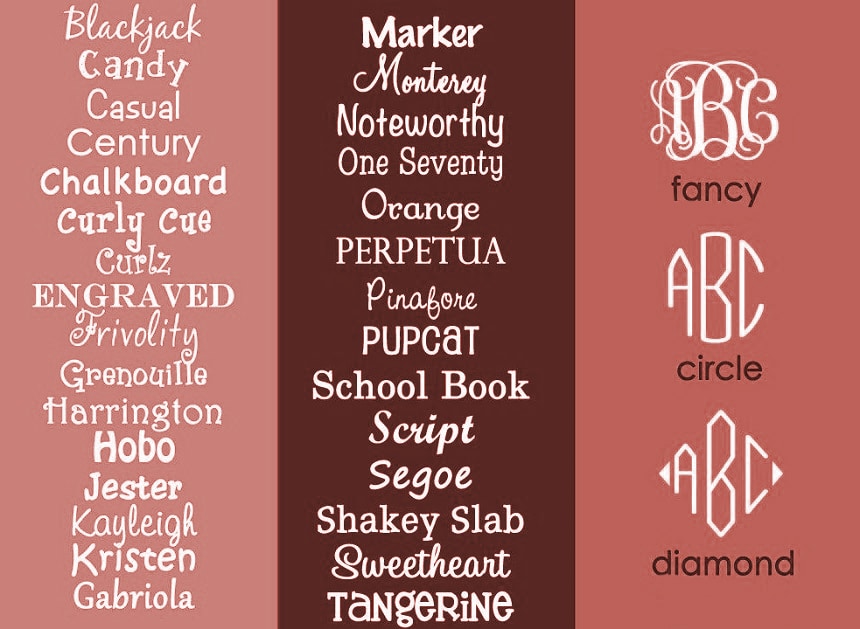
When it comes to Monogram styles, you are spoilt for choice. It’s kind of a personal tastes and preferences thing. One of the most common and simplest styles is the font. The block and script fonts are a famous go-to for most shirtmakers, but you can get a couple of other specialty fonts that suit your tastes.
Choosing an appropriate and beautiful color also plays a huge aesthetic role in the monogram style. You should keep it simple and tasteful. It shouldn’t call so much attention to itself. Also, you have to ensure that it goes well with the color of the shirt.
If you are into some ‘extra’ vibes, you can go for the more elaborate designs like dollar signs or laurel branches.
This depends on whether you want the monogram to be noticeable or not. If you don’t want it to show, choose a subtle location like the left forearm. If you wear a suit or a sports jacket, the monogram on your left forearm will be nicely hidden. You want to keep it off the right forearm because you are likely to shake hands with that hand.
Another subtle location is the shirt’s front, a few inches above the trouser line. The monogram would be visible when you take off your jacket, but it wouldn’t call for so much attention. In fact, it would only be visible when you have unbuttoned your shirt.
If you want the monogram to be visible, then an obvious location like the pockets, collar, or cuffs can do. Though considered conspicuous locations, they are the most popular parts of a shirt with monograms today.
This is the most popular way of making monogrammed shirts. It is super-easy if you know how to use an embroidery machine. Here is a detailed step by step guide on how to make monogram shirts with an embroidery machine.
The first step is to set up your machine and create a design in it. Choose a convenient location where you will be able to move freely and plug in your machine to get started. Ensure your sewing machine is capable of monogramming. It should have embroidery options. If it’s doesn’t, then you want to get one for the best results. According to most reviews, the Brother SE1900 is one of the sturdiest models with multiple design options. It is a versatile computerized machine with 240 built-in stitches and 138 designs.
The machine should have a software, designs, and preset letterings besides its embroidery options. This will make your work easier than ever. Choose the designs and font that you’d love to use, then input the design’s size. Next, thread the machine with a thread that matches the color you chose.
Choose a spot on your shirt where you’d want the monogram to go. Make a line at the bottom of this spot to act as a baseline for your alphabets.
Your machine has a hoop that decides where your design goes. So, mark the center of your monogram, then place the hoop’s center on top of it. If you still haven’t wrapped your head around your machine’s functionality and you are worried that your fabric would move as you monogram, you can use a stabilizer. With a stabilizer, you can avoid some issues like puckering.
Once you have attached and secured the hoop in place, start the program and let the machine do the magic. Ensure there are no obstacles around the hoop, including your hands. When the work is complete, detach the hoop then cut off the excess thread. Remove the stabilizer from the back of the fabric by cutting, washing, or ripping.
Who says you can’t monogram if you don’t have an embroidery machine? Making a monogrammed shirt by hands is much simpler, only it takes longer. You can look at it as a way of expressing your creativity or simply as a hobby. Here is how to make monogrammed shirts by hand.
Instead of preset designs and fonts, monogramming by hand lets you explore your creativity and imagination seamlessly. You can put the letters however you want, use different fonts, lay with the upper and lowercase, and draw borders to achieve your most desired design.
You could also get inspiration from Pinterest or anywhere on the internet; just keep the design’s size in mind when drawing.
Choose an area on your shirt where you would like to showcase your monogram, then draw a center point. Ensure that you leave enough space around the design for placing the hoop. About 2 inches would be enough.
Next, transfer the design from the paper to the fabric by placing a carbon paper between the fabric and the paper then tracing over the design. To get the accurate motif, ensure the fabric and the paper are placed on a hard and flat surface.
Once the design is on the fabric, attach a hoop to the area surrounding it, then choose the perfect thread color that suits your tastes. Ensure the color of the thread goes well with the color of your shirt. It will really help if you have a thread set with assorted colors. Most reviews have the ShinyStitch Polyester Embroidery Machine Thread Kit as one of the best thread kits for embroidery. It has 82 spools of different colors that are highly compatible with various machines and break-resistant.
The first thing to do when you start embroidering by hand is to outline the letters or your design with the
split stitch
Trusted Source
Embroidery stitch - Wikipedia
In everyday language, a stitch in the context of embroidery or hand-sewing is defined as the movement of the embroidery needle from the back of the fibre to the front side and back to the back side. The thread stroke on the front side produced by this is also called stitch. In the context of embroidery, an embroidery stitch means one or more stitches that are always executed in the same way, forming a figure.
en.wikipedia.org
; then, you can go on to fill in with satin stitches. When you are done, cut off the excess thread.
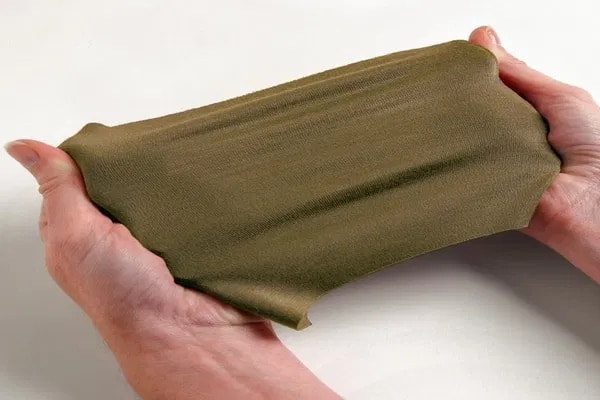
Vinyl is another fantastic way of monogramming your shirt. It’s the way to go if you want to achieve sophisticated designs. Unlike hand sewing, you get to play with computers and software. In totality, you need a vinyl or Cricut machine, a computer, and an appropriate software. Here are the basic steps on how to monogram a shirt with vinyl;-
Use a monogramming software that is compatible with your computer to create a monogram. You can download one as there are so many available. Open a blank age on the software, then use the preloaded fonts or download more to get what you really like. Type your initials, then attach them. If the initials are many, choose the ‘weld’ option to attach them and make them look like one.
Once you have established the design you want and its size, cut it. You need a vinyl cutting machine and a vinyl sheet. The machine will take the design as input give out a print on the vinyl sheet inserted in it. All you have to do is click ‘make it’ on the software to see the parts that will be cut on the design, then insert the vinyl sheet accordingly. Next, load the blade with the help of the knob, then wait for the cut button to blink. Press the button to cut the monogram.
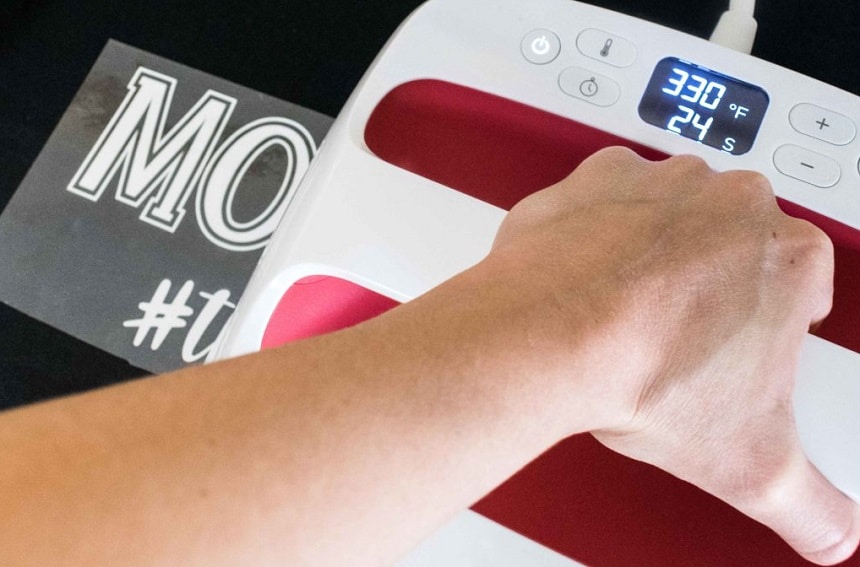
This is the final stage, and you can use a heat machine to help you transfer the vinyl to the shirt. Start by finding a center spot for your monogram by folding it into equal halves vertically and horizontally. Place it where you want it on the shirt, then cover it with multi-use paper.
Place a heat press machine on top, then wait for it to beep. It takes about 15 seconds for the machine to beep so that you can know the transfer is done; then, you can peel off the additional layer of vinyl to reveal the monogram beautifully imprinted on the shirt. You could also use an iron box, but that means you have to guess if the transfer is complete.
Some Quick Tips: Before you transfer the vinyl to your shirt, ensure you lay it on a flat surface and it doesn’t have any wrinkles on it. You can use an iron box or heat press to get rid of th wrinkles. Lint would also interfere with the design of the monogram. Be sure to remove any lint and ensure the shirt is perfectly smooth and flat.
The applique is another simple method of making monogrammed shirts. It allows you to make beautiful designs using a combination of satin fabric. Essentially,
applique
Trusted Source
Appliqué - Wikipedia
Appliqué is ornamental needlework in which pieces or patches of fabric in different shapes and patterns are sewn or stuck onto a larger piece to form a picture or pattern. It is commonly used as decoration, especially on garments. The technique is accomplished either by hand stitching or machine.
en.wikipedia.org
involves sewing a piece of fabric on top of another fabric. This means you would have to create your monogram design on a separate piece of fabric then sew it on your shirt. You can choose to sew using your hands or a sewing machine.
You can as well paint a monogram on your shirt like you would any other surface. All you have to do is create and draw a design on paper, then transfer it to the shirt using carbon paper. Place the carbon paper between the paper and the shirt, then travel over the design. Use paintbrushes and the paint color of your choice to paint the traced design.
You can also use sequins to create attractive monograms. Like you did with painting, first, draw your monogram’s design, then transfer it to the shirt using carbon paper. Once you have the shirt’s design, you can use the sequins in two different ways to achieve an attractive design. You can either fill up the inside of the design’s outline with the sequins or fill the outside of its outline.
There is no better way to personalize your apparel and accessories than monogramming. Wearing a monogrammed shirt sets you apart from the crowd, and it is a beautiful way of expressing your endearment to your name or whatever it is you have represented on the monogram. Once you have mastered how to monogram a shirt, it can be more than just a pastime. You can make it a hobby or a full-time source of profit.
We have covered the nuts and bolts of monogramming, from how to make monogram shirts with Cricut machine and vinyl to using hands and an embroidery machine. With all the pointers on this article, you can go ahead to set your artistic mind free and tell unique stories with initials.