


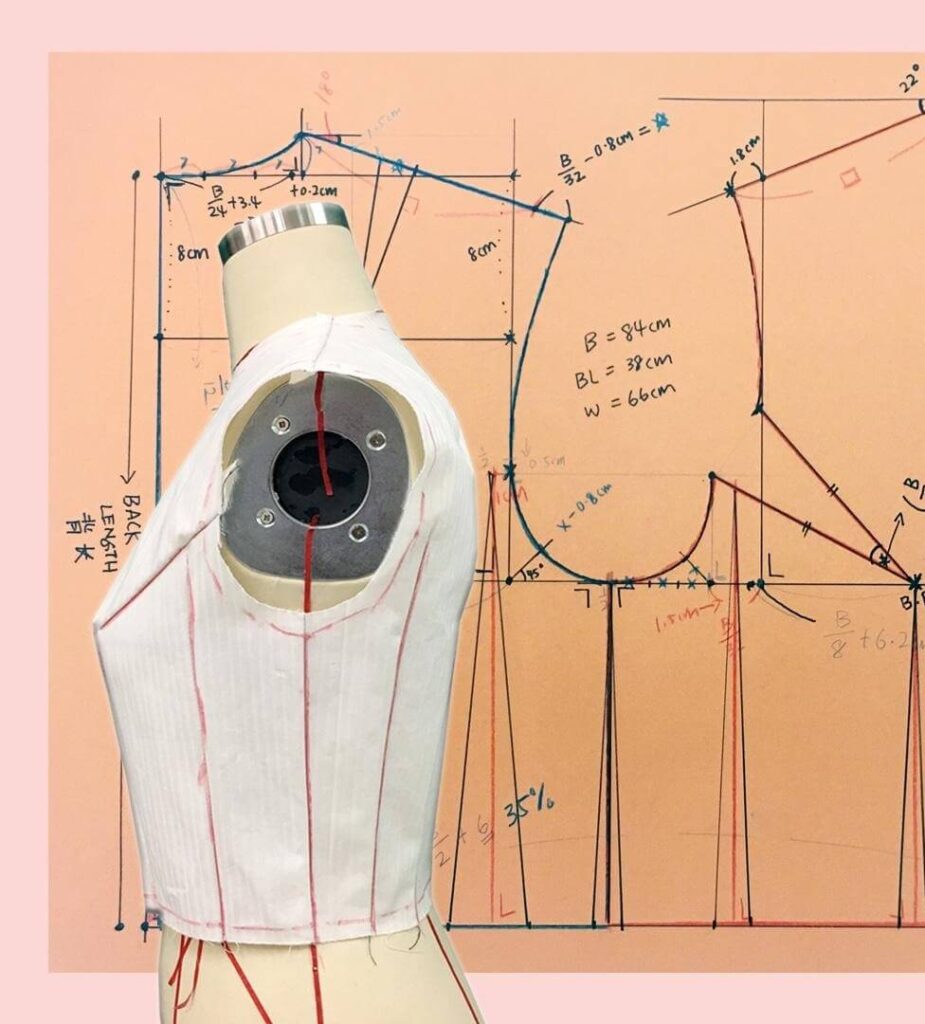
Custom dress forms are a great way to ensure the clothes you make are the right size and shape, with the flow, hug, or contour you want. Unfortunately, getting a custom-made dress form can become expensive. If you’re making clothes as a business, then you’ll come across different sizes and purchasing a custom dress form each time becomes highly unrealistic. Fortunately, there is an easier, cheaper solution; you can make your own dress form!
In this article, we’ll teach you how to make a dress form from top to bottom! We’ll try to cover as many different dress forms as possible along with dress stands and styles. It’s not hard at all to make a DIY dress form, and there is more than one way to it. Some are quick and snappy, while others will take time and concentration. Though it may take some time and practice to create your own dress form, you will save a lot more money than buying a custom dress form, and the dress form is now in your complete control.
Find out which type of dress form works for you and get stitching!

If you’re not looking to make your own mannequin, but you still need a customized size for your own stitch work, then there is a perfect solution for you: Dritz 20420 Sew-You Dressform with Tri-Pod Stand.
It offers customized mannequin that matches your exact body shape and type at an affordable price. This DIY dress form is easy to use and require little to no effort on your part. All you need are your measurements to select the right mannequin size for you.
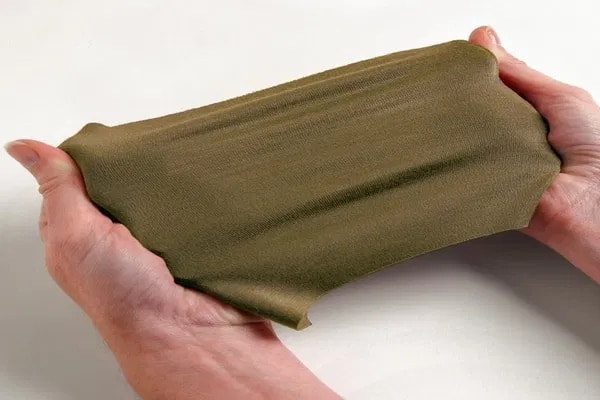
Expanding foam leans to the more complex and expensive side of DIY dress forms, but it’s a precise technique that will give your personal measurements on the dot.
You will need a few things prior to making the dress form;
Step 1: Wear something that shapes your body, such an old swimsuit piece. Any skin that is still showing should be covered with cling wrap to ensure the bandage doesn’t stick to you. You can either cover your entire body with casting bandages or first do your front and then back. The length of the dress foam is up to you, but most stop halfway through the thighs.
If you’re going to do the front first and then back, use a marker to create a vertical guideline for your friend to follow. After you have removed the two pieces, you’ll use more casting bandage to stick them together.
Step 2: Ask your friend to wet and place the bandages on your figure, making sure to foam all the curves and busts around your torso. First do the front, wait for it to dry, take it off (it will come off easily if none of your skin was exposed) and then repeat for the back.
If you’ve covered your entire body, cut the back carefully all the way down. You can cover up this cut with bandages later.
Step 3: You have to make sure there are no openings in your body form. The openings should all be tightly sealed. For the bottom, use cardboard and duct tape (or more casting bandages) to secure the hole. For the expanding foam to work, there should be no openings.
Step 4: The easier way to use expanding foam is by using a spray foam. Unfortunately, spray is not ideal in this case since you have to pour it into a cavity. In this case, two-part expandable foam is more ideal. For instructions on how to properly use and ready this foam, watch the following video:
Step 5: After 24 hours, you can take the bandages off. To do this, wet them first and they will peel off cleanly. After this, it’s time to sand the dress form. This will give you a relatively smooth surface.
Step 6: With a sponge, gently dab woodworkers glue over the body. This will cover any cavities or holes left by the foam. Finally, you can cover the dress foam with foam tape for the final, finishing touch.
And with this, you have your DIY dress form made with expanding foam.
In comparison to the expanding foam, this method is relatively inexpensive. To make a diy duct tape dress form, you’ll need the following;
Step 1: This process will start with the bottom, continuously wrapping the bottom of the long shirt. The shirt should reach mid-thigh. Try to wrap the tape tightly, but not tight enough to squeeze the body. The first layer of duct tape should fit the form snugly, without suffocating your model.
Be careful around the arms, legs, and chest so you get a proper shape. Use smaller cut pieces of tape to create the right figure.
Finally, upon reaching the shoulders and neck, use plastic wrap to secure your model’s neck. Avoid using larger tape pieces here as well.
Step 2: Go over this form two-to-three more times. Once you have all of your layers of tape made, use a black permanent marker to identify the waistline of your model. You’ll need this depending on what you’re making. (shirts, dresses, jackets)
Step 3: Now it’s time to take scissors and cut the dress form off. Make sure to cut both the t-shirt and the duct tape, not injuring your model or her clothes while you are at it.
Step 4: Finish off the form by taping up the cut and preparing the interior for filling of your choice.
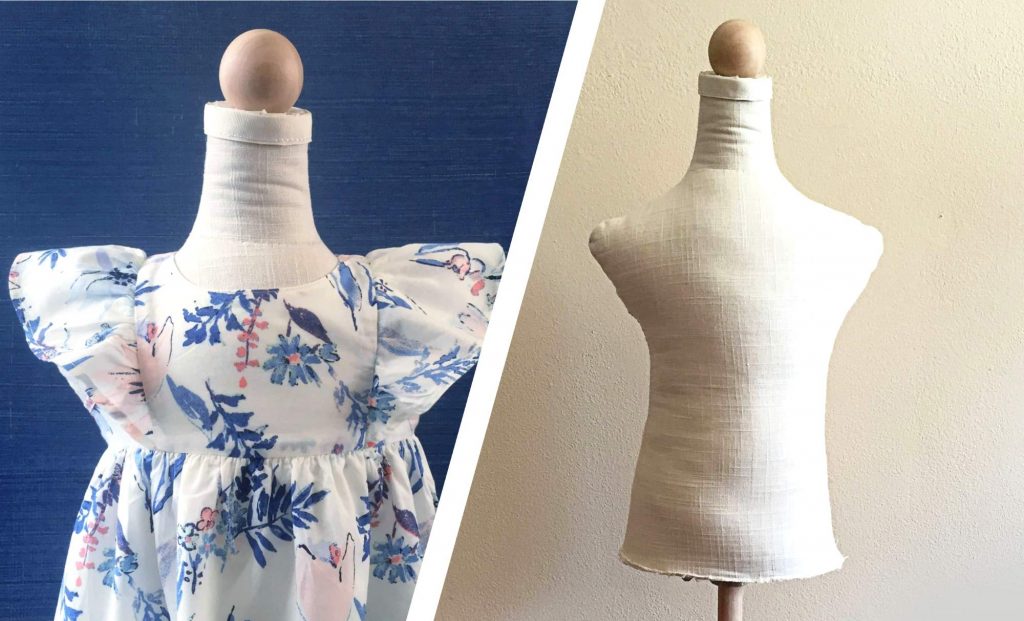
Creating a diy child dress form is not a very easy task, specially since you won’t find any children models up to the task of standing for you. Instead, the measurements will have to be based off of their clothes. This one is a long one, with a few more steps and items required.
You’ll also need a pounce wheel, pushpins, scissors, needle, clear ruler, pencil, pins, and a sewing machine for all the sewing you’ll need to do for this DIY dress form mannequin.
To build the stand, you’ll need a drill and paddle or spade bit.
Step 1: The first step is to create the actual pattern for the mannequin. Lay out a paper over your worktable and place your child’s onesie you intend on using. Use pushpins to keep the onesie in place, placing the pushpins along the seams and edges. Trace one side of the onesie with a pounce wheel. You only have to do half of the onesie, just make sure you’ve marked the center point on both the bottom and top.
Repeat this for one half of the backside as well.
Now trace over the pounce lines with a pencil. You should have a straight line for the center back and front. You don’t need the arms, so connect the shoulder and arm with a curved line (resemble a vest shape). Extend the neck 5” higher so you can make collars on your mannequin.
Make sure your pieces fit together. For sewing purposes, leave a little material on the pieces to overlap.
Step 2: Now it’s time to sew the body together. As you have made your pieces, cut them out and sew them together. There will be three layers to this mannequin. The first is muslin, the second is batting, and the final is your choice.
Stitch all the front piece together, then the back, in the order of your preferred material first, then muslin, and finally batting. Leave a little gap in the stitching for stuffing later.
Next you stitch the back and front together, keeping the top and bottom open.
Step 3: This step involves the base of the mannequin. Two wooden oval pieces have been used to create a sturdy base, one slightly larger than the other. Drill through the small one fully, and then the larger one almost all the way down.
Keep in mind, the hole should be the same size in diameter as the wooden dowel you are going to place the mannequin on. Use wood glue to stick the ovals and the dowel together.
Step 4: Now it’s time to create the bottom and top for the mannequin. The top will be a circle, while the bottom an oval. Measure the circumference of the two parts and cut out your oval and circle from foam core. In the center of the oval, create a circle for your dowel with the same diameter measurement. Place the oval and circle in your mannequin (use hot glue and smooth the fabric over the edges of the foam) and you have the body!
Step 5: To create a dowel tube, you’ll need to measure how much of the dowel is going to be inside of the mannequin. Create this tube out of muslin with the same diameter of the dowel, leaving a little material at the end. Cut this material into smaller strips. These will be attached to the base. When you place the mannequin over the dowel, paste the strips on the base fanning out.
Step 6: Finally, it is time to stuff the mannequin. Using the opening you left in the body, stuff the body carefully. Make it stiff and even all throughout the body. Avoid lumps by ripping the stuffing into small pieces.
The last part of the mannequin is the top. For decorative purposes, you can glue anything to the top of the mannequin, in this case a wooden ball. To cover up the rough edges on the top and bottom, stitch a lace or ribbon over them.
Now your DIY toddler or child dress form is finally complete.
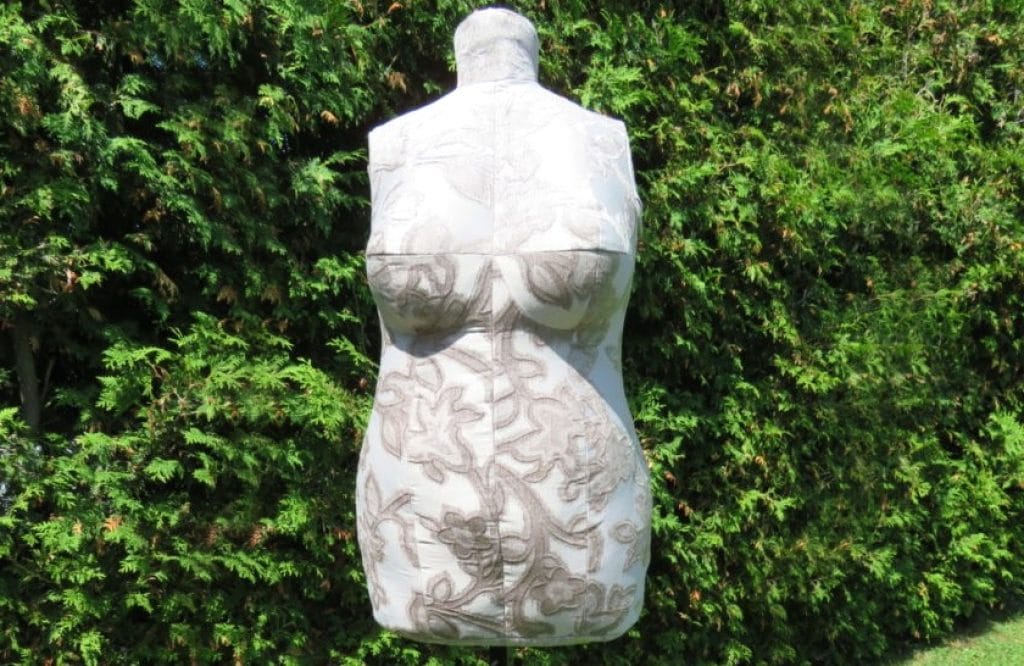
If you’re looking to make your own diy plus size dress form, then you can use the same methods mentioned above and below. There isn’t much difference in the process; only your model should be a plus size you need, or you act as your own model.
Most people find it harder to make models in plus size, and resort to purchasing full body pieces which can be customized to the exact size or made with an adjustable material which can be made slim or wider, depending on what you need.
Dealing with chicken wire is a little tricky, but it will get you the desired wired form. DIY wire dress forms are usually made for more decorative purposes than to actually use it for making dresses and clothes.
The first step would be to get a roll of chicken wire. First create a cylinder in the general size you want it to be. Cut the amount of chicken wire you need, winding the cut ends with one another, to minimize the sharp edges present on your mannequin.
You can either use a model and smoothen the shape over their figure, or use trial and error to create a mold out of your mannequin. If you’re using it for decorative purposes, then there’s no real harm in guessing the entire shape. If you want to use it to make clothes, then it’s smarter if you use a model. The advantage of chicken wire is that it’s flexible. If you need to make the waist thinner, neck wider, hips bustier, then you can do all that on the spot. It doesn’t have to stay one consistent size.
Making a diy dress form out of plaster will give you a rock-hard figurine to use for your stitching needs. These are the materials you’ll need:
Be sure to work somewhere you can afford to have a little mess, somewhere near ventilation or a window, and somewhere warm. Use the bin liners on the floor in the room you are working.

Step 1: Cut out strips for your plaster dress form, layering each strip thrice to create a robust and sturdy cast. Keep piles of plaster strips ready to go as soon as you need them. Save one or two piles for when you need to fix the cast back together.
Have a bowl of lukewarm water ready as well. You’ll have to act fast since the plaster begins to harden as soon as you have wet the strip. Avoid having the plaster near any drains as this will clog them to irreparable extents.
Step 2: You can either cover your skin with Vaseline or wrap yourself in plastic wrap, just make sure your skin is not exposed anywhere you need to place plaster strips. Keep your posture straight the entire time you’re standing, since you don’t want to deform the casting’s shape.
Step 3: Start placing strips in an X shape over your front and back to create a sturdy frame for your cast. It’s recommended to place your strips horizontally starting from your mid-thighs. Starting near your face could make you faint or choke on the fumes. Work your way to the top, uniting the sleeves with the body and go as high up the neck as you can go. Every part of the dress form should be thick and even.
Step 4: Once the entire body feels solid to you, it’s time to cut it off. It doesn’t have to be entirely dry, only thick and strong enough to stay in one piece. Place horizontal lines around the cast to make sure you can stitch it back evenly in one piece later.
Cut it open with your medical angled scissors so you don’t cut the model in the dress form. Leave it be for at least 48 hours to let it dry out completely.
Step 5: Using powder plaster of Paris and a kidney tool, smooth out the interior of the plaster. The kidney tool will get rid of any lumps or bumps present, while the plaster of Paris will help fill in noticeable indentations. Advisably, mix in a rubber bowl rather than a plastic or ceramic bowl.
Step 6: Now it’s time to fill in the cast with foam. Cover the inside of the plaster cast with a release agent. The point of this is to create a layer in which the foam cannot penetrate. PVA alcohol, release wax, Vaseline, or even cling wrap are all items you can use to cover up your cast. Remember, if it’s not properly covered, the foam will seep into the plaster and you’ll never get the two separated from there.
Stitch the two sides together once you’re done covering up the interior. You can use staples and duct tape to properly secure the sides, making sure no foam will get out.
You can use the video mentioned before in the article to help you with the foam.
Step 7: Assuming your release agent worked perfectly, the plaster should come off easily and you’ll have your foam dress form. If not, drench the plaster cast in water with dissolved baking soda.
Finally, sand down the foam to make it smooth and easy to use.
These are the following materials you’ll require to make a diy dress form out of papier-mâché.
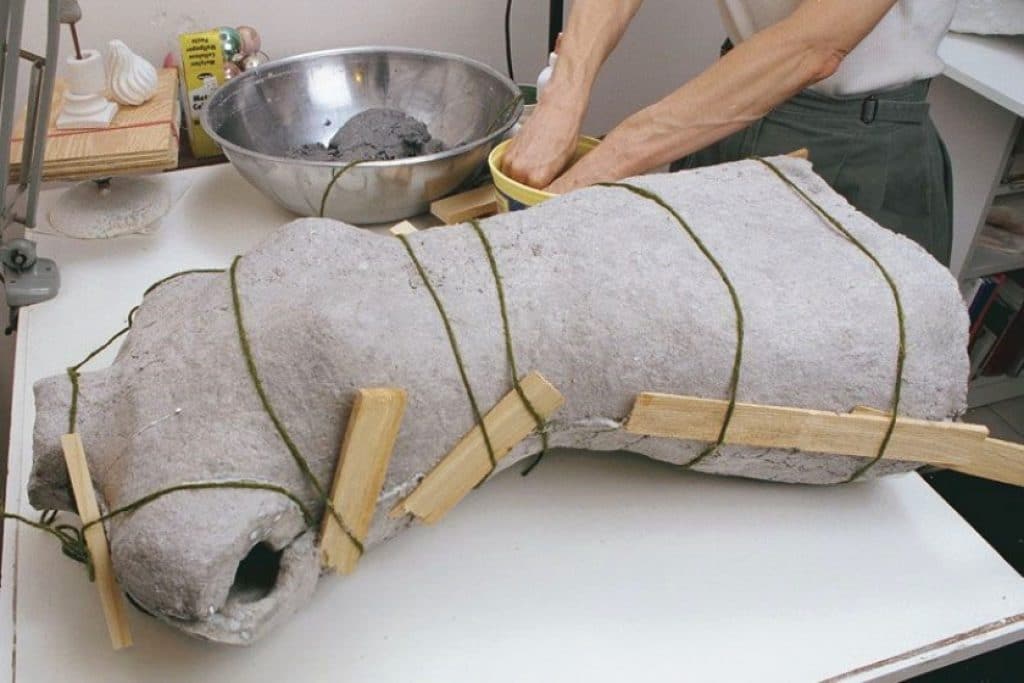
Step 1: Papier mâché works the same way the plaster does. Rather than using plaster, you are going to cover your model with plaster of Paris strips as you would in a papier mâché project. Make sure all of the skin is covered with plastic wrap. Use thinner strips for the chest and around the arms to get a smooth, strong finish.
Step 2: Be sure to remove the cast from your model while it’s still damp. If you wait too long, it may become too hard to cut through. Cut your cast so there are two halves, the front and the back.
Step 3: Mix paper pulp insulation with wallpaper paste to create the mâché. Line the inside of the cast with paper towels so the mâché doesn’t get stuck. Build up your mâché until you’ve reached the edge of the cast’s half. Once you’ve filled up both halves, wait for the mâché to dry or use a hairdryer to speed up the process.
Step 4: Use the glue, cord, and perhaps some wooden splints to keep everything tight and stuck together. Make sure the mâché dries with the entire cast tightly stuck together. You don’t want it slipping or distorting. Once it’s done drying, cover up the mannequin with a knitted material so using pins is easier.
This is a little different of a DIY than the others mentioned above. Rather than creating a dress form from scratch, you can take a dress form and turn it into a unique and elegant Christmas tree. What you will need is:
Step 1: First, start off with the dress form. The taller the dress form is, the more elegant it will appear. You’ll have to wrap chicken wire around the dress form to create the ball-room dress appearance. Protect your hands with rubber gloves and handle cutting the chicken wire with pliers. To protect the mannequin, you can cover it with a skirt.
Step 2: After you have covered it with chicken wire, wrap the garland around the wire. This will create an inconsistent rugged look as if it were an actual pine tree on the dress. To cover up the dress properly, have about 45 feet of garlands on you, real or fake.
Step 3: The next part is where it gets fun. You can get lights and ornaments to place around the dress form to give it greater Christmas flair. Try to avoid any white wires when dealing with lighting however. Green wires blend in better.
Step 4: Now it’s time to make the dress form look presentable with her Christmas tree skirt. Any light white, red, or green top will suit the theme well. You can place jewelry, scarves jackets, and more on her to make her as stylish as possible. Let your creativity run wild with her appearance.
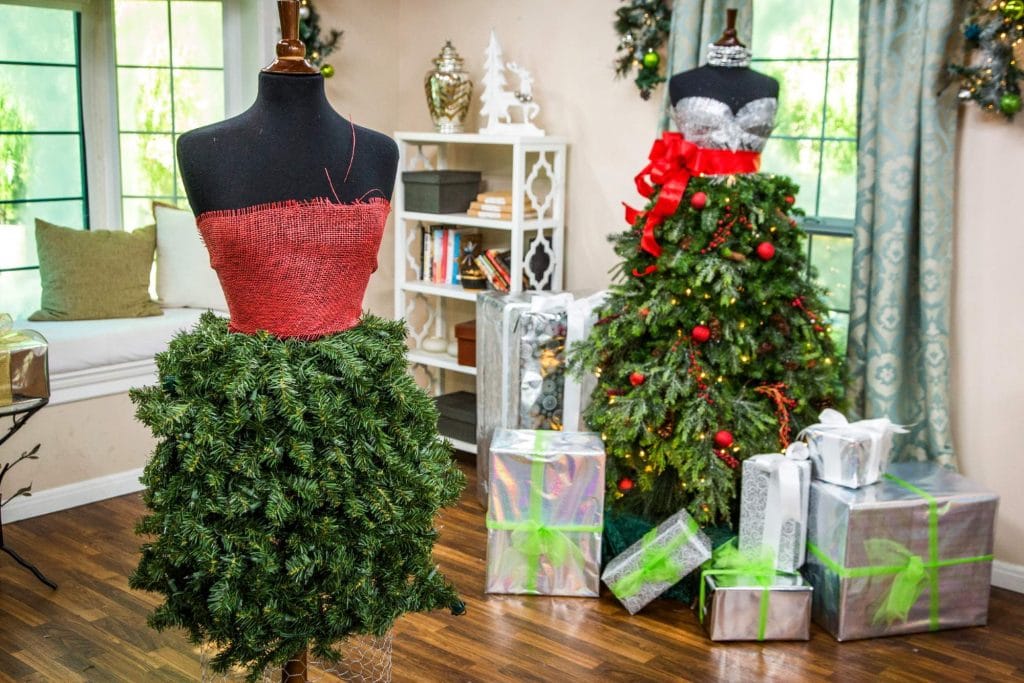
In the end, you’ll have a fashionable and creative Christmas to enjoy this year, along with a productive reason for a dress form in the holidays when you’re not working.
Now that you know how to make a mannequin for yourself, there’s nothing stopping you from stitching. Whether you stitch for profit or passion, you now have a great way to make a dress form, as well as a variety of methods to create it.
If you feel you’re not the craftiest person, you can also purchase a custom-made mannequin which will still serve you as well as any other DIY custom dress form from Bootstrap Fashion. Finding yourself a dress form is not hard at all, specially when everything you need falls under the price of any store-bought one.


There are also cool DYI dress form sewing patterns from BetterSew:
https://www.etsy.com/shop/BetterSew