
When it comes to stitching, Kenmore is a brand that comes to mind. Over the past few years, Kenmore Trusted Source Kenmore (brand) - Wikipedia Kenmore is an American brand of household appliances sold by Sears. The brand is owned by Transformco, an affiliate of ESL Investments. en.wikipedia.org has become a leading brand in the world of stitching. Kenmore sewing machines are known for their world-class stitching.
These machines are not only efficient in their function but also user-friendly when it comes to different features. Kenmore machines can easily meet all your stitching needs without any hassle.
However, despite all the great features offered by the machine, they won’t be of any use to you if you do not know how to thread a Kenmore sewing machine. Threading the Kenmore machine consists of many different stages.
However, there’s no need to worry as this guide will cover each and every step in detail. The guide will also help you thread different models of the Kenmore sewing machine.
(But if kenmore’s not your brand, we’ve got a how-to on how to thread a brother sewing machine too!)
So let’s get started!
While functions and features may differ for each model, the general threading steps for how to thread a kenmore remain the same for all. If you follow the following steps carefully, you will be successfully able to thread a Kenmore sewing machine.
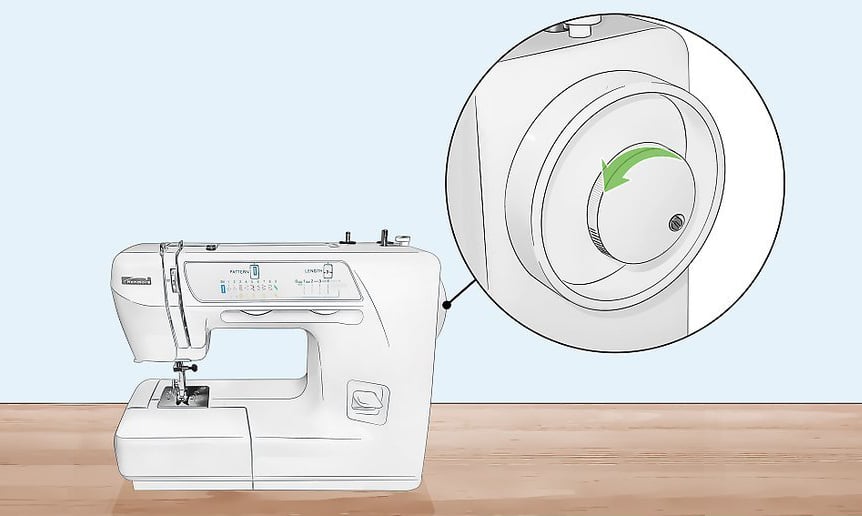
 The first thing you need to do before threading your sewing machine is to wind the bobbin. In order to wind the bobbin, you will need to unshackle the clutch on the machine. The knob for this clutch is usually situated on the right side of the sewing machine.
To unshackle the knob, you need to turn it towards yourself. After unshackling the clutch, you will need to place the thread on the spool pin. For a nice quality thread, you should get this one.
To thread the spool, ensure that there is a spool pin at the center hole of the spool. Your spool thread should be hugging this center in an anti-clockwise direction.
Next, you need to draw your thread by the tension disc Trusted Source Understanding Thread Tension on Your Sewing Machine Don’t stress over finding the correct thread tension on your sewing machine. Here’s everything you need to know about setting and adjusting thread tension dials. www.threadsmagazine.com . For this purpose, you will need to pull the thread from the spool pin and then bring it to the tension disc, which is usually situated on the front top of the sewing machine.
While doing this, keep in your mind that the thread should not be wrapped around the disc after one rotation. In fact, you should pass the thread through the upper right side of the disc and then bring it out from the lower right side.
Once you are done with that, pull the thread by the bobbin’s hole and set it on the shaft of the bobbin winder.
After this, keep on pushing the bobbin and the shaft until you hear a click. This will help your bobbin reach a bumper which helps with maintaining control during stitching.
To wind the bobbin, get your hands on the thread coming out of the bobbin and press the power pedal on the machine. Once you start the machine, your bobbin will start winding. Keep the power on until the winder stops itself automatically.
Lastly, press the winder back to its position and elevate the bobbin. After that, cut an extra piece of thread that is coming out. You would also need to infix your clutch by turning it inside in an anti-clockwise direction. Once the clutch position has become tightened, you are done with this part of the process.

Next, we move on to threading the bobbin case. This is a simple and easy step that can be done in no time.
To start off, first, pull the extension table to the left to remove it from the sewing machine.
Next, you will see that there is a marked shutter cover in there. You would then need to pull the cover to get to the marked handle on its left side.
During this time, start turning your hand wheel in an anti-clockwise direction until you reach the highest point of your needle.
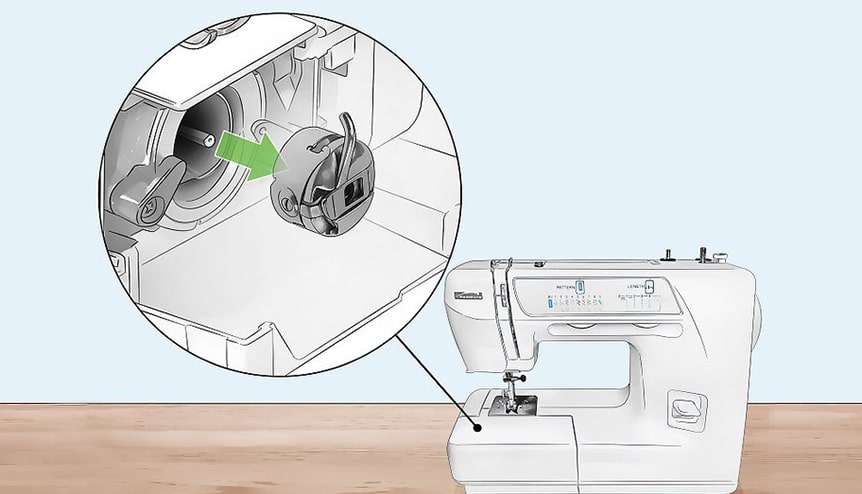
Once you bring your needle to the highest point, pull out the bolt on the bobbin case.
After doing that, place the bobbin in a way that you can thread the bobbin case in an anti-clockwise direction.
Once you are done, you can push the bobbin back to its position and place the case back into the shuttle.
To thread the top thread, you will first need to turn the handwheel in an anti-clockwise direction. Keep turning the wheel until it reaches its highest position. Once it has been placed there, you need to elevate the presser foot. You can elevate the presser foot by increasing the length of the lever.
After that, place the thread spool on its pin and make sure that the thread wraps around in an anti-clockwise direction. Next, take the thread and pull it down till it reaches the front of the machine. For easy threading, you can use a needle inserter.
Kenmore machines come with labeled paths known as A and B.
Using these paths, guide your thread through path A and then position it on the bolt. After hooking it up, drag the thread up to the top of path B and place it on the spring.
After doing so, drag the thread down again and clip it on the thread guide that is above the needle.
To complete the process, you would have to pick up the bobbin thread. For this purpose, take the end of the top thread. While doing this, start rotating your hand-wheel in an anti-clockwise direction. This will result in a tiny loop coming out from the needle plate. You can use the upper thread to help straighten this loop. End the process by dragging both threads under the presser.
While the process is generally similar for all Kenmore sewing machines, there can be a bit of change due to the structure of each model. We have covered a few common models to help you with threading a Kenmore sewing machine.
Threading the bobbin often depends on the model of your Kenmore sewing machine. For the 158 series, you can follow the instructions mentioned above. However, since there is a tension knob hidden between the tension discs, you would need to perform an extra step.
For this purpose, you would have to wrap the thread around this tension knob and then insert it between the tension discs. This step is also similar to the Kenmore 385 series.
For Kenmore 385, you will find that it is quite similar to the Kenmore 158. There is an additional tension area for the Kenmore 385. This tension area is usually found near the bottom of the machine.
In order to thread the Kenmore 385, you would need to roll the thread around the spring holder as an additional step to those mentioned above.
To thread the Kenmore 148, you would need to open the shuttle cover to get to the bobbin case. Once you get your hands on the bobbin case, release the clutch by turning the wheel of the machine in an anti-clockwise direction.
After that, take the thread from the spool and pull it through the bobbin. Once the thread has been set, then thread the top thread and place the bobbin back into its position.
For detailed instructions, follow the general steps mentioned above. Once you have successfully threaded your Kenmore 148, you can start stitching.
Threading a Kenmore 12 is quite simple. All you have to do is expose the bobbin by removing the tray. Once you get to the bobbin, you need to unlock it and pull the thread away.
After that has been done, you put the bobbin back into the case and pull the thread towards the tension spring. Then, following the process mentioned above, you thread the top thread and bring the bottom thread up.
To bring the bottom thread, turn the wheel counter-clockwise until the thread has been positioned.
As you have seen above, threading a Kenmore sewing machine is not that hard. However, there may be times when you encounter some problems with threading.
Here are some of the common Kenmore threading problems:

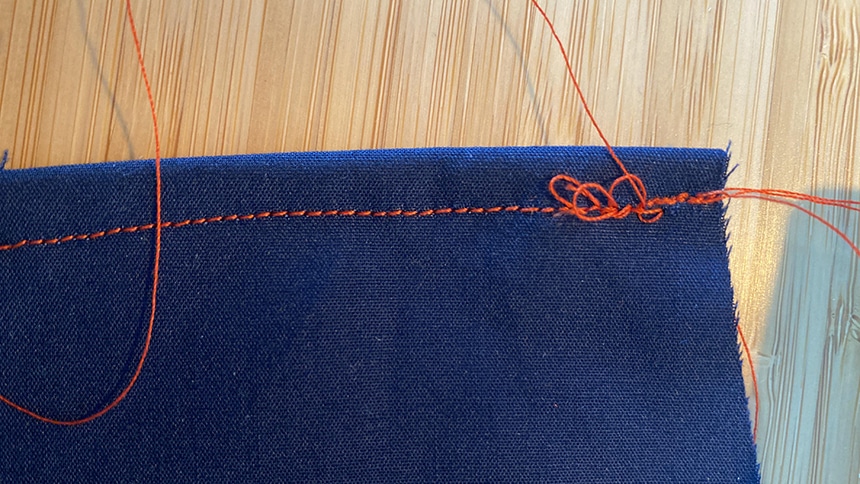
While stitching, there can be times when your thread gets tangled on the underside of the machine. Often, the cause behind this problem is faulty bobbin or improper threading. This results in the sewing machine to skip stitches as well.
In such a case, what you should do is to re-thread your Kenmore sewing machine while keeping the presser foot up. This will resolve the problem easily.
Sewing machine jams occur often and they can be caused either by a fabric getting stuck or your thread getting in the way. When such a jam occurs, you should pull out the fabric you are working on and remove the thread that has been jammed.
Removing the thread means that you remove the bobbin as well. After removing, you would need to thread the sewing machine again, using the instructions mentioned above.
While stitching, your thread may break due to a number of reasons. If your thread breaks while getting hung on the thread spool, then you should change the direction of your thread. Always make sure that you are using high-quality threads that are durable.
Usually, a new needle can also result in the thread breaking as it takes some time for the needle to get used to it. Before starting the process of stitching, always make sure that the machine is clean and dust-free. Also, make sure that the Kenmore sewing machine has been threaded properly. For proper instructions, check out the steps mentioned above.
When it comes to stitching, proper threading is the key to every professional-looking stitch. With proper threading, you are able to enjoy the process without any disruptions or breakages. This helps maintain consistent stitching throughout your garment.
For most people, the process of threading a sewing machine can be challenging. However, when it comes to Kenmore sewing machines, the process of threading is quite simple and easy. With the guide above, you can easily learn how to thread a Kenmore sewing machine. In fact, you can also change the way you thread your machine according to the model number!