How to Stitch in the Ditch: Primary Ways and Techniques

By
Jean Chaney
Jean Chaney
Research Writer
Jean is the brains behind her fashion label. She's a whiz with a needle and thread, and has been sewing since she was old enough to hold a pair of scissors. Jean has always read more
reviewed
Reviewed By
Isabel Misner
Isabel Misner
Expert Consultant
A professional seamstress. Isabel has her own video blog where she shares her experience about all the aspects of sewing – from choosing suitable materials to step-by-step read more
Last updated: August 13, 2023
JustToSew is reader-supported. We may earn a commission through products purchased using links on this page. Learn more about our process here

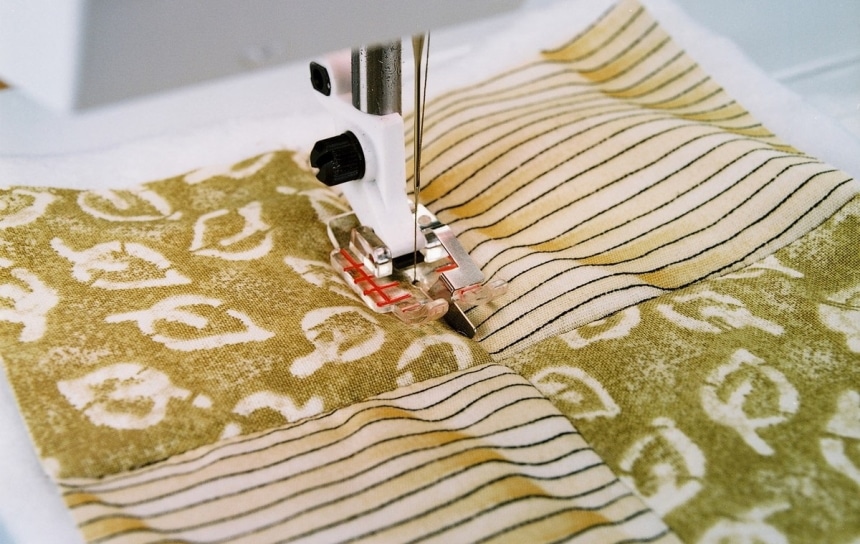
There are several ways to finish the edges of a garment, and one of them is the stitch in the ditch. This technique is universally used in sewing everyday garments and quilts. It is a popular method that can be accomplished in machine quilting while using a walking foot and is often referred to as an even feed foot.
What does “stitch in the ditch” mean?

How to Stitch in the Ditch: Primary Ways and Techniques

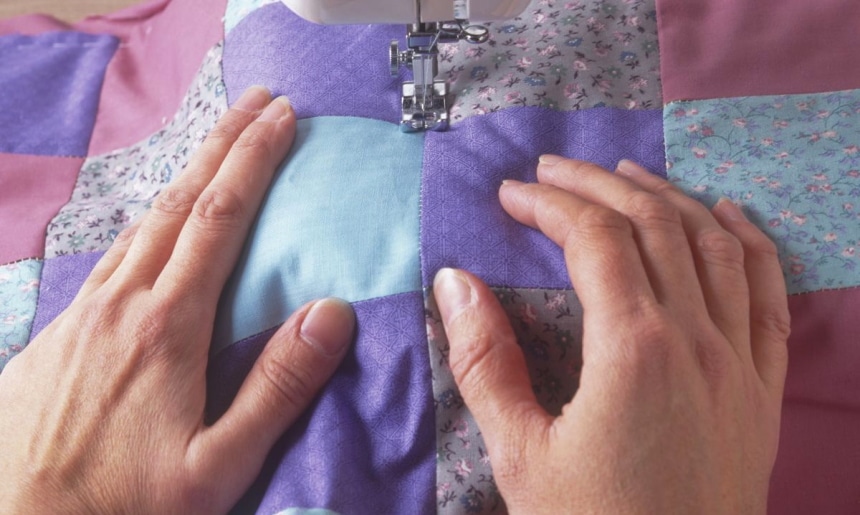
Stitch in the ditch means that a quilter ensures they follow along the seam lines of their patchwork. Simply put, if doing a patchwork quilt made of square blocks, you will be required to stitch in the ditch-this means sewing along the seams joining the square blocks.

It is a technique that emphasizes on stitching through the crack of the stitch on the right-hand side of the fabric. By doing this, you also ensure that you get to secure the under-layer on the wrong side. Every time you employ the stitch in the ditch technique, you get to clean the finished edge on the inside of a garment. At the same time, you get to create an invisible stitch on the right side of the cloth.

Learning how to stitch in the ditch is easy, and this is why it’s popular among quilters and other sewers. It simply places stitches at a hair’s width away from the seams separating blocks of a quilt. It also comes in handy when the quilt blocks are sewn together as it amplifies the ditch while at the same time remaining inconspicuous. To get the perfect results, though, you will need to learn how to stitch in the ditch quilting.
Reasons why quilters love the stitch in the ditch

  • It is perfect for beginners – Since you already have well-defined seams, it becomes easy to follow the path. This also means that you don’t have to mark lines before you quilt.
  • Helps with durability – This stitch adds to the durability of your patchwork because it serves as an extra stitch to what you already have. Quilts made using this technique tend to last longer.
  • It is a design by itself – If you happen to be struggling to pick the perfect design for your quilt, the stitch in the ditch can help you out.

How to stitch in the ditch with a sewing machine

How to Stitch in the Ditch: Primary Ways and Techniques

Stitch in the ditch technique ensures the stitches go through the crack of the stitch on the right side of the fabric while ensuring the under-layer is secured on the wrong side. This is how to stitch in the ditch with a sewing machine:

  • Start with pressing the unfinished the outer edge of the binding in and towards the wrong side. Be keen on the measurements. Normally, it would help if you pressed the edge about 3 mm less than the final seam allowance for the same edge.
  • To get precise results, on the wrong side, cover the stitch line seam with the pre-pressed edge. The stitch line should be adequately covered by pressed binding of the garment. The binding should surpass the stitch by about 3mm. Use a pin to secure the edge in place.
  • With care, place the sewing machine’s needle in the ditch of the seam and continue to sew slowly. As you stitch, pull the fabric lightly away from the needle as you continue stitching. Remember to remove the pins as you approach them.

How to stitch in the ditch – quilting technique

The stitch in the ditch is not intended to be visible on the top of the quilt. However, these stitches, when nicely done, do add a much-valued depth. They do this by compressing the batting hence making them quite visible on the backing fabric of the quilt. All of the stitches in the ditch are intended to secure all three layers of the quilt. To make the best quilt using this technique, you will need to do some practice just like with every other quilting technique. Here is how to stitch in the ditch quilting:
  • Start by dropping your machine’s needle between the fabrics that meet at a seam. The bobbin thread should then be brought to the top of the quilt.
  • To determine where the threads should fall, establish which side the seam is higher. To make the stitches fall to the other side, you need to nudge the needle a little bit for superior placement.
  • As a beginner, your stitches will not always be uniform and consistent. You shouldn’t beat yourself for this. Just focus on making the stitches straight and smooth. To avoid making plentiful mistakes, you should come up with a stitching plan. This will help you in examining your quilt before beginning work and also know to establish which direction a majority of seam allowances are pressed.
  • Make sure to stitch along the seam line. Remember to pull the fabrics apart ever so slightly on either end of the seam as you continue sewing.

How to use Janome stitch in the ditch foot

How to Stitch in the Ditch: Primary Ways and Techniques

Learning how to use Janome stitch in the ditch foot is important if you want to advance your quilting style and learn new techniques. As a renowned American sewing machine manufacturer, Janome has invested in high-quality and innovation to make each machine safe and reliable. Here are a few steps that you should follow to master this technique:

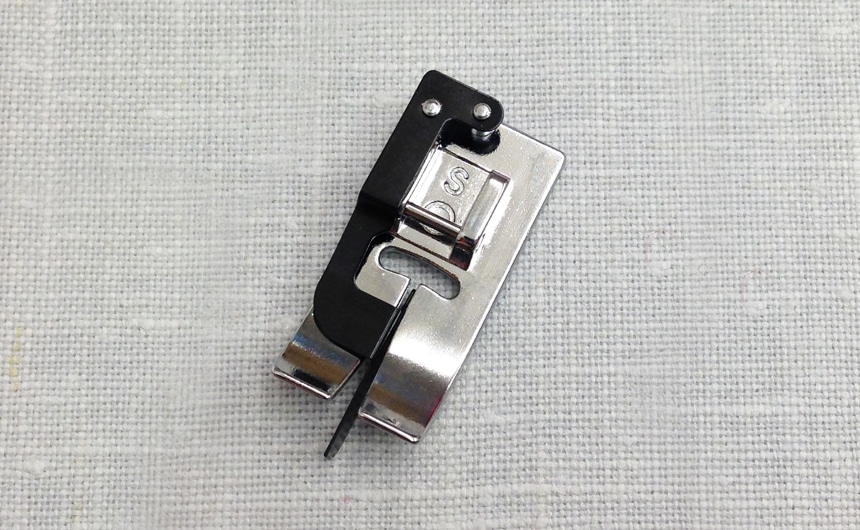
  1. The ditch quilting foot that you buy has a flange that helps at holding the seam open as you stitch in the ditch.
  2. Start with snapping the foot of the sewing machine and then select a straight stitch. A stitch in the ditch works best with straight stitches.
  3. Align the fabric, therefore, making the flange rest the seam. Besides being able to adjust the needle to determine how close it stitches to the flange, you can also adjust its speed to medium or slow.
  4. You must keep your eye on the flange to make sure it remains in the seam.
  5. The good thing with the Janome stitch in the ditch foot is there are many that you can choose from.

Conclusion

Stitching in the ditch is a popular technique used by quilters and other sewers to bring out the beauty of clothes. These stitches are not meant to be seen, but they are very instrumental at adding depth to a quilt of a piece of cloth. As a rule of the thumb, stitches in the ditch do secure the three layers of a quilt.

Quilting is diverse and unique in that if your patchwork was very large, you can add line stitches in different areas using your machine. It doesn’t have to be near the seams. You must also remember that there are no quilting vigilantes or police. You are free to have seams that are not geometrically straight or professionally interconnected. As a beginner quilter, strive to keep your stitches smooth. Every new quilt helps you learn a lot about consistency style and genuine love for quilting. You will be surprised at how many people will only see the beauty that your quilt exudes and nothing about the lack of smoothness of the stitches. Strive always to learn a new thing in quilting, and within no time, you will be making the perfect stitch in the ditch quilting maneuvers.

Leave a comment

Your email address will not be published. Required fields are marked *

X