

Learning how to sew a hole is an important sewing skill that will help you when making items for yourself and other people. Knowing how to sew a hole is also an important life skill because it allows you to fix a garment in just a few minutes. It will also save you time and money by keeping you from making a trip to the alterations place.
Unfortunately, nowadays, so many clothes are made cheaply that they rip even after just a few wears. Instead of tossing them into the garbage, consider darning Trusted Source Darning - Wikipedia Darning is a sewing technique for repairing holes or worn areas in fabric or knitting using needle and thread alone. It is often done by hand, but it is also possible to darn with a sewing machine. en.wikipedia.org the hole at home and continue wearing them. If you have the correct thread and one that matches the clothing, people won’t even be able to notice there was ever a hole there in the first place. With a sewing kit, you can even patch up a hole anywhere.
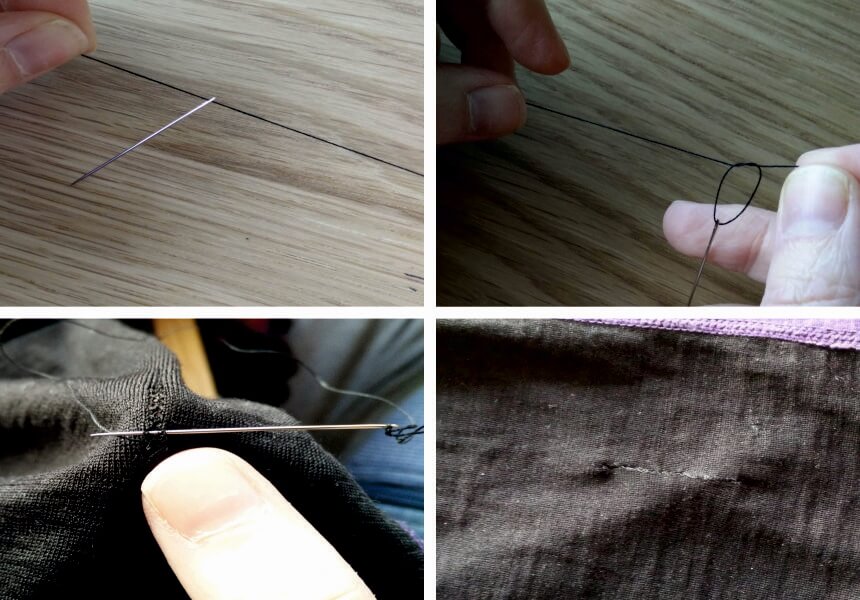 The easiest way to sew up a hole is by hand with a sewing needle. The first thing to do is thread the needle. Make sure the thread is tight and not split. You can also use a needle threader or a thimble if you need it.
After threading, you will need to knot the thread to make sure it doesn’t slip through the hole while weaving in and out. If you are fixing wool or knit garment, make sure the knot is big enough to not slip through the extra gaps in the fabric. Once you have the knot, you can begin to weave the needle in and out over the hole.
Try to start at the strongest part of the hole, such as where many threads are still attached and still have a stronghold to the item. This will ensure that your new thread has a good anchor and can’t break easily.
Stitch in straight rows moving up and down in a running stitch and stitching one over the other to create a new row each time.
Keep the rows straight and evenly spaced. Small spaces are better. Now, turn the item 90 degrees and begin sewing perpendicular. As you begin to stitch in this direction, you should see your hole disappearing. The more compact weave, the faster the hole will disappear. Keep working back and forth until you see the hole fully disappear. Then cut the thread close to the base. Also, cut any extra threads hanging around.
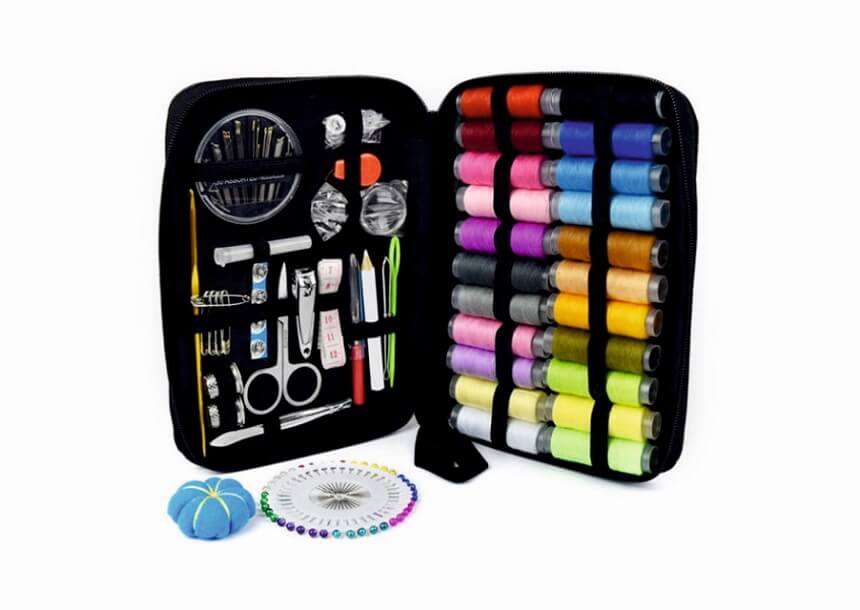 Here is a list of tools you will need to do basic garment repairs like sewing a hole:
Alternatively, you can always use a sewing machine to make repairs to a garment. If you are in a pinch and just want to fix a few things, the hand and needle trick is the best.
However, as you grow into a seasoned seamstress, consider buying a sewing machine to help you with repairs. One of the best beginner sewing machines is the Janome 2212 by Janome because it has 12-built stitches and an easy-to-turn dial pattern.
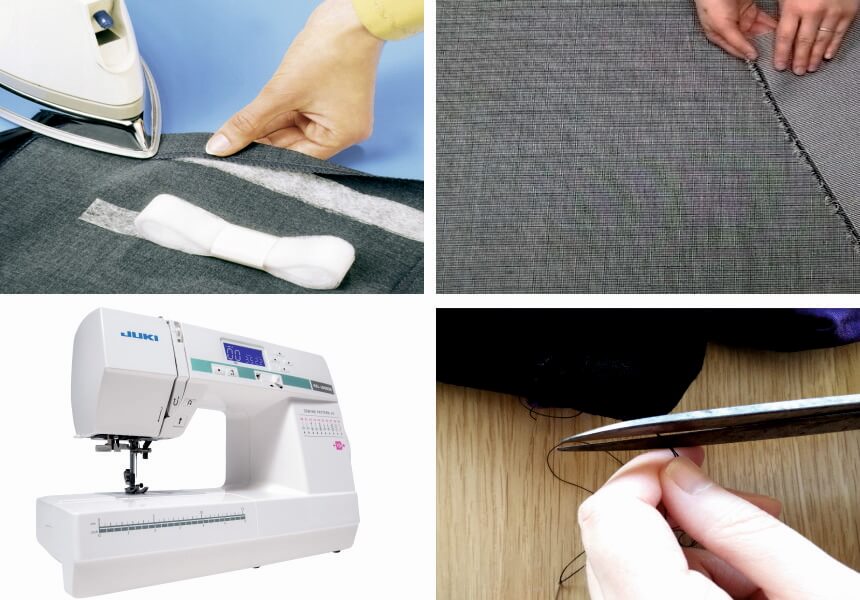 A split seam is usually easier to fix than a hole. The common places for split seams are usually inside pockets or by the elbows. Fixing a split seam is a great way to prolong the life of your garment and keep wearing your favorite item even after there is some damage.
Before beginning to fix the seam, turn the garment inside out. If you sew from the visible side, people may be able to notice that you fixed a hole and see the additional threading. Even if you are new to sewing seams, flipping the garment inside out will make your clothing look brand new.
Ironing the garment will help make the seam more visible and allow you to sew in a straighter line. If the seam rip is large, consider placing pins throughout the seam to help you sew in a better line. You can then remove the pins as you get closer to them.
You can either sew by hand or by machine. If you are looking for a good machine to help with seam rips, try the HZL-LB5020 computerized sewing machine by Juki. It has 20 stitch patterns and an auto needle threader.
Just like fixing a hole, you need to thread the needle if you are sewing by hand. Make sure the thread is not frayed and put it through the eye of the needle. Then tie a strong knot to keep it from slipping through the holes as you patch the garment.
If you choose to sew by hand, use small stitches to get maximum strength. Make sure to sew along the original seam line and try not to stray too far from it. Overlap the intact part of the original seam to keep the stitching close together.
After you’re done, take the thread out of the needle and knot it tightly. This last knot will help seal the seam stay enforced and not stretch and break again. Clip any extra threads you may have.
If you are top-stitching instead of working with a seam, like a patch pocket, you will use the same methods. Usually, top-stitching is more visible, so make sure to keep the stitching as straight as possible. Also, use a thread that’s the same color and weight as the original color.
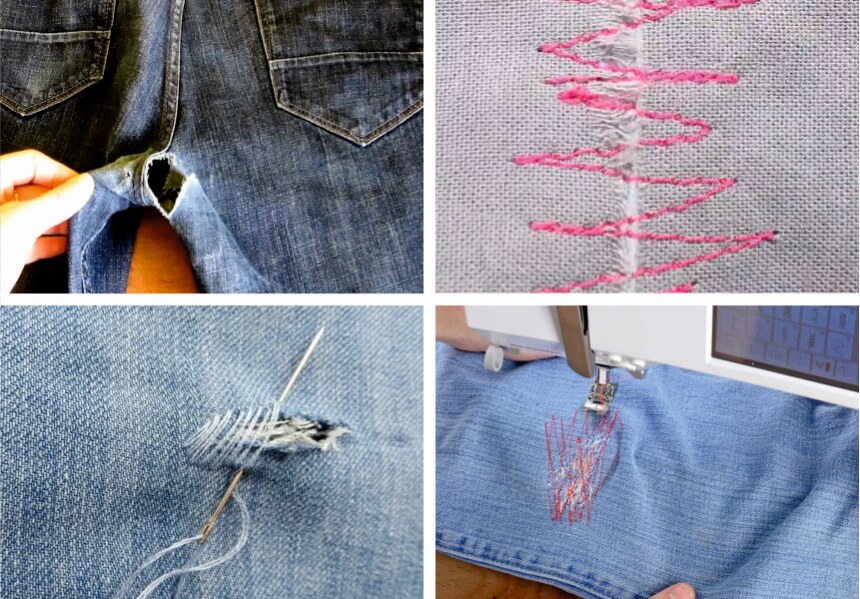 Reinforcing a hole is also a useful technique to know when learning to repair clothes. This is a common technique to sew up larger holes or ripped pockets.
You will need a measuring rope or small stick to see how large the hole is. If the hole is very large, you will need a piece of cloth that is the same color as the fabric. You will also need to sew any ripped pockets up before you begin to reinforce the hole.
If there is fabric missing, such as an area of the jean by the knee or a large hole by the elbow, you can’t just patch up the hole. This will make the area too tight when you put it on, and it will probably look awkward.
It may also pucker the fabric together and create a lump where all the fabric is grouped together.
To start, cut a small piece of fabric that is the same size and weight as the garment you want to fix. Make sure the fabric is under the hole, and it is right-side up. Bring the edges of the hole as close together as you can without making the hole pucker or lumpy.
The best way to start is to use the sewing machine to create a zigzag stitch. Stitch just around the edges of the hole as close to the edges as you can.
When reinforcing, it is best to also strengthen the torn ends. Most sewing experts recommend that you start stitching about an inch before the torn area.
This helps to support the fabric that already exists. If you start too close to the hole, you may end up tearing the fabric further as you begin the reinforcement.
For the rest of the stitching, you can use your hand and needle methods if you choose. Weave the thread in and out of the cloth.
Some people choose to use a seam sealant on frayed holes. Frayed fabric may also need over-locking stitches. You can hold the cloth and fold it so that the frayed ends are inwards. Then stitch it shut, so the frayed ends are locked in and not visible.
On clothes that may fit a little tight, it is a good idea to layer another piece of cloth below the hole before you begin stitching. This is because the garment is more prone to ripping as you slip it on and off.
Keep weaving in and out until it is time to circle back to the first stitch. Keep repeating until there is nothing left to sew. Once you’re done, make a knot and clip any extra thread.
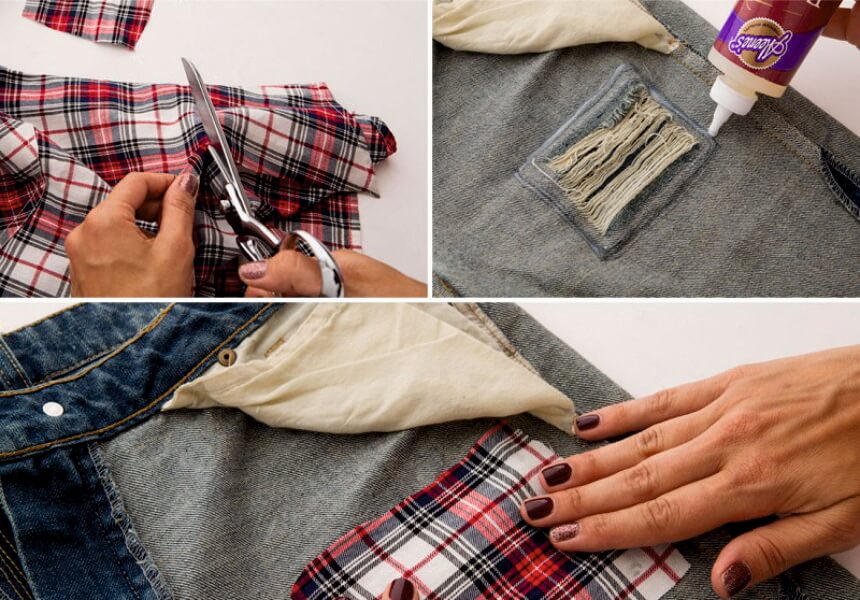 Patching a hole is a unique way to fix a garment, and it can even add a touch of fashion or design to your clothing. If you are fixing denim jackets or a similar heavy fabric, you can try using an iron-on patch. Lay the patch over the hole and iron it flat until all the edges are bound. Then, stitch around the edges so that it is firmly on the garment.
To fix it with a needle and thread or with a sewing machine, you will want to prepare the patch from the inside so that it is not noticeable. You will need to trim all the frayed ends and put seam sealant on all the edges. Make two patches, one for the bottom and one for the top. Fold a small amount of fabric at the edge and iron it into place.
To use the sewing machine, you will want to place the bottom part of the patch underneath the hole. Use the embroidery setting to stitch all the edges of the patch around the hole.
Then, stitch back and forth as well as up and down, so the entire hole has stitching across it. Straight stitch all the around the edges so that the bottom patch is enforced around the hole.
Now you will cover it with the top patch. Take the folded edge down that you ironed earlier. Make sure it covers all the machine stitching. Now you will hand sew with thread that matches from the top of the garment.
Workaround the patch several times to make sure it is securely in place and there are no gaps. Once you’re done, you can knot the thread and remove the needle.
Learning how to fix basic problems in garments can save you valuable time and money. It will also help you learn basic sewing skills and help you fix a favorite dress or pair of jeans.
The technique and process that you will use will largely depend on the material of your clothing and how big the hole is. Remember that fixing holes and seam rips take a few times to get perfect, so don’t get frustrated if you have to start over or redo the work.
When you sew a hole, you want to make sure it is not visible from the outside, so always flip the garment inside out and clip any extra threads once you’re done. Hand and needle methods work for almost every issue. A sewing machine is also an amazing investment and will help you patch holes and get your work done quicker.