If you’re relatively new to knitting, you likely start relaxing as soon as you reach the final row of your project. However, this is often a mistake as your work is far from done. You still need to ensure your yarn doesn’t unravel. Furthermore, there are a few more steps required for finishing your knit.
That said, not many beginners can say they know how to finish knitting. There are various methods to go about it, depending on the result you want. For instance, binding off is one way to ensure your yarn doesn’t come undone. You can also weave in your ends, use seaming techniques, or block your project. If you’re interested in learning these finishing techniques, we’ve given guidelines on how to pull off each one in the write-up below.
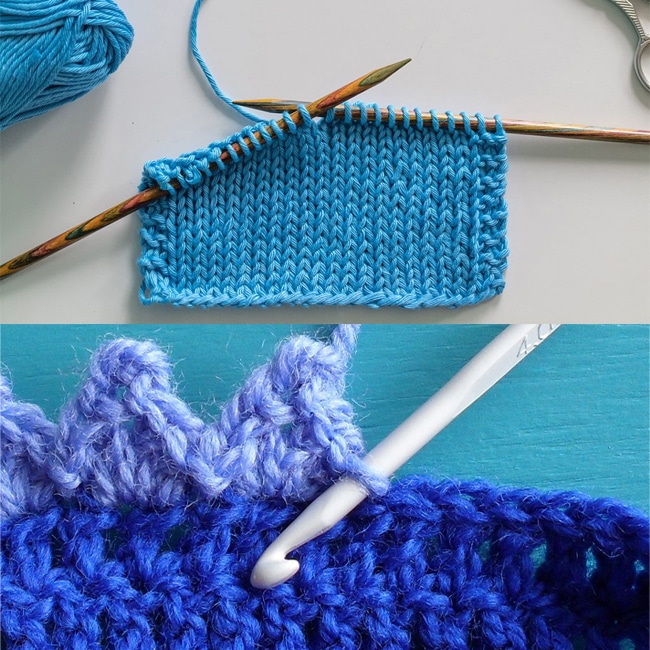
When binding off, you knit your needles off any remaining live stitches while at the same time securing your work, so the yarn doesn’t unravel. Notably, there are different ways to bind off your knitting project. The standard method is the most common and will work for quite a variety of your projects, although it can also prove insufficient for others. As such, we’ll describe the processes for the various binding off methods below so you can figure out which one to use and when. As a side note, binding off Trusted Source Binding off - Wikipedia In knitting, binding off, or casting off, is a family of techniques for ending a column (a wale) of stitches. Binding off is typically used to define the final (usually upper, taking the cast on edge as the lower) edge of a knitted fabric, although it may also be used in other contexts, e.g., in making button holes. en.wikipedia.org is also referred to as casting off in some circles.
If you’re a typical knitter, you end up with a couple of knitting stitches on your left knitting needle with none on your right as you prepare to bind or cast off. If so, you start by knitting exactly two stitches onto the right needle. Notably, your project may have called for slipping the first stitch of every row you knit. However, if you’re casting off, you shouldn’t slip any stitches, so keep that in mind as you work.
Next, you take your left needle and use it to pick up the first stitch on the right needle. This is the stitch that’s closest to your hand. Lift it and pull it over the second stitch before pulling it off the right needle. Consequently, it wraps around the second stitch (now the first) in a knot of sorts.
This leaves a singular stitch on the right needle while you still have a couple more on the left. Since you need two stitches on the right to make this process work, you’ll need to knit a second one. After that, you follow the same process to wrap one stitch around the other. This includes using your left needle to pick the first stitch. You then pull it over the second stitch and off the needle, giving you the same results where one stitch is wrapped around another.
Repeat this until you’re at the end of the row and you’re only left with one stitch on the left. This time you’ll need to knit into it with your right needle, therefore, giving the necessary two stitches for the cast-off. This also frees your left needle. After that, use the left needle to bring the first stitch over the second one. You also need to pull it off the needle as you did with the other stitches. This leaves you with only one stitch on the left side to work with.
Cut of the yarn while leaving about 10” of the same attached to your project. Take the extra yarn and wrap it over the needle, so it acts like a secondary stitch. After that, use your fingers to pull the last stitch over the “wrapped stitch” and off the needle. This pulls the tail end of the needle that you cut off through the stitch. You can then pull the thread to tighten it up, and the cast-off is complete.
Notably, these two options are used for knitting in the round, which makes binding them off slightly different compared to standard knitting. Let’s start with how to finish knitting a hat or other round project with double-pointed needles. You likely have about three needles attached to your project when you get to the final row. You’ll need to get an extra free needle for the process as well.
Just like the standard bind-off, start by knitting two new stitches onto the free needle. Use one of the other needles as your start point. After that, pick the first stitch on the new needle and wrap it over the second one. Typically, the new needle will be on the right side while the other needle on the left.
Once you wrap the first stitch over the second one and out of the needle, you knit another stitch, so you have two to work with. After that, you pick the first stitch again, wrap it around the second one, and off the needle. This is essentially the same process as the standard cast-off.
The difference comes in when there’s only one stitch left on the left needle. You’ll just knit into it like you did the other stitches, and this will free up one needle. However, rather than cut the yarn, you’ll have to remember that you still have other needles left. Consequently, you’ll just move into the closest one and continue casting off.
Since you were knitting in the round, the new needle should be right next to the endpoint for the needle you removed. Remember, you still have one stitch left on your right needle from the needle you just removed. As such, if you knit into one stitch on the new needle, you’ll create the two stitch setup required for binding off.
This will allow you to keep binding off until you can remove the second needle. After that, move into the third needle the same way you moved into the second one. When you’re down to the last stitch on the last needle, knit it into the needle on the right and free up the old needle. After that, cut the yarn approximately 10” from the stitch and then close it off the same way as a standard bind-off highlighted above.
There is also not much of a disparity between standard binding off and how you finish knitting a hat on circular needles. Notably, the ChiaoGoo Red Lace Circular needle is, according to reviewers, one of the best circular knitting needles in the market. The needles are high-grade stainless steel, and the size is etched onto the side of each. Also, they come with a durable multi-strand steel cable to connect them.
With circular options, you already have all the needles you need for the cast-off. You have one that you hold with your right hand and another on your left hand. They will also already have stitches on them.
To start, push the stitches on the right further down the needle. This helps to create space for the two stitches you need for casting off near the tip. After that, knit your two stitches on the right needle and wrap one over the other, just like with the standard cast-off. You’ll be left with a singular stitch on the right (not counting the ones you pushed down the needle), and so you’ll need to knit another one for the process to work.
As you can see, it’s basically the same as standard binding off from here on. Keep repeating the same process until you’re only left with a single knit stitch on your right-handed needle and none on your left-handed needle. At this point, it should be okay to finish up the bind off as you would finish a standard bind off. We tackled the process for doing so while explaining how to do a standard bind-off in the section above.
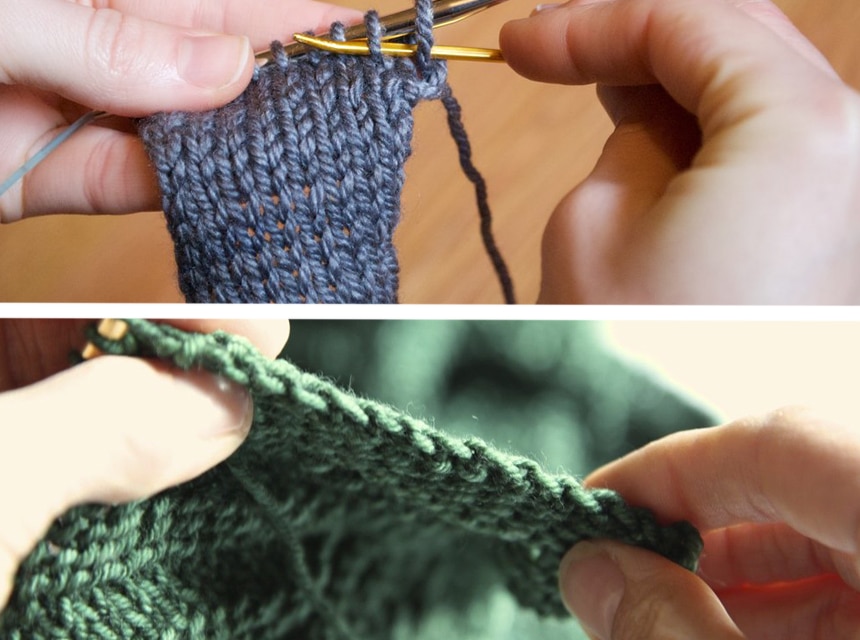
As you can tell from the sections above, binding off your knit leaves you with yarn tails that you’ll have to get rid of. Cutting them is not a good idea as it can lead to the whole project unraveling, which is why you weave in the tail ends. This even allows you to hide the loose yarn.
Weaving in your yarn tails is a method for how to finish a knitting project that requires a specialty tool known as a darning/tapestry needle. This tool has an eye large enough to thread your yarn easily. Additionally, the tip is blunt, and in some darning needles, it’s also bent.
Also worth mentioning is that how you weave in the tail yarn may be affected by the type of stitch you used to knit the project. Consequently, the process is different if you used a garter stitch, rib stitch, or if you were knitting your project in the round.
If you used a garter stitch, then weaving in your yarn tails may be a lot easier. Some pointers before you start is that you should follow the path and pattern of the yarn you already knit. Also, the process will involve two rows of horizontal ridges that are characteristic of the garter stitch Trusted Source Basic knitted fabrics - Wikipedia Basic knitted fabrics include stocking stitch, reverse stocking stitch, garter stitch, seed stitch, faggoting, and tricot. In some cases, these fabrics appear differently on the right side (as seen when making the stitch) than on the wrong side (as seen from the other side, when the work is turned). en.wikipedia.org .
Lastly, the thread should maintain the same tension as the knit. As such, be sure not to pull too hard on the thread once you start weaving it in. Since the reverse side of a stockinette stitch also has the same outlook as a garter stitch, you can use the process highlighted below to weave in the stockinette as well.
Typically, the pattern on the back will look like a set of smile and frown shapes. You could also describe it as a set of Us and umbrellas. Each U/smile shape goes into an umbrella/frown shape that then goes into another U shape. This pattern is consistent for the entirety of the project.
The first thing you do is thread the yarn tail you have leftover through the tapestry needle. You can start by pushing the needle tip through an umbrella and through the U positioned above and slightly to the right of that first umbrella. At your point of exit, there should be another umbrella attached to the U on the left side. You follow the umbrella and insert the needle into the U that’s right next to it.
Notably, you can follow the umbrella to the left or the right, depending on your project. In this example, we will assume you’re coming from the right and are weaving in the end as you move to the left. That said, the same process applies for both sides, although you might need to flip some of the directions.
Once the needle has gone through that U, angle it to the right. This will allow the needle to go through the first umbrella that your needle went through. After that, follow the U to the left of that first umbrella and insert the needle into the next umbrella. Once through, angle the needle to the right and insert the needle into the U above. This U should already have a thread going down, although this time, the thread will be going up.
Follow the umbrella to the adjacent U on the left and push the needle through it. Angle it slightly to the right as you go down to the umbrella below it. Repeat this process until you no longer have any yarn tail left. Notably, you’re allowed to leave about a ¼” or 1/8” of an inch of free yarn.
A rib stitch is basically a stitch with vertical stockinette stripes alternating with vertical reverse stockiness stripes. In addition to looking elegant, this stitch is also very elastic and will require a different weave in process. If you weave in your thread horizontally as you would do with a garter stitch, you lose some of the elasticity of the pattern.
To start, pick a column of vertical stripes that’s close to the yarn tail. Follow up by threading the yarn through the tapestry needle. If you have the choice, a tapestry needle with a straight tip rather than a bent one is preferred and may even be easier to work with. That said, any of the two available will do the job.
The right side of the column is where you will weave your thread in. Insert your needle under a right leg. Once it’s out on the other side, rotate the needle to the right or in the same direction as the leg. This will allow you to get under the next leg as well.
Notably, if you insert the needle incorrectly, the knit stitches will bunch up, and you don’t want that. Instead, it should be fairly easy to go through up to five legs. After that, you pull your needle and the yarn all the way through.
On the next stitch, you push your needle under the column legs and out onto the opposite side of the column. Then you pull the needle through as well. After that, you can start coming down the left side of the column. The needle should now be coming towards you. Insert the needle under a leg and out onto the other side. Rotate it to the right and insert it into the next leg.
Repeat this five times, so the thread goes through the same number of legs on both the left and right sides. Pull the thread through, and now that it’s secure, you can cut the rest of the yarn using your scissors.
Notably, weaving in stripes is exactly the same as a garter stitch. However, you have more threads and thread colors to work with. You should weave in each yarn tail into a section of the knit that’s the same color. For example, if it’s a blue yarn tail, it should be woven into a blue stripe. Yellow should go with yellow and so forth.
However, sometimes it’s not possible, especially if the strip is too small. In this case, you can weave it into another stripe color. That said, you should try to keep as much of the yarn covered by a similar color. If not, use a darker shade to cover the thread as you don’t want the tail yarn showing through the right side of the knit.
Blocking is another essential part of finishing your knits. This is because some knits tend to look crumpled immediately after you get them off the needles. However, if you block the knit, you can give the stitches an even, flat, and pleasing outlook. That said, avoid blocking your project if you’ve used a rib stitch, as it might affect the elasticity of the knit.
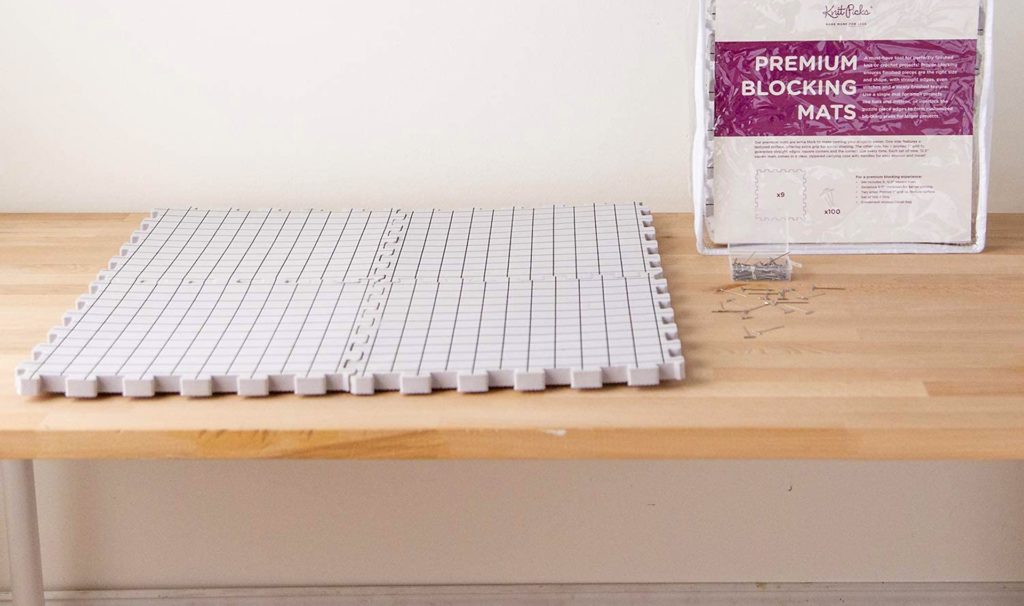
Before you start, you may need a few supplies, including a towel, an iron, water, pins, and a flat surface. According to most reviews, one of the flat top surfaces to use for such projects is the KnitIQ Blocking Mats for Knitting, which includes interlocking boards that allow you to dictate the size of the working surface. Furthermore, the product comes with 100 T-pins that might be handy later on in the process. That said, in most cases, the pins and iron are optional.
Blocking requires moisture in your knit project, and there are various ways to do it. The most obvious option is to soak the project in water. Once the project is completely soaked, you remove it and squeeze out some of the moisture.
Notably, there is a difference between squeezing the project and wringing it dry. While squeezing is not a problem, wringing water from your knit project will stretch it unevenly and likely cause damage.
For a faster blocking process, you need to squeeze out as much water as possible while still being gentle. However, you will still get good results if you don’t, although the process will be much slower. After that, you need to start stretching the project. Ideally, you should do this on a towel due to some of the leftover moisture.
First, stretch the project horizontally, making sure you pay attention to all sections of the knit. Once done, you then stretch the project vertically without missing any spots to ensure even results. A side note is that you should be gentle as you stretch the knit. Remember, you only want to even out the stitches and not to stretch the workpiece to the maximum level.
Follow up by laying the workpiece flat on the towel, so it looks like the intended final product while making sure the edges are straight. After that, you should wait for the project to dry. In some cases, you may pin some points on the project to keep it stretched as it dries. Also, be sure the project is completely dry before you take it off the towel surface; otherwise, you might ruin your progress.
If you want to speed up the process, you can use the iron steam function to get the knit project wet. However, you need to hold the iron above the project while ensuring it doesn’t touch the yarn.
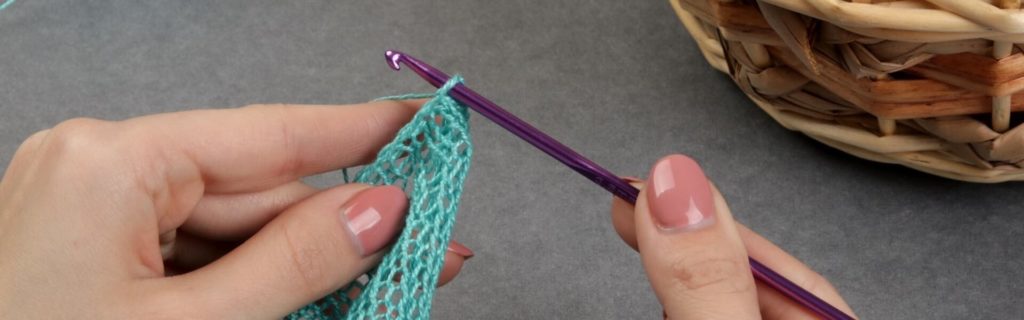
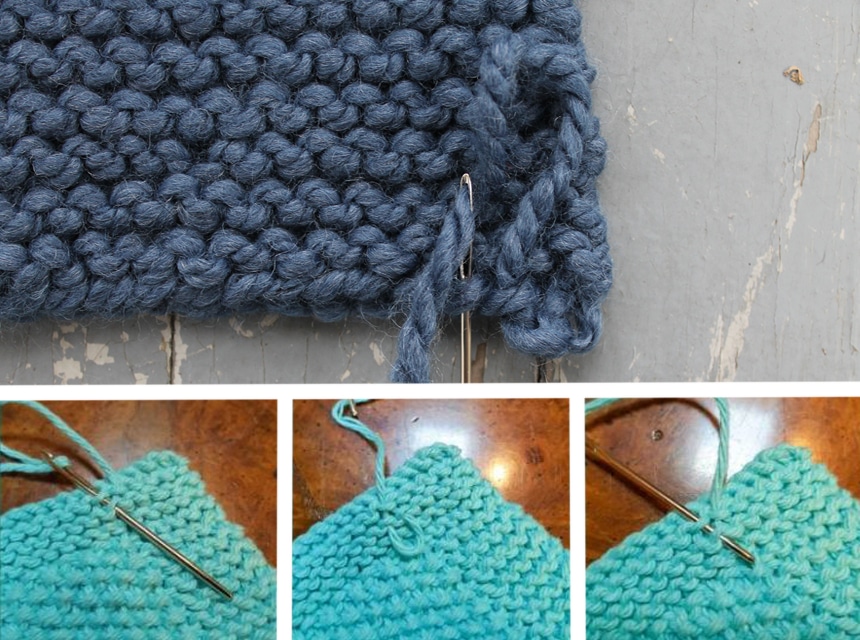
As for seaming, the easiest and most common way to do it is to use a mattress stitch. To pull it off, you’ll need a couple of supplies, including a yarn needle, scissors, removable markers, and a long thread of matching yarn.
Start by laying the pieces of the knit project that you intend to join on a flat surface. Align the edges of the two pieces as much as possible and use markers so you can easily see if they stay aligned as you work.
After that, thread your needle with the matching yarn. Follow up by inserting the needle on the first stitch on one of the pieces. This stitch should be one of the closest to the edge. Notably, the needle should go into the underside and come out the top side. Pull the needle to the other piece of your project and insert the needle into the first stitch as well. This time the needle should go in from the top side.
However, you don’t want it going all the way through. Instead, you should use the needle to catch the two legs directly above your point of insertion. Once you do that, pull the thread all the way through.
After that, pull the needle back to the other piece. Locate the hole that the yarn exited before as it was coming from the underside of the project. This will be your new point of insertion. After inserting the needle, turn it up and catch the two legs above it as well.
Most of what you’ll be doing after that is repetition. You’ll be catching two legs on one side before going to the other side and catching two legs again with your yarn and needle until you’re done. Make sure you’re adjusting yarn tension so it isn’t too tight as it can bunch up the seam. Remember you want it as flat as possible.
Notably, your markers may misalign along the way, which means that some adjustments are necessary. In this case, you can catch two legs on one side while catching one on the shorter side to even things out. For pieces that don’t exactly match, such as when you’re joining a shoulder, this adjustment technique will be pretty handy in ensuring the seam turns out even.
Also, this technique should be the same whether you’re working a vertical or a horizontal seam.
As shown above, the processes for how to finish a knit are pretty complicated. However, they are skills you can learn to ensure the best output in all your projects. They are also fundamental skills that every knitter should know. As such, we hope this knit finishing guide helps you on your knitting journey.