

Sewing dresses is like creating art. However, sewing, just like art, can be complicated, yet a piece of cake at the same time, depending on how you decide to go about it. Making a dress involves drafting different parts of a dress, and one of these parts is the bodice pattern.
In dress-making-101, you will learn that the bodice Trusted Source Bodice - Wikipedia A bodice is an article of clothing for women and girls, covering the torso from the neck to the waist. The term typically refers to a specific type of upper garment common in Europe during the 16th to the 18th century, or to the upper portion of a modern dress to distinguish it from the skirt and sleeves. en.wikipedia.org is the body of a garment that covers the upper half or blouse area of the garment. This requires not only determining the style of the dress you have envisioned but also requires taking careful measurements so the dress is a perfect fit!
Drafting a bodice can be challenging for beginners because there are certain things to consider. However, this guide will help you learn how to make a bodice like a pro! We have gathered information regarding all the tools you may need, along with an easy-to-follow step-by-step guide that will show you how to draft a flat bodice pattern.
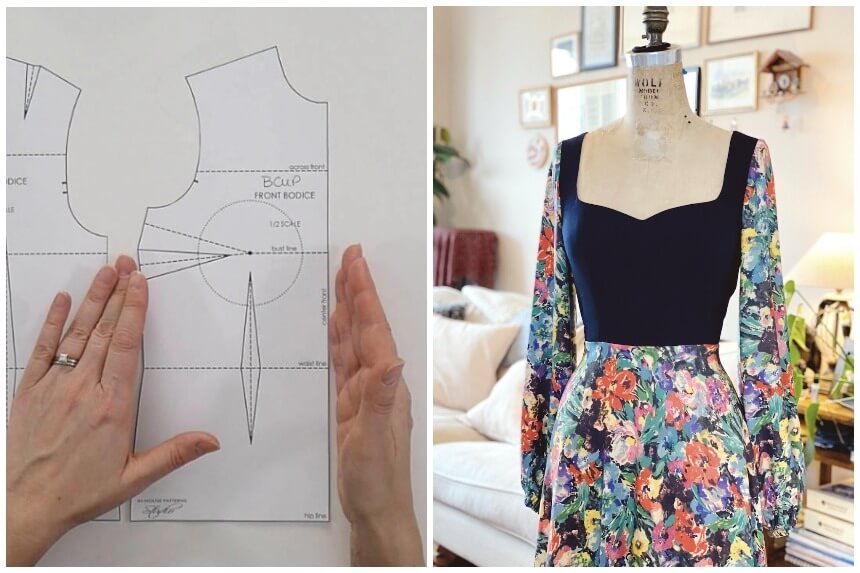 The most important thing to remember when making a dress is the outfit. What you wear can have a significant impact on how you feel about yourself, as well as how others feel about you. And feeling good about oneself can do wonders!
A well-fitting piece of clothing will make you feel confident and ready to take on the day. This is why power-dressing helps encourage a better work ethic and attitude. Making a custom-fit bodice pattern will help you create a dress tailored for your body, which will ultimately make you feel great when you wear the dress.
When designers like Dior create custom dresses for their clients, they do not just capture the intended user’s unique style but also tailor the dress to their unique bodies down to the last pin. Making a custom bodice pattern is the starting point to making a customized dress as it provides sewists with a blueprint for their dress.
This may seem like a daunting task, what with all the importance we place on it, but do not worry because there are easy ways to do it just right! Yes, even for beginners. So, making a custom fit bodice pattern will be your best bet to sewing a dress that fits like a glove, bringing your creative vision to life.
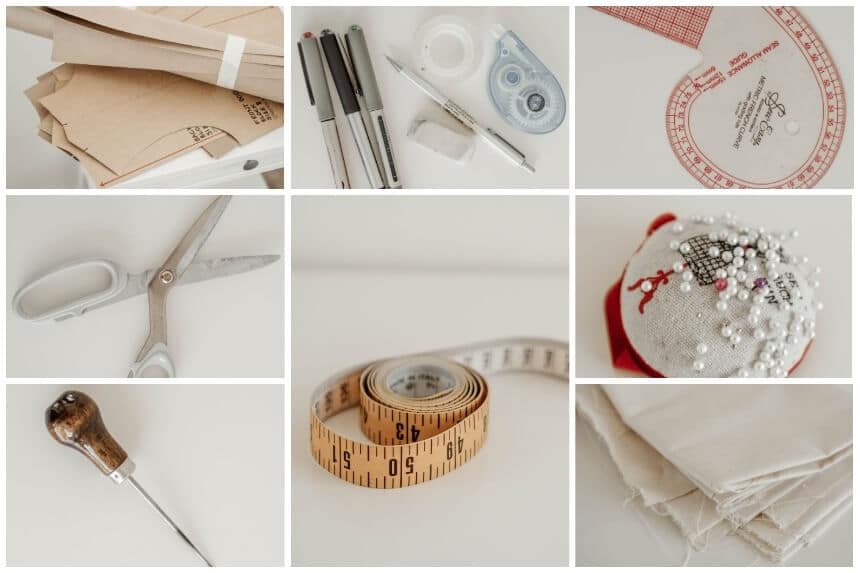
Just like any other sewing project, drafting a bodice pattern or block requires tools to make the task easier. As always, it’s best to have all the supplies and tools ready in one place before starting. This saves time and helps you feel more prepared.
Here’s a list of all the supplies you may require to make a bodice pattern.
Note: This is an elaborate list with extra items that might be useful for any sewing projects. Depending on the technique you choose for drafting a bodice pattern, you may not require all the items listed below.
Before you start drafting a bodice block for making a bodice pattern, you will need accurate measurements for all the areas of the upper half of your or the intended user of the dress’s body.
Here are all the areas to measure and how to correctly measure them:
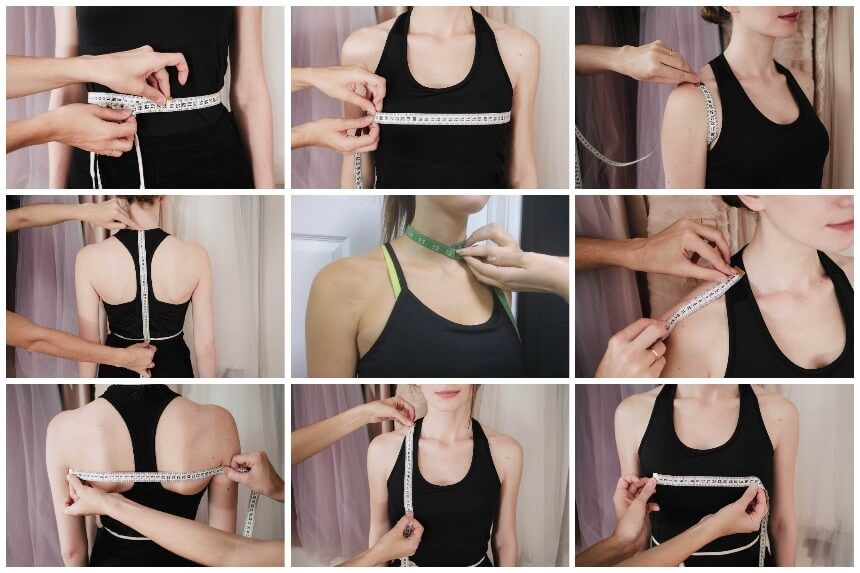
Now you have all the required measurements, you can start drafting the bodice block!
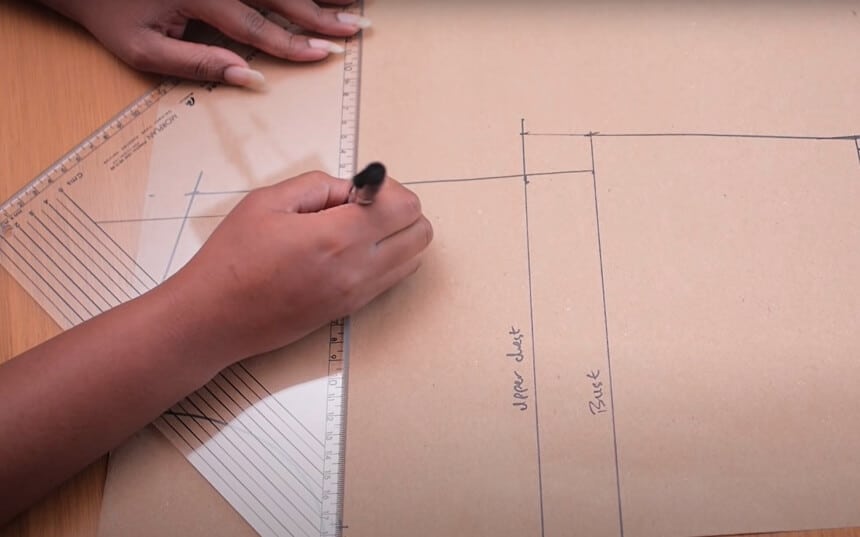
To draft a bodice pattern, you start with a rectangular shape on the pattern-making paper. Using the measurements from the length of your back that you measured from the nape of your neck to the waistline, add 2 cm and make the length of the rectangle. Then add a 4 cm margin to the bust circumference measurements to create the width of the rectangle.
Once you have a rectangle on the paper, draw a straight line from the center of the width to have 2 sections. These are the front and back of your bodice. Now using a different colored pen, draw a horizontal line at the center of the rectangle through the width, using the armscye depth measurements, along with an added margin of 1.5 cm. This will create the underarm line. Now mark the side seam along the underarm line by taking half of the bust circumference and 1.5 cm of ease from the right-side section.
For the back, use half the back width measurements with an added 1.5 cm of ease, however for the front side, add an extra 2 cm of the bust dart. Congratulations, you have a rough bodice pattern to build on. Let’s dive into drafting the specifics now.
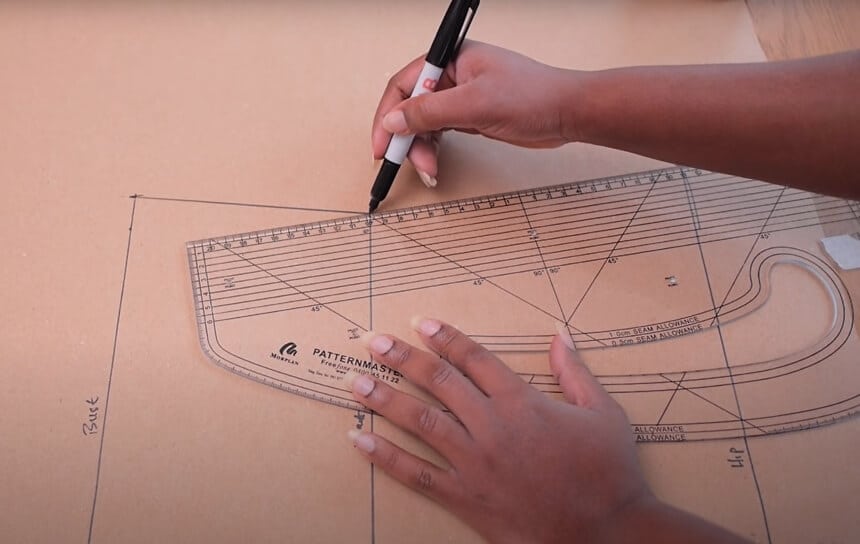 We have learned the hard way that drafting the back first is always wise. The back bodice pattern includes the neckline, shoulder slope, armscye, and hipline.
Start by drafting the neckline of the bodice. Make sure that at least 3 cm (1.2 inches) from the back are in a straight line before you curve them in the desired shape or curvature of the neckline. Draw a 4.5 cm (1.8-inch) parallel line that will indicate the shoulder slope. Now using this as a reference, take your shoulder width measurements and add 1.5 cm (0.6 inches) of the bust dart. Use this newly calculated figure to draw a line that starts at the base of the neck and ends on the shoulder slope reference line you drew earlier. Now add a dart of 1.5 cm in the middle of the shoulder line.
Moving on to drafting the armscye. Start by measuring 5 cm (1.9 inches) upwards from the underarm line all the way to the shoulder peak. Mark a point at the center of this line. Draw the armscye in a curved shape that touches the point you marked in the center, but leaves mm of distance from the shoulder peak. Make sure not to curve the armscye line too much.
Once you have constructed the marks for the upper part of the back, you can proceed to draft the hipline. Using the measurements for the waistline, you will draft the next area. For the back pattern, take half the waistline circumference measurements and add 1.5 cm (0.6 inches) of ease and some more dart width, and take the sum of these measurements to mark the side seam along the waistline of the rectangle.
Similarly, take the hip circumference measurements, divide them by two, add 1.5 cm (0.6 inches) of ease and mark the side seam for the hip. Now draw a curved line that joins the points you marked for the hipline, waist, and armscye to create the side seam of the bodice.
 It’s easier to draft the front piece after the back piece pattern is completed, making things considerably less complicated. The front includes the neckline and the bust dart, considering that we have already drafted the armscye and waistline, which can be used for reference for the front piece for now.
The second small rectangle that we reserved for the front piece will be used and starting from the neckline, you can replicate the armscye distance from the back piece. Add 1 cm (0.4 inches) to the extra space from the shoulder peak downwards to draw the neckline from the front.
When it comes to drafting the bust for the front piece, you can use the measurements from the back piece to mark the distance between the base of the neck and the smaller dart. The two front and back darts will meet at the shoulder line of the bodice.
Start measuring the bust level from the shoulder peak, down to the smaller dart, and add a mark. Then take the measurements for the distance between the bust points, divide them in half and mark the bust. Combine this point with the one you marked earlier to form a line. Now mark 7.5 cm (2.9 inches) starting from the bust point, along the length of the dart leg, and then turn a 90-degree angle and further mark 2 cm (0.8 inches). Use these points to draw the second dart leg from the bust point. Finally, draw a 6.5 cm (2.6 inches) parallel line starting from the shoulder peak and downwards.
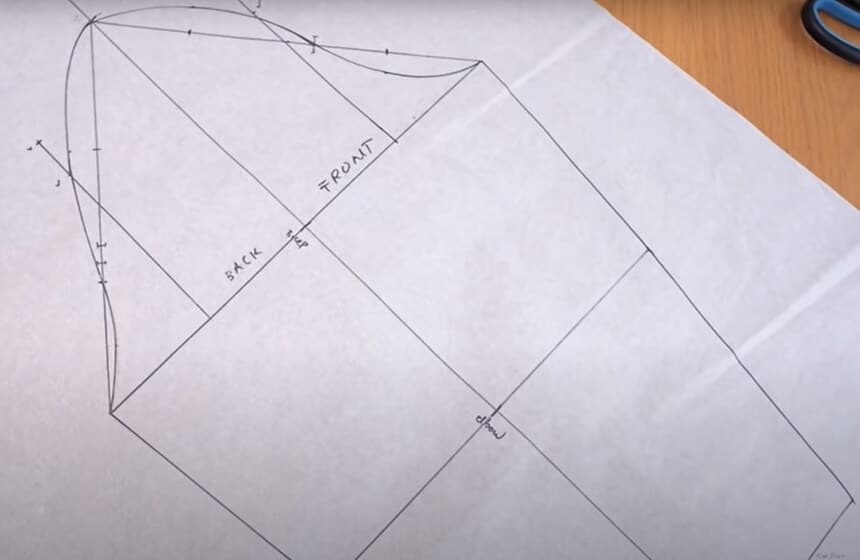 Now that the front and back pieces of the bodice have been drafted, you can proceed to draft the sleeves. Close the bust dart and draw the shoulder slope to the length of your shoulder width measurements. This will finish the horizontal line you drafted earlier. Now open the dart again.
Moving on to the armscye, you will add a 5 cm (2-inch) mark from the underarm line toward the top. The front armscye line will need to cross this point you marked. Draw a curved line from the back and front to make the armhole. Great job, you have successfully drafted a basic bodice pattern!
Once you have a basic sketch of the bodice pattern, it’s time to map it onto the fabric. Always remember to never cut the original pattern and check all the lines to make sure you drafted the pattern correctly. You can make a tool to check the measurements and alter any lines in the original pattern to make the pattern a better fit. Using the tracing paper, trace the pattern onto the fabric and make sure you do this correctly, with all the lines correctly mapped onto the fabric before you get to cutting and sewing.
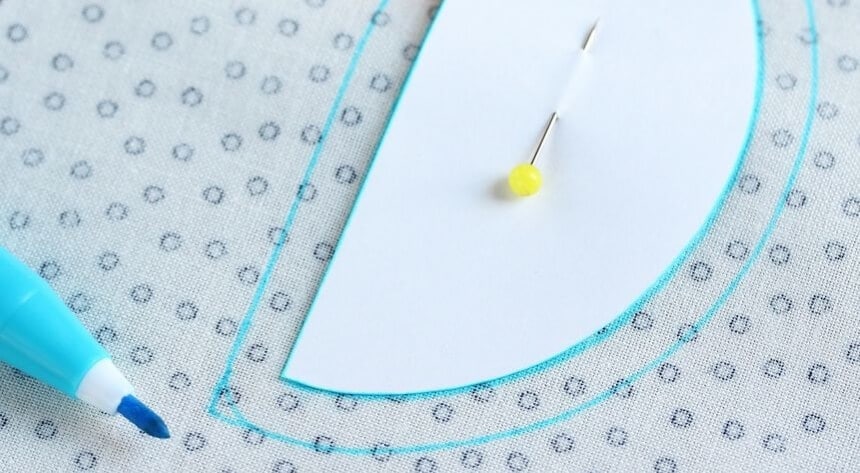 Seam allowance is the area you leave between the edge of the fabric and the stitching line of the pattern. This is the margin or ease that you leave when drafting the bodice pattern onto the fabric. It is important to have this extra margin for ease of sewing and to leave room for altering the dress in case it requires any size adjustments.
Usually, the seam allowances most professionals add are ¼ inches, however, some people prefer adding wider seam allowances. When it comes to making a bodice pattern, after tracing the pattern onto the fabric, make sure you add seam allowances to the waistline, hipline, and sleeve area before cutting the fabric.
Below is a detailed video guide on how to make a basic bodice block pattern yourself.
Sewing may seem like an easy task, especially when you see people doing it on a sewing machine. However, what most people don’t realize is that sewing involves a lot more than just cutting fabric and stitching it together. It requires close measurements, intricate cutting, and keeping track of everything at once.
If you are a sewing enthusiast, there is a lot more you can learn about making sewing patterns and learning about other interesting sewing techniques and hacks! You get sewing books such as The Pattern Making Primer and Pattern Magic to assist you with your sewing projects. You can also get some other tools to help you make your crafts look better, like an iron for sewing that has good seam pressure.
We hope this guide helped you understand how to draw a basic bodice pattern block. Don’t forget to let us know how your bodice pattern following our technique turns out!