
Once you have learned how to sew, you are probably feeling pretty proud of yourself. Now, if you want to, you can make anything out of fabric; you need to know how to use a sewing pattern. Using a pattern can really make you feel like your skills are elevating, and there are patterns for everything out there!
Sewing with patterns isn’t as hard as most people make it out to be. Instead, every single pattern comes with instructions and a template sheet to give you at least some guidance. Learning how to use a sewing pattern is a fun and useful life skill that will only increase your sewing abilities.
Here’s some information about how to sew using a sewing pattern and why sewing patterns can be so effective for your next project. Once you get started on sewing with patterns, then there’s nothing you won’t be able to make for yourself Trusted Source Best free sewing patterns online | Sewing | The Guardian Karen Ball: the internet, along with some generous sewing enthusiasts, will give you the boost you need to start sewing www.theguardian.com and others.
Unlike a traditional pattern, the sewing pattern isn’t just about sewing the same shapes and colors together again. Instead, the pattern is a template. You will trace parts of the garment onto the fabric before cutting them out and assembling them. Patterns are used for both the business world and the world of the average sewer.
There are tons of patterns that are sold to consumers like you, where you cut and sew the pattern yourself. Patterns are either created on a flat surface using various measurements with tools, where every aspect of the person is measured. Or the fabric is pinned to the top half of a mannequin, and then the patterns are taken from the shape of the mannequin itself.
It might seem a bit crazy to have a 2-dimensional paper help to create a 3-dimensional garment; however, the paper also has all the markings needed to share the smaller details of the project. Then you just need to follow along with your sewing kit.

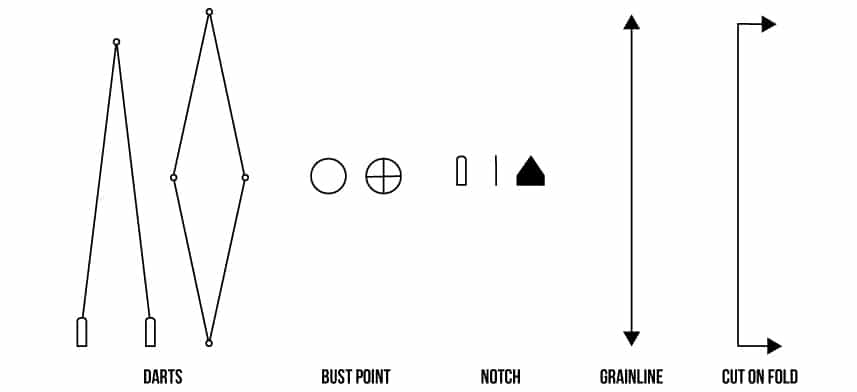
A dress, gown, or even a simple shirt isn’t just a shaped piece of fabric. Even people who know next to nothing about fashion know that there are plenty of buttons, zippers, hems, and seams that all need to be put into place. Without them, that lump of fabric will never be a fully functional piece of clothing.
Without them, the fabric will not fit together in the way that the pattern maker wanted it to. So don’t ignore all of those little markings. If you’ve bought a pattern to use yourself, make sure to read and understand all of those markings Trusted Source Use of patterns and marking out - Textiles: Manufacturing techniques - Eduqas - GCSE Design and Technology Revision - Eduqas - BBC Bitesize Learn and revise textiles manufacturing techniques with BBC Bitesize for GCSE Design and Technology Eduqas. www.bbc.co.uk before you get started with cutting fabric.
The instructions for your pattern might give additional information about the markings, including what is required, where you can customize the pattern and a few other tips.
One of the biggest things that frighten newcomers away from sewing patterns is that there can’t be much room for error. If you are working with plaid or with a fabric that already has a pattern on it, you need to be careful how to cut it. Cutting a pattern incorrectly can lead to shapes and colors repeating themselves with every single seam, and you want the pattern of the fabric to remain consistent even though you are cutting the fabric apart.
How do you do this? First, you need to determine if you are dealing with an even or uneven pattern. You simply fold the fabric in half and then turn back one corner of the fabric at a right angle. If the pattern is unbroken and looks the same, you have an even plaid. If it doesn’t, then you have an uneven plaid.
Next, figure out where the pattern stops and repeats. You might have to go from one focal point to the next, or it could be just as easy as measuring from one shape to the next one. These repeats are going to act like guidelines as you cut your patterns to make sure they match.
Finally, make sure to always buy extra fabric before you start fabric matching. Mistakes can happen, and you want to be prepared in case things go wrong and you need to recut something again.
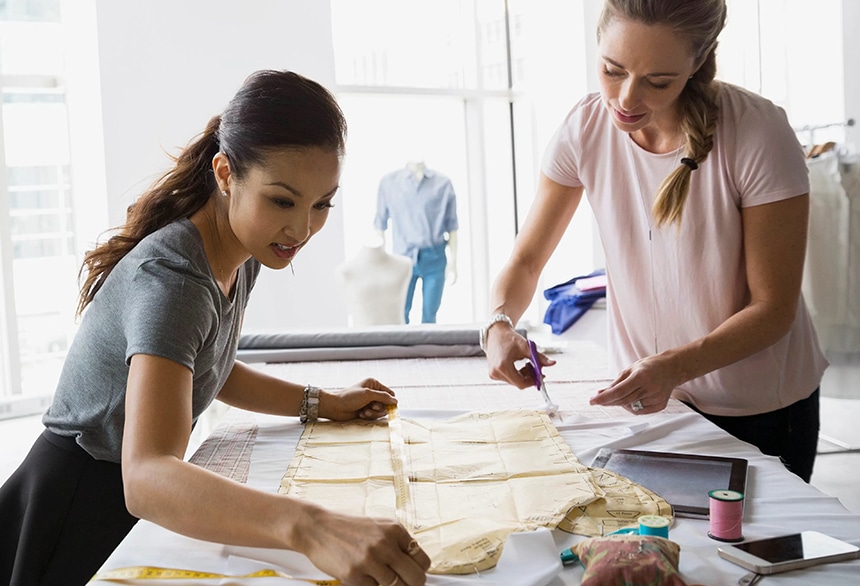
After you trace your lines onto the paper, then you can get started cutting out the shapes. Pin the pattern to the fabric using pins, and then get a pair of sewing scissors. Regular scissors aren’t going to do it for you. Make sure that your fabric is also wrinkle-free, is kept flat on the cutting board area, and that you are cutting smooth edges on your cutting mat.
You don’t want cut patterns that are too ugly to use with jagged edges. It takes some time, even if you are methodically cutting everything. Another tip is to have your cutting area set up so you can walk around the area and make cuts from all four sides.
Your cutting arm should not be uncomfortable, so anchor your noncutting hand down and then start slowly cutting. Don’t close the points of your shears or scissors all the way, and keep the bottom of your shears near the table at all times. One of the best scissors for a first-timer is the Gingher 8-Inch Knife Edge Dressmaker’s shears, which help to keep your hand steady according to all the reviews!
Use longer strokes to cut straight and large curves and smaller cuts for shorter strokes. If you keep the shears and the fabric on the table at all times, then the fabric will remain smooth and will not shift. It can take a while to truly become a good pattern cutter, but once you master it, you will be able to cut anything.
Once you have your pattern laid out and you understand what all of the pieces and markings mean, then you should cut each pattern piece out. You don’t have to worry about making a mistake with the cutting, or even if you accidentally cut the pattern. As long as the shape is held in place, you will be fine.
Then, lay the patterns out on the fabric and place pins inside of the fabric at the places designated by the user guide. These pins are all designed to take advantage of the ⅝” (15mm) seam allowance. If you don’t want to jab needles into the garment, then you can use fabric pattern weights to hold the patterns down instead. Don’t skimp on the needles and weights, especially as a beginner, because you don’t want the patterns slipping and sliding all over the place while you cut.
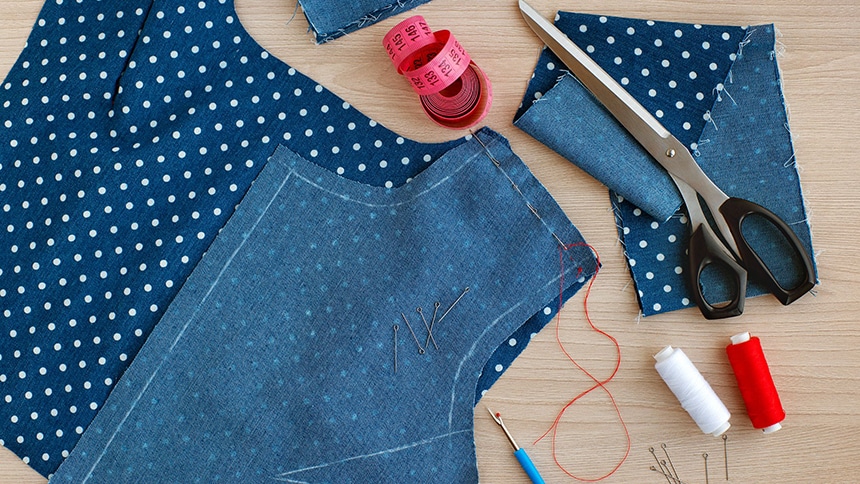
Finally, mark and cut each pattern by using a tailor’s chalk or some tape labels, and then you are free to start cutting the fabric! You should have all of this gear inside of your sewing kit, and if you don’t, then the Perskii Premium DIY kit is made for you. It’s got everything a beginner could need!

We are going to step into the world of carpentry here, but it is very important that whenever you use sewing patterns that you are doing your best to make sure that you are cutting as accurately as possible. Keep your hand by where you are cutting, smooth out any wrinkles as fast as they appear, and do your best to keep your cutting hand still, so you aren’t leaving jagged lines.
Measuring twice and cutting once isn’t something that you can ignore. Instead, you need to make sure that your cutting is as perfect as it can be. As you get more and more comfortable with the use of sewing patterns and the cutting of your fabric, you will be able to obsess about cutting perfectly less and less.
After you have decided on the sewing pattern for what you want to create, then you need to pick a good fabric. The type of fabric you choose needs to complement not only your style but also the sewing pattern that you are using. The fabric helps you discover just how your piece of clothing will perform, how it will feel when you wear it, and how durable it can be.
A well-built piece of clothing that is made from good fabric can be worn dozens of times, while some other types of clothing aren’t made nearly well enough for just one outing! One of the first places to check is the back of the sewing pattern. Along with the information about the clothing, it will say how much fabric you need.

The information will also talk about what types of fabrics are the best for the project. You don’t need to follow the guidelines exactly, but they are there to aid you if you are a beginner in the world of handling sewing patterns.
One of the biggest differences between the two fabrics is the difference between stretch and woven fabrics. Stretch fabrics have some give to them, and you can pull down the fabric without the use of fasteners. Woven fabrics have no give and instead require you to fasten them with zippers, buttons, and other fasteners.
Each type of fabric has its own properties and sizes, and if you try to use a fabric pattern meant for one with another type, it can cause problems.
You should also take a look at the weight of the fabric, as this also can change what you make the fabric into. Heavier fabrics such as cotton denim, wools, and corduroy are all heavy fabrics. These fabrics are made into pants, outerwear, and dresses for winter.
Medium-weight fabrics such as velvet and sateen are used for durable pieces of clothing that need flexibility. Blouses and shirts made from medium-weight fabric are all flexible enough to be moved whenever you need to stretch, but they are also able to hold in details and still look good.
Finally, lightweight fabrics such as lace, cheesecloth, and mesh are lightweight fabrics. These fabrics are very easy to tear, and most of the time, they are added to the medium-weight fabrics as accessories. Using a lightweight fabric for a highly detailed project can be a big risk if you don’t know what you are doing!
Finally, you need to figure out how to care for your clothing as you put it together. Most fabrics are able to be washed in the washing machine, even ones that were typically dry clean only in the past. You should also make sure that you wash any fabric in danger of shrinking, such as cotton before you start. Finally, some fabrics need to be ironed with care.
What all this means is that you don’t want to pick a fabric that isn’t able to be cared for effectively. If you have a casual piece of clothing that is made from cotton, then you will need to jump through hoops to get it cleaned. Save the fancy fabrics for the fancy clothes, while everything else can be made from medium fabrics that can take a few hits.
Learning how to use a sewing pattern isn’t easy, even for someone who is getting into learning to sew. You need to make sure that you select the correct sewing pattern and that you understand what the marks on the pattern mean. You also need a steady hand and more than a little patience. It’s not a skill for everyone because it does require fine attention to detail and some skills with scissors.
But if you can learn how to use sewing patterns effectively, you can make just about anything. They are the template that the sewing world is built on and will open the door to dozens of future projects. Once you learn about using a sewing pattern, who knows the type of projects, you will take on?